Window Security Bar Maintenance and Rust Prevention: The Complete Guide
Window security bars are a one-time investment that should last 20 to 30 years, but only if you maintain them properly. Steel is the only material that provides genuine forced-entry resistance, and steel's one vulnerability is corrosion. The difference between a bar that still looks factory-fresh at Year 15 and a bar that is flaking rust at Year 5 comes down to two things: the quality of the original finish and the maintenance routine you follow after installation.
This guide covers everything you need to know about keeping your window security bars in peak condition. We break down the science behind rust formation, compare powder coating to paint finishes, walk through a complete seasonal maintenance checklist, address the special challenges of coastal and humid climates, explain how to spot and treat rust before it becomes structural, and help you decide when maintenance is no longer enough and full replacement makes more sense.
Whether you installed your bars last month or inherited them with a home purchase 10 years ago, this guide will extend their functional lifespan and keep them looking sharp.
Why Window Bar Maintenance Matters
Window security bars are outdoor hardware. They face rain, snow, UV radiation, temperature swings, humidity, and in some regions salt spray or industrial pollutants. Even the best-finished steel bar will eventually show wear without basic upkeep. But here is the critical point: a 30-minute annual inspection and touch-up routine can double or triple the cosmetic lifespan of your bars and prevent structural degradation entirely.
Rust is not just ugly. Once corrosion penetrates beyond the surface of a steel bar, it compromises the cross-sectional integrity of the metal. A bar that has lost significant material to deep pitting rust is easier to bend, cut, or snap than the same bar in its original condition. Maintenance is not cosmetic vanity -- it is security preservation.
The good news is that modern professional-grade window bars are engineered to make maintenance minimal. A multi-stage powder-coated bar from a manufacturer like SWB requires dramatically less upkeep than a single-coat painted bar from a big-box store. Your maintenance burden starts with the product you choose.
The Cost of Neglect vs. The Cost of Maintenance
| Scenario | Annual Time Investment | Annual Cost | Bar Lifespan | Total 20-Year Cost (8 windows) |
|---|---|---|---|---|
| Professional-grade bar + annual maintenance | 30 minutes | $10-$20 in supplies | 25-30+ years | $720 bars + $200-$400 supplies = ~$1,000 |
| Professional-grade bar + zero maintenance | 0 minutes | $0 | 15-20 years | $720 bars = $720 (but earlier replacement) |
| Budget bar + zero maintenance | 0 minutes | $0 | 3-5 years | $240 x 4-5 replacements = $960-$1,200 |
The numbers speak for themselves. A quality bar with minimal maintenance is the least expensive option over any reasonable time horizon. A budget bar with zero maintenance is the most expensive -- and provides the weakest security throughout its short life.
How Rust Forms on Window Security Bars
Understanding the enemy helps you fight it. Rust -- technically iron oxide -- forms when steel is exposed to oxygen and moisture simultaneously. The chemical reaction is simple: iron + water + oxygen = iron oxide (rust). But the conditions that accelerate or decelerate this reaction are what determine whether your bars last 5 years or 50.
The Four Factors That Drive Corrosion
- Moisture exposure. Water is the primary catalyst. Bars in dry desert climates corrode far slower than bars in rainy or humid regions. Standing water -- pooling on horizontal surfaces, trapped in joints, or sitting in mounting bracket crevices -- accelerates corrosion dramatically compared to water that sheets off and evaporates.
- Salt. Chloride ions from ocean salt spray or road de-icing salts attack the passive oxide layer that protects steel. Coastal homes and homes in northern states where roads are salted in winter face accelerated corrosion timelines. For a deep dive into salt-air challenges, see our guide on coastal window bars that resist rust.
- Coating integrity. The protective finish -- powder coat or paint -- is the primary barrier between steel and the environment. As long as the coating is intact, the steel underneath does not rust. Rust starts at failure points: chips, scratches, worn spots, and areas where the coating has degraded from UV exposure. This is why coating quality and thickness are the single most important factors in long-term durability.
- Galvanic reaction. When two dissimilar metals are in contact in the presence of moisture, the less noble metal corrodes faster. This can happen when steel bars are mounted with aluminum brackets, or when copper flashing near a window drains water onto steel bars. Using matching metals for all components eliminates this risk.
Where Rust Starts First
On a typical window security bar, corrosion follows a predictable pattern. Knowing where to look lets you catch problems early.
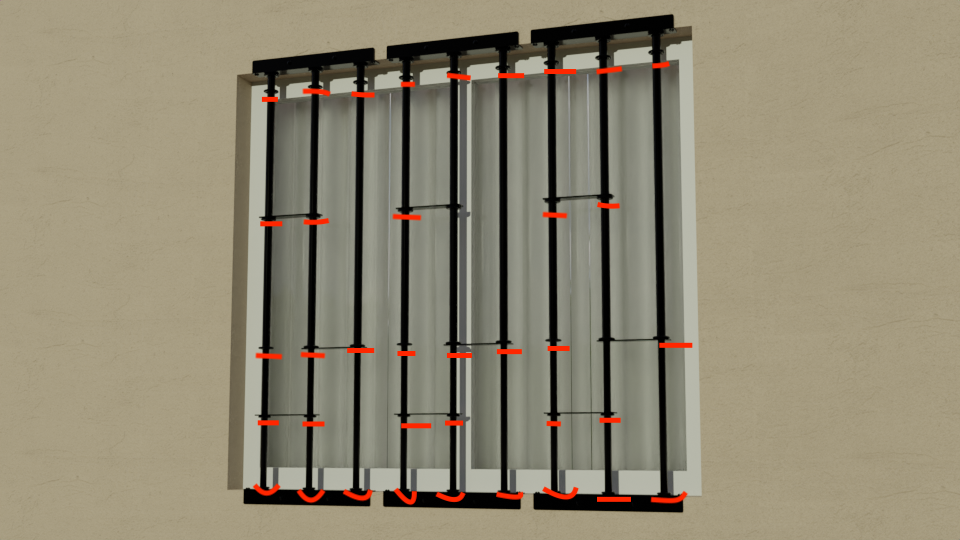
- Mounting bracket contact points -- where the bracket meets the bar, moisture can wick into the joint by capillary action and sit trapped between the two metal surfaces
- Weld points -- welding disrupts the protective coating and creates microscopic surface irregularities that trap moisture
- Bottom horizontal rail -- gravity pulls water to the lowest point of the bar assembly, and horizontal surfaces hold standing water longer than vertical ones
- Screw holes and fastener contact areas -- where the coating was penetrated during installation
- Telescopic adjustment joints -- on adjustable bars, the sleeve-and-rail junction is a potential moisture trap if not properly sealed
Powder Coating vs. Paint: Which Finish Lasts Longer?
The finish on your window security bars is the single most important factor in their long-term resistance to corrosion. Not all finishes are created equal, and the difference between a powder coat and a spray paint job is not cosmetic -- it is structural.
What Is Powder Coating?
Powder coating is a dry finishing process where electrostatically charged powder particles are sprayed onto a grounded metal surface, then cured in an oven at 350-450 degrees Fahrenheit. The heat melts the powder into a continuous, bonded film that is chemically and mechanically different from paint. A properly applied powder coat:
- Bonds at the molecular level to the metal substrate
- Creates a uniform thickness of 60-120 microns (2-5 mils)
- Contains no solvents, so there are no microscopic pinholes from solvent evaporation
- Resists chipping, scratching, and abrasion far better than liquid paint
- Maintains UV color stability for 15-25+ years outdoors
What Is Standard Paint?
Standard paint -- whether brush-applied or spray-applied -- is a liquid coating that dries through solvent evaporation. As the solvent escapes, it leaves behind microscopic pores and an uneven film thickness. Even high-quality exterior paint applied in ideal conditions creates a thinner, more porous barrier than powder coating.
Head-to-Head Comparison
| Property | Multi-Stage Powder Coat | Single-Coat Spray Paint | Brush-Applied Exterior Paint |
|---|---|---|---|
| Typical thickness | 60-120 microns | 25-50 microns | 50-75 microns |
| Adhesion method | Electrostatic + heat fusion | Surface tension only | Surface tension only |
| Chip resistance | Excellent | Poor | Fair |
| UV stability | 15-25+ years | 2-5 years | 3-7 years |
| Porosity | Virtually non-porous | Microporous (solvent evaporation) | Microporous |
| Corrosion resistance | 20-30+ years | 3-5 years to first rust | 5-10 years to first rust |
| Pre-treatment included? | Yes (phosphate wash + primer) | Rarely | Only if applied by diligent painter |
| Recoat difficulty | Requires stripping or scuffing | Easy (sand and recoat) | Easy (sand and recoat) |
The Pre-Treatment Stage Matters Most
A multi-stage powder coat process starts with chemical pre-treatment -- typically a phosphate wash that etches the steel surface, removes oils and contaminants, and creates a crystalline layer that dramatically improves coating adhesion. This step alone adds years to the finish lifespan. Budget bars skip pre-treatment entirely, applying paint or powder directly to bare steel. The result is a finish that looks acceptable on day one but begins failing at contact points and edges within months of outdoor exposure.
When shopping for window security bars, the finish specification tells you more about long-term value than any other single feature. The SWB Model A and Model B both use a multi-stage powder coat process: phosphate pre-treatment, epoxy primer, and polyester topcoat. This is the same finishing standard used on commercial architectural metalwork, outdoor furniture rated for hotel pool decks, and industrial equipment exposed to harsh environments.
Annual Maintenance Checklist: The 30-Minute Routine
This is the core maintenance protocol that keeps your window bars in top condition year after year. Schedule it once annually -- spring is ideal, after winter weather has ended and before summer heat sets in. The entire process takes about 30 minutes for a typical home with 6-10 barred windows.
Step 1: Visual Inspection (5 Minutes)
Walk the exterior of your home and examine each barred window. You are looking for:
- Chips or scratches in the powder coat or paint -- any exposed metal is a rust initiation point
- Surface rust -- orange-brown discoloration, especially at mounting brackets, weld points, and the bottom rail
- Loose mounting hardware -- give each bar a firm push and pull; there should be zero movement
- Debris accumulation -- leaves, dirt, and organic matter trapped against the bar holds moisture and accelerates corrosion
- Water pooling -- look for areas where the bar design or mounting angle creates horizontal surfaces that trap standing water
Step 2: Cleaning (10 Minutes)
- Rinse each bar with a garden hose to remove loose dirt, dust, and debris
- Wash with mild soap -- dish soap diluted in a bucket of warm water works well. Apply with a soft cloth or sponge
- Scrub gently around mounting brackets, joints, and any areas where debris has accumulated
- Rinse thoroughly to remove all soap residue -- soap left on the surface can attract dirt and trap moisture
- Let air dry completely before moving to the next step
Do not use: abrasive cleaners, steel wool, wire brushes, or pressure washers on powder-coated surfaces. Abrasives scratch through the coating. Pressure washers can force water into joints and undercut the coating at edges.
Step 3: Touch-Up Repairs (10 Minutes)
- For minor chips and scratches: Apply a thin coat of rust-inhibiting spray paint in a matching color (black or white, available at any hardware store for $5-$8). Clean the area first, let it dry, then apply two light coats rather than one heavy coat
- For small spots of surface rust: Sand the rusted area lightly with 220-grit sandpaper or a fine Scotch-Brite pad until the rust is removed and bare metal is exposed. Wipe clean with a tack cloth. Apply a rust-converting primer, let it dry per the label, then topcoat with matching paint
- For worn areas without rust: Scuff lightly with 320-grit sandpaper to create adhesion, wipe clean, then apply matching paint
Step 4: Hardware Check (5 Minutes)
- Check every mounting screw and bolt for tightness. Use the appropriate driver or wrench to snug any that have loosened. Do not over-torque -- just snug
- Inspect mounting brackets for signs of corrosion, especially at the bracket-to-wall contact point where moisture can wick in
- Test telescopic adjustment locks on adjustable bars -- the bar should not slide or compress when pushed
- Test quick-release mechanisms on egress bars -- the interior lever should operate smoothly. Apply a drop of silicone-based lubricant (not WD-40, which attracts dust) to the pivot points if the mechanism feels stiff
Supplies You Need (Under $25 Total)
- Bucket, sponge, dish soap
- Garden hose
- 220-grit and 320-grit sandpaper or fine Scotch-Brite pads
- Rust-inhibiting spray paint in matching color (black or white)
- Rust-converting primer (for any active rust spots)
- Silicone-based lubricant (for egress mechanisms)
- Screwdriver or drill with matching security bit
Seasonal Care by Climate Zone
A single annual inspection works for mild climates. If you live in a region with extreme weather conditions, adjusting your maintenance schedule by season prevents problems before they start.
Northeast and Midwest (Cold Winters, Road Salt)
Road salt spray reaches ground-floor windows along busy streets. Salt-contaminated slush splashes onto bars and dries into a corrosive film that attacks the finish all winter. In spring, melting snow and ice create extended moisture exposure.
- Fall (before first freeze): Full annual inspection and touch-up. Apply a thin coat of automotive paste wax to the bars -- this creates a sacrificial moisture barrier that protects the finish through winter
- Spring (after last freeze): Wash off all salt residue immediately. Re-inspect for any winter damage and touch up as needed
Southeast and Gulf Coast (High Humidity, Hurricanes)
Year-round humidity means year-round corrosion pressure. Hurricane season adds salt-laden wind and driven rain. This region demands the most vigilant maintenance schedule.
- Spring: Full annual inspection and touch-up before the humidity peaks in summer
- After any major storm: Rinse bars with fresh water to remove salt deposits, debris, and standing water from horizontal surfaces
- Fall: Second inspection -- check for damage from hurricane season weather
Southwest and Mountain West (Dry Heat, UV Exposure)
Moisture-driven rust is minimal in arid climates, but intense UV radiation degrades coatings faster. Desert sun can fade and chalk a painted finish in as little as two to three years.
- Spring: Annual inspection focused on UV damage -- look for fading, chalking (a powdery surface residue), and coating brittleness
- Touch-up priority: UV damage rather than rust
Pacific Northwest (Rain, Mild Temperatures)
Constant moisture from rain and fog creates a steady corrosion environment, but temperatures rarely reach the extremes that stress coatings. Organic growth (moss, algae, mildew) can trap moisture against bar surfaces.
- Spring: Full inspection with focus on organic growth removal and moisture-trap areas
- Fall: Second cleaning before the wet season begins -- remove any accumulated organic material
Coastal and Humid Climate Maintenance
Homes within five miles of the ocean face the most aggressive corrosion environment in the United States. Airborne salt particles land on every outdoor surface, create a hygroscopic (moisture-attracting) film, and attack protective coatings at an accelerated rate. If you live on or near the coast, standard maintenance is not enough.

Coastal-Specific Maintenance Protocol
- Monthly rinse: Hose down all exterior bars with fresh water at least once a month -- more frequently during onshore wind events. This flushes salt deposits before they can penetrate the coating
- Quarterly inspection: Check all bars every three months rather than annually. Coastal corrosion moves faster than inland corrosion, and catching a chip or scratch within weeks rather than months prevents the damage from spreading
- Apply marine-grade wax: A carnauba or synthetic marine wax applied twice a year (spring and fall) adds a sacrificial protective layer on top of the powder coat. Marine wax products designed for boat hardware and stainless steel railings work well on window bars
- Inspect underside surfaces: Salt deposits accumulate on the bottom of horizontal rails where rinse water does not always reach. Pay special attention to the underside of the bottom rail and the tops of mounting brackets
- Replace standard fasteners with stainless steel: If your bars use standard zinc-plated hardware, upgrade to 316-grade stainless steel screws and bolts. Standard zinc plating fails rapidly in salt air. This one upgrade eliminates the most common coastal corrosion failure point
For comprehensive guidance on product selection for salt-air environments, see our detailed guide on coastal window bars that resist corrosion. Homes directly on the beachfront may also want to consider upgrading to bars with a marine-grade powder coat formulation, which uses specialized resins with enhanced salt-spray resistance.
Humidity Without Salt (Inland South, River Valleys)
High humidity without salt exposure is less aggressive than coastal environments but still demands more attention than dry climates. The key issue is condensation -- bars that stay wet for extended periods because morning dew takes hours to evaporate, or because they are shaded and never fully dry during the humid season.
- Ensure bars are installed with slight drainage angles so water sheets off rather than pooling
- Clear vegetation and debris away from barred windows -- overhanging plants drip water onto bars and block airflow that would otherwise help them dry
- Inspect twice annually (spring and fall) rather than once
How to Spot and Treat Rust Early
Catching rust in its earliest stage is the difference between a 5-minute touch-up and a complete bar replacement. Here is how to identify each stage of corrosion and the appropriate response for each.

Stage 1: Surface Rust (Cosmetic)
What it looks like: Light orange-brown discoloration on the surface, usually at a chip, scratch, or wear point. The rust sits on top of the coating or on a small area of exposed metal. The surrounding coating is still intact and bonded.
Treatment:
- Sand the affected area with 220-grit sandpaper until all visible rust is removed and you see clean, bright metal
- Wipe the area clean with a tack cloth or damp rag and let it dry
- Apply a rust-converting primer (brands like Rust-Oleum Rust Reformer or Corroseal work well). These primers chemically convert any remaining microscopic rust into a stable, paintable surface
- Let the primer cure per the product label (typically 24 hours)
- Apply two light coats of matching rust-inhibiting paint
Time: 10-15 minutes active work plus drying time.
Cost: Under $15 in supplies.
Stage 2: Scale Rust (Moderate)
What it looks like: Rough, flaking rust that has begun pitting the metal surface. The coating has failed in a visible area, and the rust has spread under the surrounding coating, causing it to bubble or lift. You can feel texture and roughness when you run a finger over the area.
Treatment:
- Use a wire brush or coarse Scotch-Brite pad to remove all loose rust and flaking coating in and around the affected area. Feather back the surrounding good coating by 1-2 inches
- Sand the transition zone with 120-grit, then smooth with 220-grit
- Apply rust-converting primer and let it cure
- Apply a coat of rust-inhibiting primer (separate from the converter)
- Topcoat with two coats of matching paint
Time: 20-30 minutes active work plus drying time.
Cost: Under $25 in supplies.
Stage 3: Penetrating Rust (Structural)
What it looks like: Deep pitting in the metal surface, through-wall perforation on thin sections, or significant material loss. The bar may feel rough, thin, or weak in the affected area. Rust has penetrated into the core of the steel, not just the surface.
Treatment: Replacement. Once rust has penetrated deeply enough to compromise the structural cross-section of the bar, no amount of surface treatment will restore its security function. A bar weakened by deep corrosion can be bent or broken with less force than a sound bar of the same design. This is when you order a new bar.
For a detailed step-by-step on rust removal techniques, see our guide on how to remove rust from window bars.
Mounting Hardware Inspection and Maintenance
The mounting hardware is the connection between your security bars and your building. If the hardware corrodes, loosens, or fails, the bar itself is irrelevant -- it is no longer anchored. Hardware inspection should be part of every annual maintenance cycle.
What to Check
- Screw tightness: Every mounting screw and bolt should be snug. Thermal expansion and contraction cycles (hot days, cold nights) can gradually loosen threaded fasteners over time. Re-torque any that have loosened
- Screw head condition: Look for corrosion on the screw heads themselves. Corroded screw heads are harder to remove for maintenance and may indicate that the screw shaft inside the wall is also corroding
- Bracket integrity: Check mounting brackets for cracks, bending, or corrosion at stress points. A bracket that has bent or cracked has lost its load-bearing capacity
- Wall condition around fasteners: Look for cracking, crumbling, or pulling away of the wall material around the mounting points. In wood frames, check for rot. In masonry, check for mortar deterioration
- Anti-tamper hardware: Verify that security screws have not been tampered with -- the drive pattern should be intact and undamaged
Replacing Corroded Hardware
If any mounting hardware shows significant corrosion, replace it immediately. A corroded screw that snaps during a forced-entry attempt is the same as no screw at all.
- Remove the corroded fastener (use penetrating lubricant if stuck)
- Inspect the hole -- if the hole is still sound, install a new fastener of the same type and size
- If the hole is enlarged or the surrounding material is compromised, move to a fresh location offset by 1-2 inches
- For masonry installations, use new expansion anchors or Tapcon screws in a fresh hole
- Apply a dab of silicone sealant around the new fastener head to prevent moisture intrusion into the mounting hole
For comprehensive installation and hardware details, see our guides on measuring windows for security bars and the DIY installation walkthrough.
Quick-Release Mechanism Maintenance
If you have egress-compliant bars with quick-release mechanisms -- like the SWB Model A/EXIT -- the release hardware requires its own maintenance attention. A quick-release mechanism that is stiff, stuck, or corroded is not compliant with fire code and is not protecting your family in an emergency.
Quarterly Quick-Release Test
Test every quick-release mechanism at least four times per year. This is not part of the annual maintenance -- it is a separate, more frequent check because egress is a life-safety system.
- From inside the window, operate the release lever or button exactly as you would in an emergency
- The mechanism should release smoothly with one hand, without excessive force, tools, or keys
- Time yourself: if the release takes more than 5 seconds, the mechanism needs service
- Re-secure the bars after testing and verify they lock back into the closed position
Lubrication
Apply a small amount of silicone-based lubricant to the pivot points and sliding contact surfaces of the release mechanism during every annual maintenance cycle, or whenever the mechanism feels stiff during quarterly testing. Do not use WD-40 or petroleum-based lubricants -- they attract dust and gum up over time, which is the opposite of what you want on a mechanism that must work instantly in an emergency.
For more on egress requirements and which windows need quick-release bars, see our guides on interior vs. exterior window bars and egress window bars that open from inside.
When to Stop Maintaining and Start Replacing
Maintenance extends lifespan, but every bar eventually reaches the end of its useful life. Here are the clear indicators that repair and touch-up are no longer sufficient and full replacement is the better investment.
Replace When You See:
- Deep pitting rust that has eaten into the structural cross-section of any bar member -- surface treatment cannot restore lost metal
- Visible thinning of bar members at corrosion points -- compare the corroded section to an uncorroded section of the same bar. If you can see or feel a difference in thickness, the bar is compromised
- Mounting points that will no longer hold -- if the wall material around the fasteners has deteriorated to the point where screws pull out or brackets flex, the bar cannot resist force regardless of its own condition
- Coating failure exceeding 30-40% of the bar surface -- at this point, you are fighting a losing battle with touch-up paint. A new bar with a factory powder coat will last decades; a mostly-bare bar repainted by hand will need repainting every 2-3 years
- Quick-release mechanisms that cannot be restored to smooth operation -- if the egress hardware is corroded internally and lubrication does not solve the problem, the bar no longer meets fire code
- Outdated design with no egress option -- if your existing bars are fixed (non-removable) on bedroom windows, they are not code-compliant. Replacing them with egress-compliant bars like the Model A/EXIT is not maintenance -- it is a code correction
Lifespan Expectations by Product Tier
| Product Tier | Typical Lifespan (Maintained) | Typical Lifespan (Neglected) | Replacement Cost (8 windows) |
|---|---|---|---|
| Budget (Amazon/generic) | 5-7 years | 3-4 years | ~$240 each cycle |
| Mid-range (home improvement store brands) | 12-18 years | 8-12 years | ~$520 each cycle |
| Professional-grade (SWB) | 25-35+ years | 15-20 years | ~$726 (once) |
The math consistently favors buying professional-grade bars once and maintaining them. For a full pricing analysis, see our window security bars cost and pricing guide.
Best Products for Long-Term Durability
If you are reading this guide because your current bars are already showing significant rust or deterioration, replacement with a product engineered for longevity is the smart move. Here are our recommendations based on long-term durability.
Best Overall: SWB Model A (~$85)
The SWB Model A uses a multi-stage powder coat over phosphate-pretreated cold-rolled steel. The telescopic adjustment and modular design fit virtually any standard residential window. The coating system is rated for 20+ years of outdoor exposure in most US climates, and with basic annual maintenance, 30+ years is realistic. Anti-tamper hardware prevents fastener corrosion from becoming an entry point for bar corrosion.
Best for: Homeowners who want maximum lifespan with minimal maintenance effort. DIY installation in 15 minutes per window.
Best for Masonry: SWB Model B (~$85)
The SWB Model B shares the same multi-stage powder coat system as the Model A but is purpose-built for masonry walls. The heavy-gauge steel construction and expansion anchor mounting create a connection that outlasts the bar itself. In brick and concrete environments, the primary maintenance concern is the mortar joints around anchor points -- check these during annual inspections for cracking or deterioration.
Best for: Brick homes, concrete block buildings, and any structure where masonry mounting provides the strongest anchor.
Coating Quality Checklist (For Any Brand)
If you are evaluating window bars from any manufacturer, ask these questions about the finish:
- Is it powder coated or painted?
- What is the coating thickness in microns or mils?
- Does the process include a chemical pre-treatment (phosphate, chromate, or equivalent)?
- Is a separate primer layer applied before the topcoat?
- What is the salt spray test rating (hours to first corrosion in ASTM B117 testing)?
- What UV stability rating does the coating carry?
If the manufacturer cannot answer these questions, the coating quality is likely inadequate for long-term outdoor exposure. For a full product comparison across the market, see our best window security bars buyer's guide.
Frequently Asked Questions
How often should I maintain my window security bars?
Perform a complete inspection and touch-up once per year for most US climates. Coastal homes within five miles of the ocean should rinse bars monthly with fresh water and inspect quarterly. Homes in areas with road salt exposure should wash bars in early spring after the last salt event. Quick-release egress mechanisms should be tested every three months regardless of climate.
What is the best way to prevent rust on window security bars?
The most effective rust prevention starts with buying bars that have a multi-stage powder coat finish over chemically pretreated steel. After installation, prevent rust by performing annual inspections, touching up any chips or scratches immediately with rust-inhibiting paint, keeping bars clean of debris that traps moisture, and applying a coat of automotive or marine paste wax in areas with high humidity or salt exposure. Addressing a small chip the day you notice it prevents the rust spread that leads to expensive repairs or replacement.
Is powder coating better than paint for window security bars?
Yes. Multi-stage powder coating is significantly more durable than paint for window security bar finishes. Powder coat creates a thicker, denser, more uniform barrier that bonds to the metal at the molecular level during the oven-curing process. It resists chipping, scratching, and UV degradation far better than liquid paint. A quality powder coat lasts 20 to 30 years outdoors, while spray-painted bars typically show rust within 3 to 5 years. The pre-treatment step in professional powder coating also adds a corrosion-resistant layer that paint alone cannot replicate.
Can I repaint window security bars myself?
Yes. Repainting window security bars is a straightforward DIY project. Remove any loose rust or flaking coating with sandpaper or a Scotch-Brite pad. Apply a rust-converting primer to any exposed metal. Let it cure fully. Then apply two light coats of a rust-inhibiting exterior spray paint in a matching color. The entire process takes about 30 minutes per window and costs under $20 in supplies. For bars with extensive coating failure covering more than a third of the surface, professional media-blasting and powder recoating is a better option than hand-painting.
How do I maintain window security bars in a coastal area?
Coastal maintenance requires a more aggressive schedule than inland locations. Rinse all bars with fresh water at least once a month to flush salt deposits. Inspect quarterly instead of annually. Apply marine-grade carnauba or synthetic wax twice per year as a sacrificial barrier over the powder coat. Replace any standard zinc-plated mounting hardware with 316-grade stainless steel to prevent fastener corrosion. Pay special attention to the underside of horizontal rails and mounting bracket contact points where salt accumulates out of sight.
What cleaning products are safe to use on powder-coated window bars?
Use mild dish soap diluted in warm water and a soft cloth or sponge. Rinse thoroughly with clean water after washing. Do not use abrasive cleaners, scouring pads, steel wool, bleach, ammonia-based cleaners, or pressure washers on powder-coated surfaces. Abrasives scratch through the coating, creating corrosion initiation points. Pressure washers can force water under the coating at edges and joints. For stubborn stains or marks, a non-abrasive automotive cleaner or isopropyl alcohol on a soft cloth works safely.
When should I replace window security bars instead of repairing them?
Replace window security bars when you see deep pitting rust that has reduced the thickness of any bar member, when coating failure covers more than 30 to 40 percent of the bar surface, when mounting points can no longer hold securely in the wall material, or when quick-release egress mechanisms cannot be restored to smooth operation despite lubrication and cleaning. A bar with structural rust damage cannot be restored to its original forced-entry resistance through surface treatment alone because lost metal cannot be replaced.
How long does a powder coat finish last on window security bars?
A professional multi-stage powder coat finish on window security bars lasts 15 to 25 years before it shows significant cosmetic degradation in typical US climates. With basic annual maintenance including cleaning and touch-up of minor damage, the functional corrosion protection lasts 25 to 30 years or more. The finish degrades faster in coastal salt-air environments and under intense desert UV exposure. A single-coat powder application without pre-treatment lasts significantly less, typically 8 to 12 years.
Do SWB window bars come with a rust-resistant finish?
Yes. All SWB window security bars, including the Model A, Model B, and Model A/EXIT, are finished with a multi-stage powder coat process that includes phosphate chemical pre-treatment, an epoxy primer layer, and a polyester topcoat. This three-layer system provides professional-grade corrosion resistance rated for 20 or more years of outdoor exposure. The same finishing standard is used on commercial architectural metalwork, outdoor hospitality furniture, and industrial equipment designed for harsh environments.
Can rust on window security bars be a safety hazard?
Yes. Rust on window security bars is both a cosmetic and a security issue. Surface rust is primarily cosmetic, but if corrosion progresses to the scale or penetrating stage, it reduces the cross-sectional thickness of the steel. A corroded bar is easier to bend, cut, or snap than a sound bar of identical design. Corroded mounting hardware can also fail under force, allowing the bar to be pulled away from the wall. Additionally, heavy rust on quick-release egress mechanisms can prevent them from operating in an emergency, creating a fire safety hazard.
Final Takeaway: Protect Your Investment
Window security bars are one of the few home security investments that genuinely last a lifetime -- but only if you give them 30 minutes of attention once a year. The maintenance routine is simple: inspect, clean, touch up, tighten. The supplies cost less than $25. The payoff is bars that look sharp and function at full strength for 25 to 30 years.
If your current bars are already showing significant rust or coating failure, the most cost-effective move is replacement with a product engineered for longevity rather than pouring time and money into rehabilitating a bar that was under-engineered from the start.
Ready to upgrade to bars that last?
- SWB Model A -- Telescopic + modular, multi-stage powder coat, DIY install | ~$85
- SWB Model B -- Heavy-gauge masonry mount, commercial-grade finish | ~$85
- SWB Model A/EXIT -- Quick-release egress, IBC/NFPA/OSHA compliant | ~$85