Basement Window Security: The Complete Below-Grade Protection Guide for 2026
Basement windows are the single most targeted entry point for residential break-ins in the United States, and the vast majority of homeowners leave them completely unprotected. Below-grade windows sit at ground level or below, hidden behind shrubs, tucked inside window wells, and invisible from the street. They are small enough that many homeowners dismiss them as too tight for an intruder to fit through. That assumption is wrong. A determined burglar can fit through an opening as small as 8 by 10 inches, and most basement windows are significantly larger than that.
This is not a generic overview of basement security. This is the complete below-grade protection strategy for 2026 -- covering window wells, egress code requirements, flooding and moisture considerations, the light-versus-security tradeoff, seasonal and vacation home vulnerabilities, and the specific steel bar products that turn a below-grade window from a liability into an impenetrable barrier. If you have a basement with windows, every section of this guide applies directly to your property.
Why Basement Windows Are the #1 Break-In Target
Law enforcement data consistently shows that basement windows rank among the top three entry points for residential burglaries, and in many suburban and rural markets, they are the single most common point of forced entry. The reasons are straightforward when you think like a burglar.
Natural Concealment
Basement windows provide built-in concealment that no other entry point offers. A burglar working on a basement window is below the sightline of anyone standing at ground level. Window wells act as ready-made hiding spots. Landscaping shrubs planted around the foundation -- intended to improve curb appeal -- create a visual barrier that shields the intruder from neighbors and passing traffic. A basement window on the side or rear of a house can be breached in broad daylight without anyone noticing.
Compare this to a front door or ground-floor window, where the intruder is fully visible to the street, neighbors, and security cameras. The concealment advantage of below-grade windows is so significant that experienced burglars often bypass easier-to-reach ground-floor windows in favor of a basement window that offers cover.
Weaker Construction
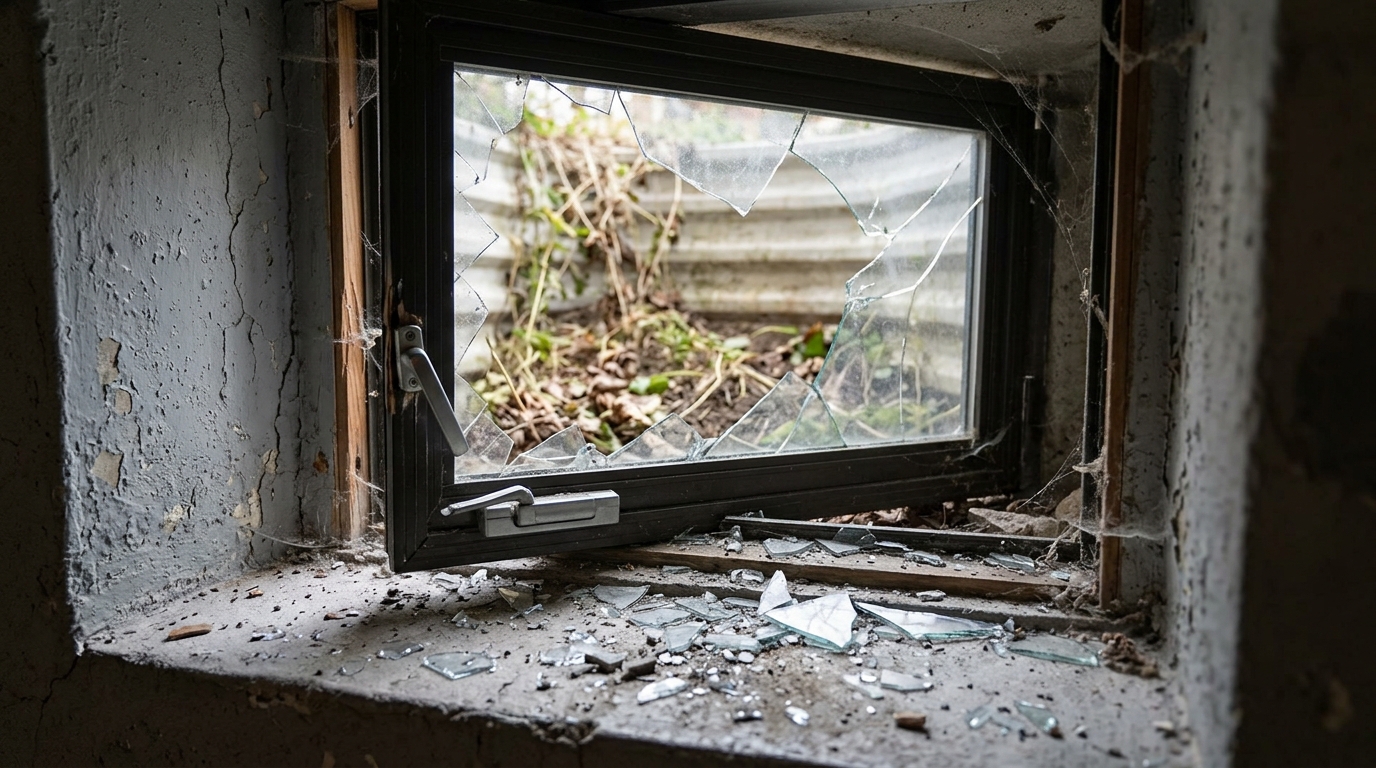
Basement windows are frequently the weakest windows in any home. Builders prioritize quality on the windows that buyers see during a walkthrough -- front-facing living room windows, kitchen windows, bedroom windows. Basement windows get the budget treatment: single-pane glass, basic latches, aluminum or vinyl frames with minimal reinforcement. Many older homes still have original basement windows from the 1950s or 1960s with rotted wood frames that can be pushed in by hand.
Neglected by Homeowners

Most homeowners do not think about their basement windows. They think about their front door locks, their sliding glass door, maybe their garage. The basement is storage space, laundry, or a workshop. The windows down there are an afterthought. This neglect shows in the data: homes with unprotected basement windows are statistically more likely to experience a break-in than homes where basement windows have been reinforced. Burglars know which homes are defended and which are not, and they choose accordingly.
Direct Access to the Interior
Once through a basement window, the intruder is inside the building's envelope with direct access to the entire home. Many basements connect to the main living areas via an unlocked interior door. Even finished basements with locked stairway doors still give the intruder a concealed workspace -- they can move through the basement, collecting tools, electronics, and stored valuables without ever being heard on the floors above.
For a broader perspective on how basement windows fit into overall home security architecture, see our Four Layers of Home Security framework, which explains how detection, deterrence, delay, and denial work together to protect your property.
Understanding Below-Grade Window Vulnerabilities
Below-grade windows present a unique set of vulnerabilities that above-grade windows do not share. Understanding these vulnerabilities is the foundation for building an effective defense strategy.
Window Well Access
Most basement windows in homes with full basements are set into window wells -- the corrugated metal or concrete enclosures that extend below grade around the window. Window wells are, from a security perspective, pre-built access points. They provide a stable platform for the intruder to stand on, walls that shield them from view, and direct access to the window glass and frame. An intruder standing in a window well is invisible to anyone more than 10 feet away at ground level.
Glass Type and Condition
Basement windows commonly feature:
- Single-pane glass -- standard in homes built before the mid-1990s. Breaks with a single tap from a center punch or even a firm elbow.
- Hopper-style frames -- top-hinged windows that tilt inward. The latch mechanism is typically a single cam lock that can be defeated with a flat screwdriver.
- Slider-style frames -- horizontal sliding panels with a basic thumb latch. Can be forced open by lifting and pulling the panel off its track.
- Glass block -- more secure than standard glass but still vulnerable. Individual blocks can be knocked out with a hammer, creating an opening.
- Acrylic or polycarbonate panels -- sometimes installed as budget replacements. Can be cut or melted with common tools.
Frame Deterioration
Below-grade windows are exposed to constant moisture from soil contact, rainwater runoff, and condensation. This accelerates frame deterioration, especially in older homes with wood frames. A rotted wood frame can be pulled apart by hand. Even aluminum and vinyl frames develop fatigue points where the frame meets the foundation, allowing the entire window unit to be pried out of the rough opening with minimal effort.
Latch and Lock Weakness
Standard basement window latches are not security devices. They are friction-fit mechanisms designed to hold the window closed against wind pressure, not against a human applying directed force. A hopper window cam lock can be defeated by inserting a thin tool through the gap between the sash and frame. A slider thumb latch can be overcome by lifting the panel. Even locked basement windows can often be opened in under 10 seconds by someone who understands how the latching mechanism works.
This is why physical barriers like steel security bars are essential for basement windows. Locks and latches create the illusion of security. Steel bars create actual, physics-based resistance that cannot be picked, bumped, or bypassed.
Window Well Security: Your First Line of Defense
The window well itself is the first element of your below-grade security system. Properly secured window wells make basement windows significantly harder to access, adding time and noise to any break-in attempt.
Window Well Covers
Window well covers sit on top of the well, preventing debris accumulation, keeping out rainwater, and -- when properly secured -- blocking direct access to the window below. There are three main types:
| Cover Type | Material | Security Rating | Light Transmission | Cost Range |
|---|---|---|---|---|
| Polycarbonate bubble covers | Clear polycarbonate | Low -- can be lifted or broken | Excellent | $40-$120 |
| Metal grate covers | Galvanized steel or aluminum | Moderate -- bolted covers resist casual attempts | Good | $60-$200 |
| Locking steel covers | Heavy-gauge steel with padlock or keyed lock | High -- requires tools to defeat | Poor to moderate | $150-$400 |
The critical limitation of window well covers: they protect against casual access and opportunistic attempts, but they are not a standalone security solution. A polycarbonate cover can be cracked with a rock. An unbonlted metal grate can be lifted off. Even a locked steel cover can be defeated with bolt cutters on the padlock. Window well covers are the first layer, not the only layer.
Window Well Depth and Dimensions
The depth and width of the window well affect both security planning and egress compliance. Standard window well dimensions in US residential construction:
- Width: 36 to 60 inches (matching the window width plus clearance)
- Depth from grade: 24 to 48 inches (depending on foundation depth and window placement)
- Projection from wall: 18 to 36 inches (how far the well extends from the foundation)
Deeper window wells provide more concealment for intruders but are also more difficult to climb into. Shallow wells (under 24 inches) are the highest security risk because they require almost no effort to access.
Window Well Lighting
Motion-activated lighting inside or above the window well is a cost-effective deterrent. A bright LED flood light triggered by motion eliminates the concealment advantage that makes basement windows attractive to burglars. Position the light so it illuminates the interior of the well and the window itself. Solar-powered motion lights work well for this application since they require no wiring and can be mounted on the well rim or adjacent foundation wall.
Landscaping as a Security Feature
The landscaping around your window wells can either help or hurt your security. Thick shrubs planted directly adjacent to window wells provide concealment for intruders. Clear the area within 3 feet of every window well -- remove tall shrubs, relocate dense plantings, and trim back any vegetation that blocks the view of the well from the yard or neighboring properties. Low groundcover or gravel beds around window wells maximize visibility without sacrificing aesthetics.
Egress Window Requirements and How Bars Fit In
If your basement has a bedroom, a living space, or any room used for sleeping, your local building code almost certainly requires at least one egress window. Egress requirements and security bars are not in conflict -- but you must choose the right product to satisfy both.
IRC Egress Window Requirements
Under the International Residential Code (IRC) Section R310, egress windows in basements must meet these minimum dimensions:
- Minimum net clear opening area: 5.7 square feet
- Minimum net clear opening height: 24 inches
- Minimum net clear opening width: 20 inches
- Maximum sill height from floor: 44 inches
For below-grade egress windows, the window well must also meet requirements:
- Minimum horizontal area: 9 square feet
- Minimum horizontal projection from wall: 36 inches
- Permanent ladder or steps required if the well depth exceeds 44 inches from grade
Security Bars on Egress Windows: The Legal Framework
Both the IBC (International Building Code) and IRC allow security bars, grilles, and grates on egress windows provided they can be opened from the inside without tools, keys, or special knowledge. This means standard fixed bars are not compliant on egress windows. You need a quick-release mechanism that allows the occupant to open or remove the bars in an emergency.
The SWB Model A/EXIT (~$92) is specifically engineered for this requirement. Its quick-release mechanism allows the bars to swing open from the inside with a single action -- no keys, no tools, no fumbling in smoke-filled darkness. The mechanism meets IBC, NFPA 101, and OSHA requirements for emergency egress compliance.
For a detailed breakdown of egress codes by state and how they apply to window bars, see our state-by-state legal guide to window bars.
Non-Egress Basement Windows
Not every basement window is an egress window. Small utility windows, hopper windows in laundry rooms, and fixed-pane windows in unfinished basements typically do not serve as egress points. These windows can be fitted with fixed bars (no quick-release required) since they are not part of the building's emergency exit path.
The distinction matters for product selection and cost. Fixed bars are simpler and slightly less expensive than quick-release models. If your basement has four windows and only one is a designated egress window, you can install fixed bars on three and a quick-release Model A/EXIT on the egress window.
Flooding, Moisture, and Material Selection for Below-Grade Bars
Below-grade installations face environmental conditions that ground-floor and upper-floor windows never encounter. Moisture is the enemy of every below-grade security product, and material selection determines whether your bars last 3 years or 30.
Moisture Sources in Below-Grade Environments
Basement windows are exposed to moisture from multiple sources simultaneously:
- Soil moisture -- the foundation wall and window well retain moisture from surrounding soil, especially after rain
- Condensation -- temperature differentials between the cooled basement interior and warmer exterior air create condensation on window frames and any metal hardware
- Window well drainage -- even with proper drainage, window wells collect standing water during heavy rain events
- Snow melt -- in northern climates, snow that accumulates in window wells melts slowly, creating prolonged water exposure against the window and any mounted hardware
- Splash-back -- rain hitting the ground surface splashes into window wells, depositing soil and organic matter that retains moisture against metal surfaces
Why Material Matters More Below Grade
A security bar mounted on a second-floor window is exposed primarily to occasional rain and humidity. The same bar mounted on a basement window inside a window well faces constant moisture contact, soil chemistry, and minimal air circulation for drying. Uncoated steel in a below-grade environment will show surface rust within months and structural corrosion within 2 to 3 years.
This is why powder-coated steel is the mandatory specification for below-grade applications. Powder coating creates a fused polymer barrier that is 3 to 5 times more durable than liquid paint against moisture, UV, and chemical exposure. Both the SWB Model A and SWB Model B use industrial powder coating rated for exterior and below-grade exposure, which is a primary reason they carry a 20 to 30 year expected lifespan even in high-moisture environments.
Flood-Prone Areas: Additional Considerations
If your property is in a flood zone or has a history of basement water intrusion, your security bar selection must account for periodic submersion. Key factors:
- Mounting hardware -- stainless steel fasteners resist corrosion far better than zinc-plated alternatives. Upgrade the standard mounting screws to stainless if you are in a flood-prone area.
- Drainage clearance -- ensure the bar mounting does not obstruct the window well's drainage path. Water must be able to flow to the drain at the bottom of the well without being dammed by mounting brackets.
- Post-flood inspection -- after any flooding event, inspect all below-grade bars for debris accumulation around mounting points, fastener corrosion, and frame damage. Clean and dry all components promptly.
Materials to Avoid Below Grade
| Material | Above-Grade Performance | Below-Grade Performance | Recommendation |
|---|---|---|---|
| Uncoated mild steel | 5-10 years | 1-3 years before structural rust | Never use below grade |
| Painted steel | 5-8 years | 2-4 years before paint failure and rust | Avoid -- powder coat instead |
| Powder-coated steel | 20-30 years | 15-25 years with periodic inspection | Recommended for all below-grade work |
| Aluminum | 15-20 years | 10-15 years (no rust, but lower strength) | Acceptable for low-security applications only |
| Galvanized steel | 15-20 years | 8-15 years depending on soil chemistry | Acceptable but not preferred over powder coat |
The Light vs. Security Tradeoff: How to Have Both
One of the most common objections to basement window bars is that they block natural light. Basements already struggle with natural lighting, and homeowners worry that adding steel bars will make an already dark space feel like a dungeon. This concern is valid but solvable.
How Much Light Do Bars Actually Block?
Vertical steel bars with standard 3.5 to 4-inch spacing block approximately 15 to 20 percent of the total light entering through the window. The bars themselves are typically 1/2 inch to 3/4 inch in diameter, and the spacing between them allows the vast majority of light to pass through unobstructed.
To put this in perspective: closing a set of standard vertical blinds to a 45-degree angle blocks roughly 50 percent of incoming light. A sheer curtain blocks 30 to 40 percent. Security bars block less light than most common window treatments that homeowners already use without complaint.
Maximizing Light with Security Bars
Several strategies minimize the visual and lighting impact of basement window bars:
- Vertical bar orientation -- vertical bars cast narrow shadow lines that move throughout the day. Horizontal bars cast wider, more noticeable shadows. All SWB models use vertical bar orientation for this reason.
- Slim bar profile -- thinner bars block less light. The SWB Model A uses an optimized bar diameter that provides maximum structural strength with minimum cross-section.
- Light-colored powder coat -- white or light gray bars reflect light into the basement rather than absorbing it. For basements where light is a priority, white bars outperform black.
- Clean window wells -- the biggest factor in basement light is not the bars but the cleanliness of the window and well. A clean window well with a clear polycarbonate cover and clean glass admits dramatically more light than a debris-filled well with dirty glass, regardless of whether bars are present.
- Interior mount vs. exterior mount -- interior-mounted bars can be set flush against the window frame, minimizing the shadow depth. Exterior bars mounted on the foundation wall project farther from the glass, casting slightly deeper shadows.
When Security Must Take Priority
In certain situations, security must override lighting concerns entirely:
- Basement windows facing alleys, side yards, or secluded areas -- these windows face the highest break-in risk and should have bars regardless of light impact
- Homes in high-crime neighborhoods -- the security benefit far outweighs the minor light reduction
- Seasonal or vacation homes -- unoccupied properties need maximum physical security on every opening
- Homes that have experienced a previous break-in -- the recidivism rate for residential burglary is significant; if you have been burglarized, bar every basement window immediately
Seasonal and Vacation Home Basement Security
Seasonal and vacation homes are among the highest-risk properties for basement break-ins. Extended periods of vacancy make these homes magnets for burglars, who can take their time with entry and departure without any risk of encountering occupants.
Why Vacant Properties Are High-Value Targets
A burglar targeting an occupied home has a window of minutes before the homeowner returns, a neighbor notices, or an alarm triggers a response. A burglar targeting a vacant seasonal home may have hours, days, or even weeks. This extended timeline changes the threat calculus entirely:
- No time pressure -- the intruder can work slowly and quietly on the window, reducing noise
- Multiple visits -- some seasonal home burglaries involve repeated visits to remove large items over time
- No alarm response risk -- many seasonal homes do not have active alarm monitoring during the off-season, or the monitoring company cannot dispatch quickly to remote locations
- Delayed discovery -- a break-in may not be discovered for weeks or months, complicating insurance claims and evidence collection
Below-Grade Security for Seasonal Properties
For seasonal and vacation homes, the security strategy should assume no human oversight for extended periods. This means relying entirely on physical barriers rather than electronic monitoring. Steel security bars on every basement window are the foundation of this approach.
Specific recommendations for seasonal properties:
- Bar every below-grade window -- no exceptions. Use fixed bars (Model A or Model B) on non-egress windows and Model A/EXIT on any designated egress window.
- Install locking window well covers -- add a second barrier above the bars to further increase the time and noise required for access.
- Upgrade window well drainage -- ensure wells drain properly during the off-season. Standing water accelerates corrosion and can freeze, damaging window frames and making them easier to breach.
- Remove concealment landscaping -- trim shrubs and vegetation away from window wells before closing the property for the season.
- Add battery-powered motion lights -- solar or battery-operated lights continue working without grid power and deter after-dark access to window wells.
Lake Houses, Cabins, and Rural Properties
Rural seasonal properties face an additional vulnerability: distance from neighbors and law enforcement. Response times of 20 to 40 minutes are common in rural areas, meaning a break-in can be completed long before help arrives. Physical barriers -- steel bars, locking covers, reinforced window frames -- are the only security measures that work without human response. They stop the intruder at the point of entry, regardless of whether anyone is coming to help.
For rural and seasonal property security planning that extends beyond basement windows, our best window security bars guide covers whole-house protection strategies including upper-floor windows and door sidelights.
Best Security Bars for Basement Windows: Product Picks
Choosing the right product for basement windows depends on three factors: your foundation material (wood frame, masonry, or poured concrete), whether the window is a designated egress point, and your budget.
Best for Standard Basement Windows: SWB Model A (~$90)
The SWB Model A is the top recommendation for most residential basement window applications. Its telescopic adjustment mechanism handles the non-standard widths common in basement windows -- from small hopper windows as narrow as 14 inches to larger slider windows up to 48 inches. Frame mount or wall mount options handle both wood-framed and vinyl-framed basement windows.
Why Model A works for basements:
- Telescopic adjustment covers the wide range of basement window sizes without custom fabrication
- Powder-coated steel resists the constant moisture exposure of below-grade environments
- Frame mount installs directly onto the window frame -- no drilling into the foundation required
- 15-minute DIY installation per window with a standard cordless drill
- ~$90 per unit -- protecting a typical 4-window basement costs $360 total
Best for Masonry and Concrete Foundations: SWB Model B (~$91)
The SWB Model B is the right choice when your basement windows are set directly into concrete block, poured concrete, or brick foundation walls. This is common in homes where the basement was not designed for finished living space -- the window sits in a rough opening in the foundation wall with no separate frame for mounting.
Why Model B works for masonry basements:
- Expansion anchor mounting drills directly into concrete, block, or brick foundation walls
- Heavy-gauge steel provides commercial-grade forced-entry resistance appropriate for below-grade vulnerability
- Masonry-specific engineering means the bars become part of the foundation's structure, not an add-on to a frame
- ~$91 per unit, and once mounted in masonry, removal requires demolishing the surrounding wall material
For a detailed comparison of frame mount vs. masonry mount approaches, including step-by-step installation differences, see our masonry installation guide.
Best for Egress Basement Windows: SWB Model A/EXIT (~$92)
If any basement window is a designated egress point (required in finished basements with bedrooms), the SWB Model A/EXIT is the only option that delivers both security and code compliance. Its quick-release mechanism allows the bars to swing open from the inside in one motion -- no keys, no tools, no special knowledge. This meets IBC, NFPA 101, and OSHA egress requirements.
The Model A/EXIT is especially important for basement bedrooms, home offices, and in-law suites where occupants may need to exit through the basement window during a fire. Fixed bars on an egress window are a code violation and a life-safety hazard.
Product Comparison for Basement Applications
| Feature | Model A | Model B | Model A/EXIT |
|---|---|---|---|
| Best for | Wood/vinyl frame basement windows | Concrete/brick foundation walls | Egress-rated basement windows |
| Mounting | Frame mount or wall mount | Masonry expansion anchors | Frame mount with quick-release hinge |
| Telescopic adjustment | Yes | No (sized to opening) | Yes |
| Quick-release egress | No (fixed) | No (fixed) | Yes -- single-action release |
| Moisture resistance | Powder coat, 20-30 year lifespan | Powder coat, 20-30 year lifespan | Powder coat, 20-30 year lifespan |
| DIY install time | ~15 min/unit | ~30-45 min (needs rotary hammer) | ~20 min/unit |
| Approximate cost | ~$90 | ~$91 | ~$92 |
| Fire code compliant | Yes (non-egress windows) | Yes (non-egress windows) | Yes (egress and non-egress) |
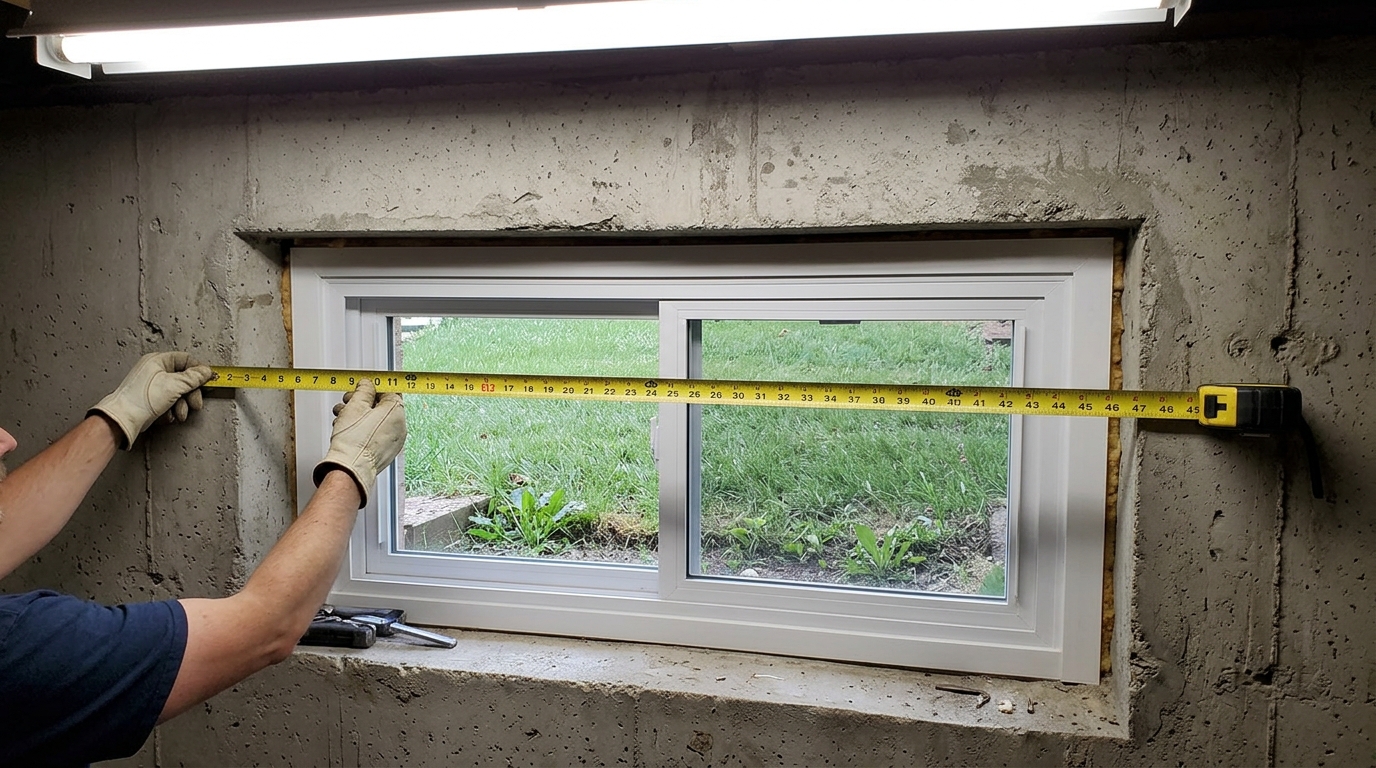
How to Measure and Size Bars for Basement Windows
Basement windows come in a wider variety of sizes and configurations than standard above-grade windows. Accurate measurement is even more important below grade because the rough openings in foundation walls are often irregular.
Standard Basement Window Sizes
While sizes vary widely by home age and construction type, these are the most common residential basement window dimensions:
| Window Type | Common Width | Common Height | Typical Frame |
|---|---|---|---|
| Hopper (tilt-in) | 32" to 48" | 14" to 24" | Vinyl or aluminum |
| Slider | 36" to 48" | 18" to 24" | Vinyl or aluminum |
| Casement (crank-out) | 24" to 36" | 24" to 48" | Vinyl, aluminum, or wood |
| Egress (code-compliant) | 36" to 48" | 36" to 48" | Vinyl with well system |
| Glass block | 24" to 48" | 16" to 32" | Mortar-set in foundation |
Measurement Process for Basement Windows
- Measure inside width at three points: top, middle, and bottom of the window opening. Record the smallest measurement. Foundation walls are often not perfectly plumb, so these three readings may differ.
- Measure inside height at three points: left, center, and right. Record the smallest measurement.
- Identify mounting surface material -- is the window surrounded by a separate frame (wood, vinyl, aluminum), or is it set directly into the foundation wall (concrete, block, brick)?
- Check for obstructions -- window well brackets, drainage pipes, foundation wall irregularities, or existing window hardware that might interfere with bar mounting.
- Measure window well clearance -- if mounting exterior bars, verify that the well depth allows enough working room for drilling and fastening.
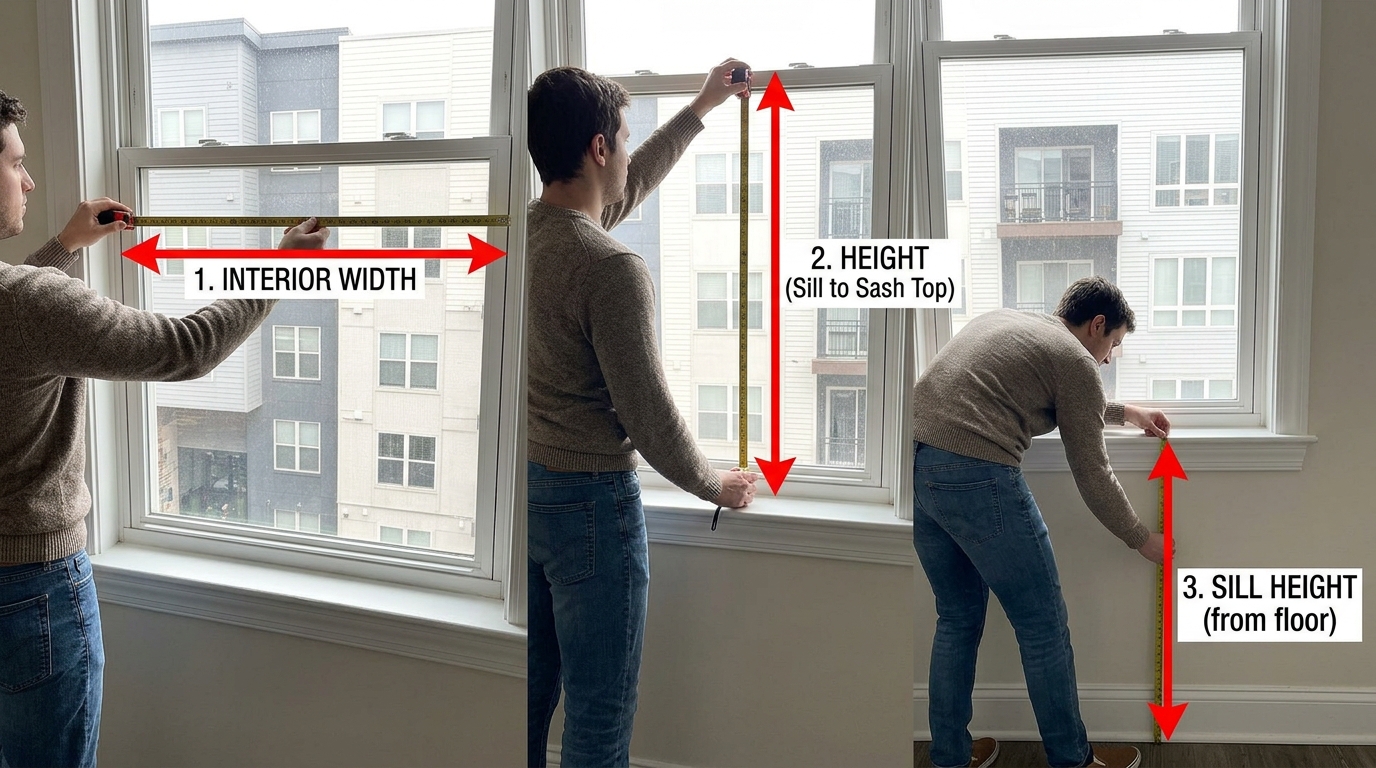
For the complete step-by-step measurement protocol with visual references, see our window measurement guide -- the same process applies to both above-grade and below-grade windows.
Installation Guide: Mounting Bars on Below-Grade Windows
Below-grade installation follows the same fundamental process as standard window bar installation, with a few modifications for the unique conditions of basement window environments.
Interior Mount vs. Exterior Mount
For basement windows, you have two mounting options:
Interior mount (inside the basement) -- The bars are mounted on the interior side of the window. This approach:
- Keeps bars out of the weather and moisture
- Extends product lifespan by eliminating direct water exposure
- Is less visible from outside (better aesthetics)
- Requires interior access for installation
- Prevents the window from opening inward (hopper windows) unless a quick-release mechanism is used
Exterior mount (inside the window well) -- The bars are mounted on the exterior side of the window. This approach:
- Does not interfere with window operation (window opens freely behind the bars)
- Is visible from outside, acting as a visual deterrent
- Is exposed to moisture, requiring powder-coated products
- May be more challenging to install in tight window wells
Frame Mount Installation (Model A)
- Position the Model A bar in the window opening and extend the telescopic mechanism to the correct width
- Level the bar using a bubble level -- foundation walls may not be perfectly level, so do not assume
- Mark mounting holes through the pre-drilled bracket holes
- Pre-drill pilot holes into the window frame (use appropriate drill bit for frame material)
- Drive anti-tamper security screws through the brackets into the frame
- Verify the bar is secure by applying firm lateral and outward pressure -- zero movement is the target
Masonry Mount Installation (Model B)
- Position the Model B bar against the foundation wall surrounding the window
- Level and mark anchor locations through pre-drilled bracket holes
- Drill anchor holes using a rotary hammer drill with the correct masonry bit diameter
- Clear dust from drilled holes using compressed air or a blowout bulb
- Set expansion anchors to the correct depth
- Mount the bar and torque fasteners to specification
- Apply a bead of exterior silicone caulk around the bracket-to-wall junction to prevent moisture infiltration behind the mounting points
Pro tip for masonry installations: Seal the anchor holes with silicone before setting the anchors. This prevents water from wicking through the anchor holes into the foundation wall's interior, which can cause freeze-thaw damage in cold climates.
For a complete walkthrough of both installation methods, including no-drill options for renters, see our installation without drilling guide.
The Layered Basement Defense Strategy
Steel security bars are the most effective single upgrade you can make to basement window security, but maximum protection comes from layering multiple measures. Each layer addresses a different aspect of the threat.
Layer 1: Deterrence (Visible Security)
- Visible security bars on basement windows signal that this home is defended
- Motion-activated lights in and around window wells eliminate concealment
- Security signage near window wells (even without an active system, signage creates doubt)
- Clear landscaping around foundation -- no tall shrubs providing cover
Layer 2: Delay (Physical Barriers)
- Steel security bars -- the primary physical barrier (Model A, Model B, or Model A/EXIT)
- Locking window well covers -- secondary barrier above the bars
- Reinforced window locks -- upgraded latches and locks on the window itself
- Security film on glass -- holds broken glass together, adding time even if the intruder gets past the bars (which they should not)
Layer 3: Detection (Awareness)
- Glass break sensors -- alert you if someone breaks the window glass, even with bars preventing entry
- Motion sensors -- detect movement in window wells or the basement interior
- Camera coverage -- a weatherproof camera covering the foundation and window wells records activity
Layer 4: Response (What Happens After Detection)
- Monitored alarm system -- professional monitoring dispatches police when sensors trigger
- Self-monitoring alerts -- smartphone notifications let you verify and respond remotely
- Neighbor awareness -- inform trusted neighbors about your basement security setup so they know what to watch for
The critical insight is that layers 3 and 4 (detection and response) only work if layer 2 (physical barriers) buys enough time. A glass break sensor that alerts you does nothing if the intruder is already inside by the time you check your phone. Steel bars provide the delay time that makes detection and response meaningful.
Cost Analysis: Basement Window Security in 2026
Here is exactly what it costs to secure every basement window in your home, broken down by property type and security level.
Typical Residential Basement: 4 Windows
| Security Level | Components | Total Cost (DIY) |
|---|---|---|
| Basic | 4x Model A fixed bars | $360 |
| Standard | 3x Model A fixed + 1x Model A/EXIT egress | $362 |
| Enhanced | 3x Model A + 1x Model A/EXIT + 4 window well covers | $602-$842 |
| Maximum | 3x Model A + 1x Model A/EXIT + 4 locking covers + 4 motion lights | $802-$1,242 |
Large Basement: 6-8 Windows
| Configuration | Units | Product Cost | With Professional Install |
|---|---|---|---|
| 6 windows (5 fixed + 1 egress) | 5x Model A + 1x Model A/EXIT | $542 | $842-$1,142 |
| 8 windows (7 fixed + 1 egress) | 7x Model A + 1x Model A/EXIT | $722 | $1,122-$1,522 |
| 6 masonry windows | 5x Model B + 1x Model A/EXIT | $547 | $997-$1,447 |
Cost Comparison: Bars vs. Alternatives
| Security Measure | Upfront Cost (4 windows) | Annual Cost | 10-Year Total | Break-In Prevention |
|---|---|---|---|---|
| SWB security bars | $360 | $0 | $360 | Physical barrier -- stops entry |
| Window sensors + monitoring | $100-$200 | $300-$500 | $3,100-$5,200 | Alerts only -- does not prevent entry |
| Security cameras | $200-$600 | $120-$300 (cloud storage) | $1,400-$3,600 | Records only -- does not prevent entry |
| Security film | $400-$800 | $0 | $400-$800 | Delays glass breakage -- does not stop determined entry |
| Glass block replacement | $1,200-$2,400 | $0 | $1,200-$2,400 | Moderate barrier -- individual blocks can be removed |
The numbers make the decision straightforward. Steel bars cost less upfront than every alternative except basic window sensors, they have zero ongoing costs, and they are the only option that physically prevents entry. For a detailed breakdown of security bar pricing across all applications, see our complete cost guide.
7 Basement Window Security Mistakes That Leave You Exposed
Mistake #1: Assuming Basement Windows Are Too Small for Intruders
This is the most dangerous assumption in residential security. Law enforcement professionals confirm that a motivated intruder can fit through an opening as small as 8 by 10 inches. Most basement windows are 32 by 14 inches or larger -- more than enough for an adult to enter. Never dismiss a window as "too small to worry about."
Mistake #2: Relying on Window Well Covers Alone
Window well covers are a useful first layer, but they are not security devices. A polycarbonate bubble cover can be broken with a rock. An unbolted metal grate can be lifted off. Covers buy time and add inconvenience, but they do not stop a determined intruder. Steel bars on the window itself are the barrier that stops entry.
Mistake #3: Using Painted Bars Instead of Powder-Coated
Below-grade environments destroy painted steel in 2 to 4 years. The paint chips, moisture reaches the bare metal, rust begins, and structural integrity degrades. Powder-coated steel lasts 15 to 25 years in the same environment. The few extra dollars for powder coat are the difference between a 3-year product and a 25-year product.
Mistake #4: Putting Fixed Bars on Egress Windows
If your basement has a bedroom or any room used for sleeping, at least one window must be an egress point. Fixed bars on that window violate building codes and create a life-safety hazard. Use the Model A/EXIT with quick-release on every egress window. Use fixed bars only on non-egress windows.
Mistake #5: Ignoring Window Well Drainage
A window well that collects standing water creates two problems: it accelerates corrosion on any metal hardware (including security bar mounting points), and it can freeze in winter, expanding against the window frame and creating gaps that compromise security. Ensure every window well has a functional drain connected to the foundation drainage system or a gravel sump at the bottom.
Mistake #6: Securing Front-Facing Windows but Not Side and Rear Basements
Homeowners often focus on the basement windows they can see from inside the house (the ones facing the yard or the street) and neglect side-facing or rear-facing windows. Burglars target the least visible windows. Bar every basement window, not just the ones you think about.
Mistake #7: Forgetting About Seasonal Changes
Snow accumulation in window wells during winter creates a platform that raises the intruder closer to the window. Leaf accumulation in fall clogs drainage and creates moisture problems. Overgrown vegetation in summer provides concealment. Seasonal maintenance of your window wells and the area around them is part of your security strategy, not just a housekeeping task.
Frequently Asked Questions
What is the best way to secure basement windows?
The most effective way to secure basement windows is to install steel security bars rated for below-grade environments. Powder-coated steel bars like the SWB Model A (~$90) mount directly to the window frame and create a physical barrier that cannot be bypassed quietly or quickly. For windows in concrete or brick foundation walls, the SWB Model B (~$91) anchors directly into the masonry. Pair the bars with motion-activated lighting in the window well, a locking window well cover, and trimmed landscaping to eliminate concealment. This layered approach provides maximum protection with minimal ongoing cost.
Are security bars on basement windows legal?
Yes, security bars on basement windows are legal in all 50 states. The key legal requirement is that any bar on a designated egress window (required in basement bedrooms and finished living spaces) must have a quick-release mechanism that allows the occupant to open the bars from the inside without keys, tools, or special knowledge. This requirement comes from the International Building Code (IBC) and International Residential Code (IRC). Non-egress basement windows (utility rooms, storage areas, unfinished spaces) can have fixed bars with no release mechanism. Always check your local building code for any additional requirements.
Do basement window bars block natural light?
Steel security bars block approximately 15 to 20 percent of natural light entering through the window, which is less than standard vertical blinds (50 percent) or sheer curtains (30-40 percent). Vertical bar orientation, slim bar profiles, and light-colored powder coats (white or light gray) minimize the impact. The biggest factor in basement lighting is typically the cleanliness of the window and window well, not the presence of bars. A clean window with bars admits more light than a dirty window without them.
Can burglars fit through small basement windows?
Yes. Law enforcement professionals confirm that a motivated intruder can fit through an opening as small as 8 by 10 inches. Most standard basement hopper windows measure 32 by 14 inches or larger, which provides more than enough clearance for an adult to enter. Children and teenagers recruited as accomplices can fit through even smaller openings. Never assume a basement window is too small to be a security risk. If the opening is larger than 8 by 10 inches, it should have security bars.
How much does it cost to secure all basement windows?
A typical 4-window basement costs $360 to $362 for steel security bars with DIY installation (three fixed Model A bars at $90 each plus one Model A/EXIT at $92 for the egress window). Professional installation adds $50 to $100 per window for frame mount or $75 to $150 per window for masonry mount. Adding locking window well covers brings the total to $600 to $840. The entire investment pays for itself in one prevented break-in and has zero recurring costs for 20 to 30 years.
What type of security bars work on concrete basement walls?
For basement windows set into concrete, concrete block, or brick foundation walls, use masonry-mount bars like the SWB Model B (~$91). These bars use heavy-duty expansion anchors that drill directly into the masonry, creating a permanent bond that is literally stronger than the surrounding wall material. Frame-mount bars (Model A) can also be used if the basement window has a separate vinyl or wood frame within the masonry opening. The key is matching the mounting method to the surface material. A rotary hammer drill is required for masonry installation.
Do I need quick-release bars on every basement window?
No. Quick-release bars (like the SWB Model A/EXIT) are required only on designated egress windows. Under IRC Section R310, basements with bedrooms or sleeping areas must have at least one egress window meeting minimum size requirements, and any bars on that window must have a quick-release mechanism. Non-egress basement windows (laundry rooms, storage areas, utility spaces, unfinished basements without sleeping areas) can use fixed bars. This means a typical basement with 4 windows might need only 1 quick-release unit and 3 fixed units, reducing cost.
Will basement window bars rust in wet conditions?
Powder-coated steel bars will not rust in normal below-grade moisture conditions. The powder coating creates a fused polymer barrier that is 3 to 5 times more durable than liquid paint against moisture exposure. Products like the SWB Model A and Model B carry a 20 to 30 year expected lifespan even in high-moisture environments. However, uncoated steel or painted steel bars will rust rapidly below grade, often showing corrosion within 1 to 3 years. Always specify powder-coated steel for any below-grade application. In flood-prone areas, upgrade mounting screws to stainless steel for additional corrosion resistance.
How do I secure basement windows in a vacation home?
Vacation and seasonal homes need maximum physical security on every basement window because extended vacancy periods give intruders unlimited time. Install fixed steel bars (Model A or Model B) on every non-egress window and Model A/EXIT on any egress window. Add locking window well covers as a second barrier. Install battery-powered or solar-powered motion lights in each window well. Clear all vegetation within 3 feet of window wells before closing the home for the season. Ensure window well drainage is functioning to prevent water damage to bars and frames during the off-season.
Can I install basement window bars myself?
Yes. Frame-mount bars like the SWB Model A install in approximately 15 minutes per window using a standard cordless drill, level, and tape measure. No cutting, welding, or specialty tools are required. The telescopic mechanism adjusts to fit the window width, and pre-drilled mounting brackets accept anti-tamper security screws. Masonry-mount bars (Model B) require a rotary hammer drill for concrete or brick installations, which adds complexity. If you do not own a rotary hammer drill, hiring a handyman for the masonry work is cost-effective at $75 to $150 per window while still handling the frame-mount windows yourself.
Final Recommendation: Securing Every Below-Grade Window
Basement windows are the most vulnerable and most neglected entry points in American homes. They offer intruders natural concealment, weak construction, and direct access to the interior. The fix is straightforward, affordable, and permanent.
For every basement window with a wood or vinyl frame, install the SWB Model A (~$90). Its telescopic adjustment handles the non-standard sizes common in basement windows, the powder-coated steel withstands decades of below-grade moisture exposure, and the 15-minute DIY installation means you can secure your entire basement in an afternoon.
For basement windows set into concrete, block, or brick foundation walls, install the SWB Model B (~$91). Its masonry-specific mounting integrates the bars into the foundation itself, creating a barrier that is part of the building's structure.
For every egress-rated basement window (bedrooms, finished living spaces), install the SWB Model A/EXIT (~$92). Its quick-release mechanism delivers code-compliant emergency egress while providing the same steel-barrier security as fixed models.
The complete below-grade protection strategy layers these products with window well covers, motion lighting, cleared landscaping, and -- for properties that warrant it -- electronic detection. But the bars are the foundation. Without physical barriers on the windows, every other measure is a notification system that tells you about a break-in after it has already happened.
A four-window basement costs $360 to $362 to secure with steel bars. That is less than one month of professional alarm monitoring annualized over the bars' 20 to 30 year lifespan. There is no more cost-effective security investment available for any residential property.
Ready to protect your basement? Start with the right product for your foundation type:
- Model A -- Telescopic + Modular | Frame or wall mount | ~$90 | Best for wood/vinyl frame basement windows
- Model B -- Heavy-duty masonry mount | Brick, block, concrete | ~$91 | Best for bare foundation wall installations
- Model A/EXIT -- Quick-release egress | IBC/NFPA/OSHA compliant | ~$92 | Required for egress-rated basement windows