How to Secure Basement Windows Against Break-Ins: Step-by-Step Guide
Your basement windows are probably the weakest link in your home's security right now. They sit below grade, out of sight from the street, hidden by landscaping, and protected by nothing more than a basic latch that a determined intruder can defeat in seconds. If you have never taken steps to reinforce these windows, this guide walks you through every method available -- ranked by effectiveness, with exact steps for each approach.
We are not going to waste your time with vague advice. This is a practical, step-by-step walkthrough that starts with the most effective measure (steel security bars) and works through every supplementary upgrade worth considering. By the end, you will have a clear action plan to secure every basement window in your home this weekend.
Step 1: Audit Your Basement Windows
Before buying anything, walk through your basement and document every window. This audit takes 15 to 20 minutes and gives you the information you need to make smart purchasing decisions.
What to Check at Each Window
Stand at each basement window and record the following:
- Window type -- hopper (tilts inward from top), slider (slides horizontally), casement (cranks outward), or fixed pane. The window type determines which security measures are compatible.
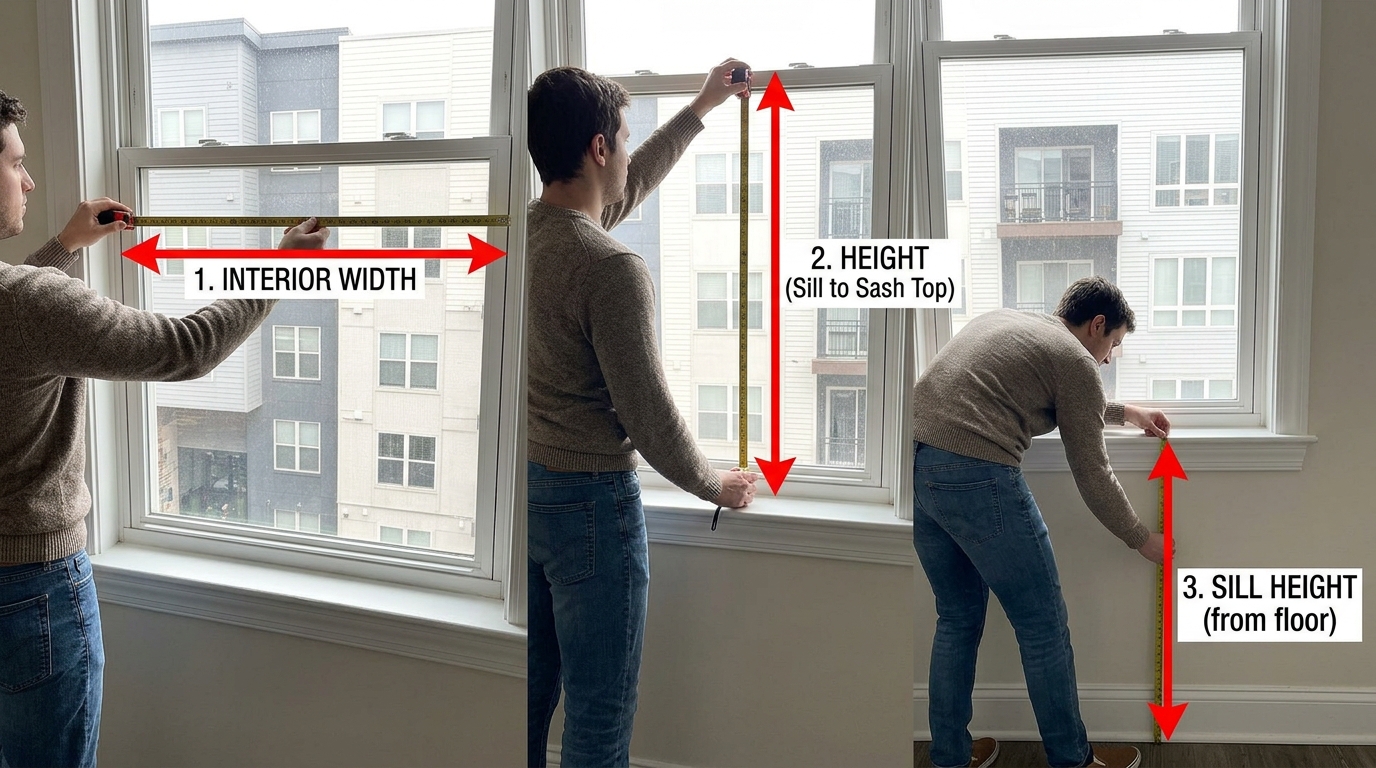
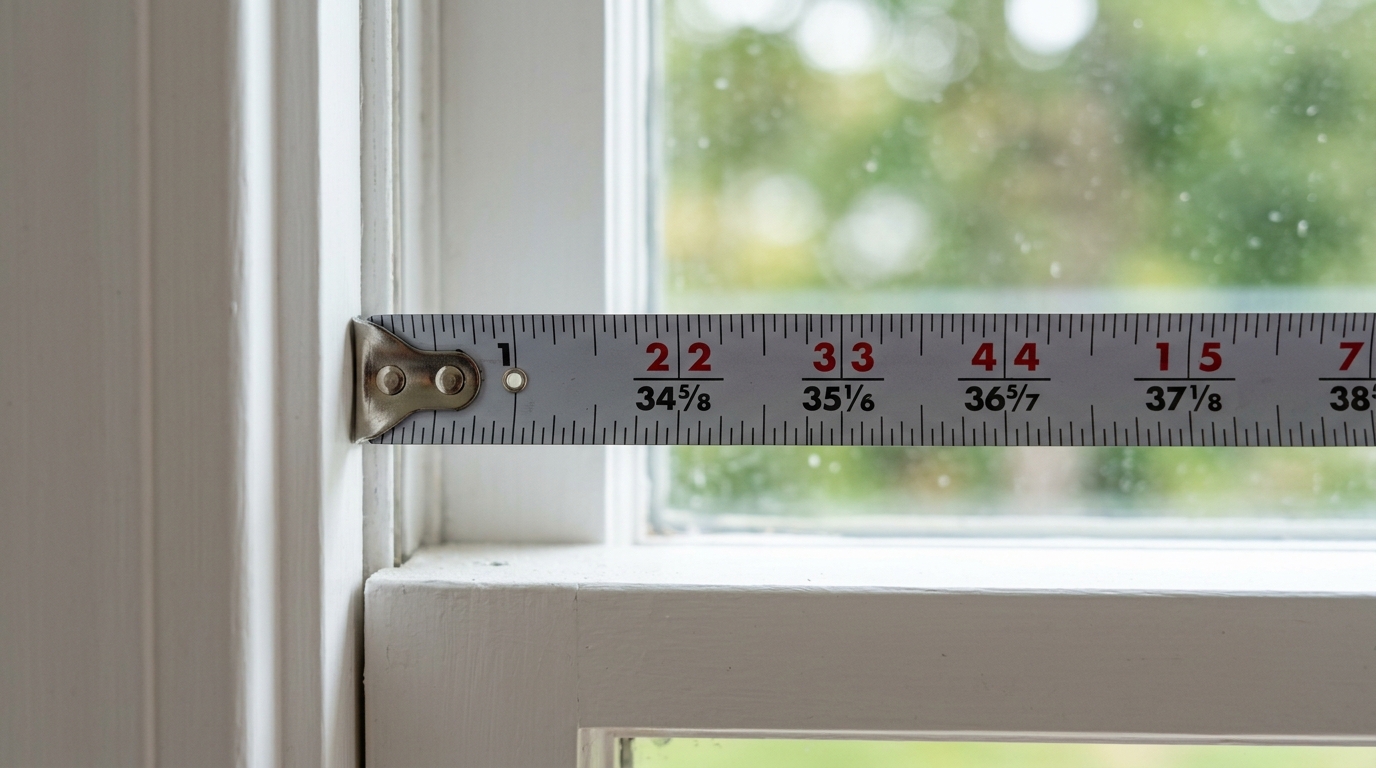
- Window dimensions -- measure the inside width and height of the opening. You will need these for sizing security bars. Measure at three points (top/middle/bottom for width; left/center/right for height) and record the smallest number.
- Frame material -- wood, vinyl, aluminum, or bare foundation (concrete/brick). This determines mounting method for bars.
- Frame condition -- check for rot (wood frames), cracks (vinyl), corrosion (aluminum), or crumbling mortar (foundation-set windows). A deteriorated frame is a security vulnerability even with bars installed.
- Current lock type -- identify the existing latch or lock mechanism. Most basement windows have a basic cam lock or thumb latch that provides minimal security.
- Egress status -- is this window required as an emergency exit? Basement bedrooms must have at least one egress window. Egress windows need quick-release bars, not fixed bars.
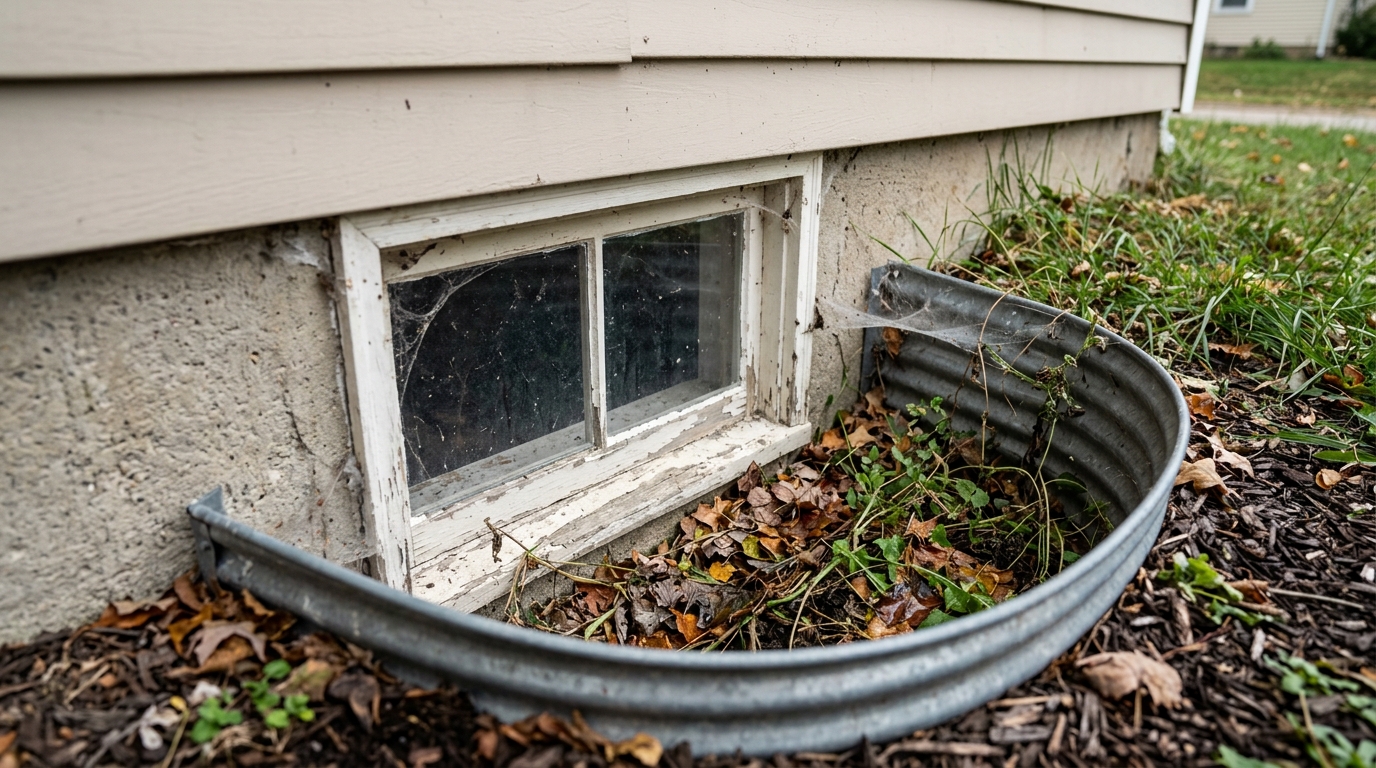
- Window well -- does the window have a window well? Note the well's depth, width, material (corrugated metal, concrete, plastic), and whether it has a cover.
- Visibility from outside -- can this window be seen from the street, a neighbor's house, or only from the side/rear yard? Windows with low visibility are higher priority.
Create Your Priority List
After auditing all basement windows, rank them by risk:
- Highest risk: Windows on the side or rear of the house, hidden from street view, with window wells that provide concealment
- Medium risk: Windows facing the backyard (visible to neighbors but not the street)
- Lower risk: Windows facing the front of the house or clearly visible from the street
If budget forces you to prioritize, start with the highest-risk windows and work down the list. But the goal is to secure every basement window -- an intruder will find and exploit whichever one you leave unprotected.
Step 2: Install Steel Security Bars (The Most Effective Measure)
Steel security bars are the single most effective upgrade you can make to basement window security. They create a physical barrier that cannot be picked, bypassed, or defeated quietly. Every other measure on this list is supplementary to bars -- useful, but not a substitute.
What You Need
- Security bars -- one unit per window. The SWB Model A (~$90) is the best option for most residential basement windows. Its telescopic adjustment fits the wide range of non-standard basement window sizes.
- Cordless drill with appropriate drill bits for your frame material
- Tape measure
- Bubble level
- Pencil for marking hole locations
- Safety glasses
Installation Steps: Frame Mount
- Confirm your measurements. Verify that the bar's telescopic range covers your window width. The Model A adjusts to fit a wide range of openings without cutting or modification.
- Decide on interior or exterior mounting. Interior mount (inside the basement) keeps bars out of the weather and extends their lifespan. Exterior mount (in the window well) is more visible as a deterrent and does not interfere with inward-opening hopper windows.
- Position the bar in the window opening. Extend the telescopic mechanism until the bar spans the full width of the opening with firm contact on both sides.
- Level the bar. Place your bubble level on top of the bar and adjust until it reads level. Do not assume the window frame is square -- foundation settling can throw frames out of level.
- Mark mounting hole locations. Using a pencil, mark through the pre-drilled holes in the mounting brackets onto the window frame.
- Pre-drill pilot holes. For wood frames, use a drill bit slightly smaller than the screw diameter. For vinyl, use the same approach but drill slowly to avoid cracking. For aluminum, use a metal drill bit.
- Drive the anti-tamper security screws. Insert the provided security screws through the bracket holes and drive them into the pre-drilled holes. These are not standard Phillips screws -- they require a security bit (included with SWB products) and cannot be removed with a standard screwdriver from the outside.
- Test the installation. Apply firm pressure to the bar in multiple directions: push in, pull out, push side to side. There should be zero movement. If the bar shifts, the screws need to be re-seated or the frame needs reinforcement at the anchor points.
Time required: approximately 15 minutes per window for the first installation, faster for subsequent windows once you have the process down.
For Masonry Foundations
If your basement windows are set directly into concrete, block, or brick (no separate frame), you will need masonry-mount hardware or a product designed for masonry like the SWB Model B. Masonry mounting requires a rotary hammer drill and expansion anchors. If you do not own a rotary hammer drill, consider renting one from a hardware store ($40-$60 for 4 hours) or hiring a handyman for this specific task ($75-$150 per window).
For detailed instructions on both mounting methods and material-specific guidance, see our complete measurement and installation guide.
Egress Windows: Use Quick-Release Bars
If your audit identified any window as an egress point (required in basement bedrooms), do not install fixed bars on that window. Use the SWB Model A/EXIT (~$92) instead, which has a quick-release mechanism that allows the bars to swing open from inside in one motion. This keeps you compliant with fire codes while still providing full security. See our legal guide to window bars for state-specific egress requirements.
Step 3: Upgrade Window Locks and Latches
With bars installed, the window glass is protected. But upgrading the lock on the window itself adds another layer of resistance and prevents the window from being opened even if someone somehow gets past the bars (which is extremely unlikely with properly installed steel bars).
Lock Upgrades by Window Type
Hopper windows (tilt-in):
- Replace the standard cam lock with a keyed sash lock. Keyed sash locks require a key to disengage from the inside, preventing operation through broken glass. (Only use keyed locks on non-egress windows.)
- Add a pin lock as a secondary measure -- a steel pin driven through the sash frame into the fixed frame prevents the sash from tilting even if the primary latch is defeated.
Slider windows:
- Install a slider window bar or track lock that prevents the sliding panel from moving.
- Add anti-lift pins in the upper track to prevent the panel from being lifted out of its track.
- A foot-operated lock at the base of the panel provides an additional locking point beyond the thumb latch.
Casement windows (crank-out):
- Casement windows are inherently more secure than hopper and slider types because the locking mechanism engages at multiple points along the frame. If the existing hardware is in good condition, it may not need upgrading.
- If the crank mechanism is worn, replace it. A worn crank that does not fully close the window leaves a gap that can be exploited.
Cost of Lock Upgrades
Window lock upgrades are inexpensive: $8 to $25 per window for aftermarket locks, pins, and track locks. Combined with security bars, they create a two-barrier system that is virtually impossible to defeat quickly.
Step 4: Secure Window Wells
If your basement windows have window wells, securing the wells adds another obstacle between the intruder and the window.
Window Well Cover Options
- Polycarbonate bubble covers ($40-$120) -- clear, dome-shaped covers that let in maximum light and keep out rain and debris. Security value is low (they can be cracked or lifted), but they add inconvenience and cover the well from casual view.
- Steel grate covers ($60-$200) -- open metal grates that allow air and light while blocking direct access. When bolted to the well or foundation, they require tools to remove.
- Locking steel covers ($150-$400) -- solid or grated covers with a keyed padlock or integrated lock. These provide the highest well-level security but reduce light transmission and require a key for access.
Installation
Most window well covers are sized to fit standard corrugated metal wells (the half-round galvanized wells common in residential construction). Measure the outside diameter of your well and match it to the cover size. Secure the cover to the well or the foundation wall using the included hardware. For maximum security, use bolts rather than clips -- clips can be unhooked from outside, while bolts require tools to remove.
Drainage Consideration
If you install a solid or bubble cover, ensure that the window well has adequate drainage at the bottom (a gravel bed connecting to the footing drain or a dedicated well drain). A sealed well without drainage will collect rainwater and create flooding and moisture problems. Grate covers avoid this issue because water passes through.
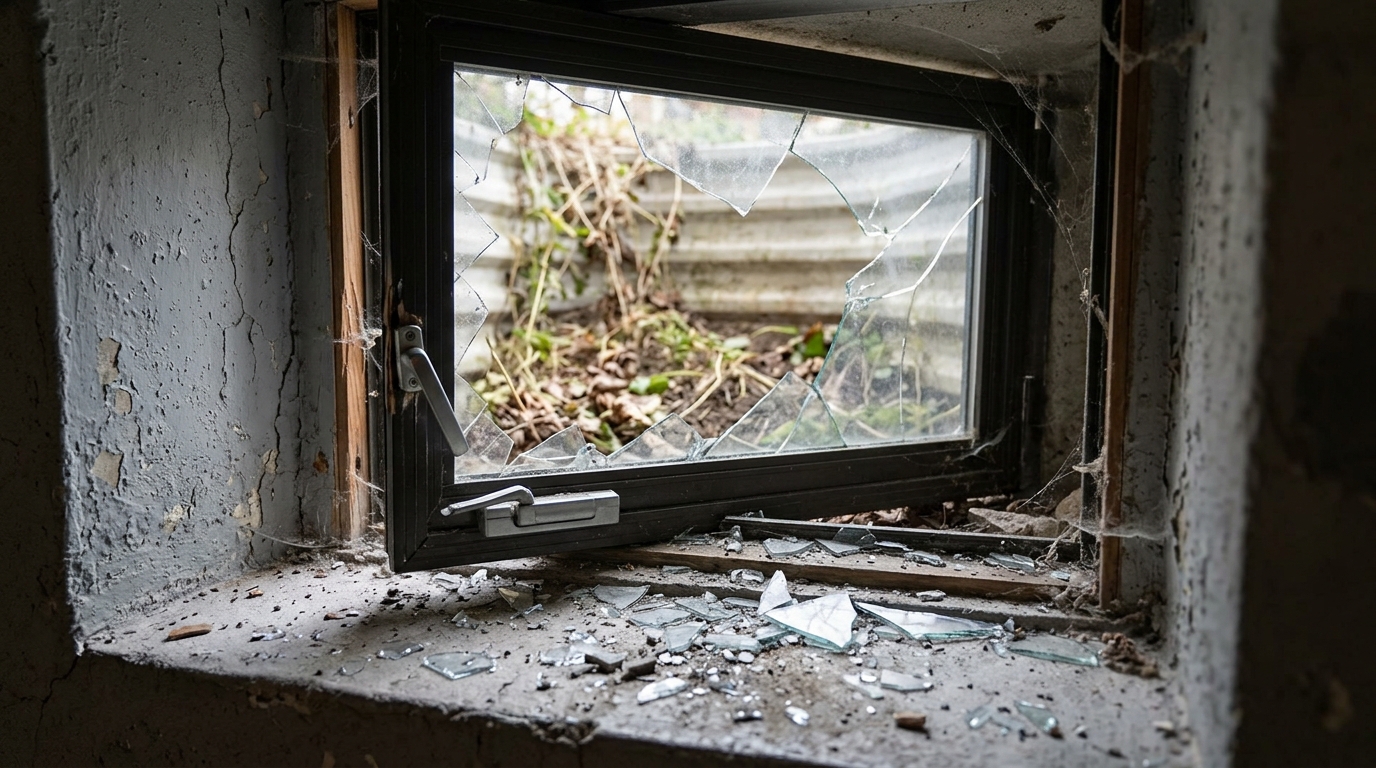
Step 5: Apply Security Film to Glass
Security window film is a thick, adhesive polyester film applied to the interior surface of the glass. When the glass is struck, the film holds the broken pieces together instead of allowing them to shatter into an open hole. This does not prevent glass from breaking, but it prevents the instant opening that a burglar needs for quick entry.
How to Apply Security Film
- Clean the glass thoroughly. Any dirt, dust, or residue under the film will create bubbles and weak spots. Use glass cleaner and a lint-free cloth.
- Cut the film to size. Measure the glass pane and cut the film 1/4 inch smaller than the pane on all sides.
- Wet the glass. Spray a solution of water with a few drops of dish soap onto the glass surface.
- Apply the film. Peel the backing from the film and position it on the wet glass. The soapy water allows you to slide the film into position.
- Squeegee out air bubbles. Starting from the center, work outward toward the edges with a squeegee, pressing firmly to remove air and water.
- Allow to cure. The film takes 7 to 14 days to fully bond to the glass. Avoid touching or cleaning during this period.
Limitations
Security film is a supplementary measure, not a primary defense. It delays glass breach by seconds to minutes depending on thickness (4 mil to 14 mil), but a determined intruder with a hammer or heavy tool can eventually punch through. It works best as part of a layered system where bars provide the primary barrier and film provides a secondary delay.
Step 6: Address Lighting and Landscaping
Two zero-cost and low-cost changes dramatically reduce the attractiveness of your basement windows to burglars: eliminating concealment and eliminating darkness.
Landscaping Changes
- Clear all tall vegetation within 3 feet of window wells. Tall shrubs, ornamental grasses, and bushy ground covers provide concealment for anyone crouching near your basement windows.
- Replace tall plantings with low-profile alternatives. Low groundcover, gravel beds, or decorative stone around the foundation maintain curb appeal without providing cover.
- Remove any items stored near window wells. Trash cans, garden equipment, stacked firewood, and stored materials give an intruder something to hide behind.
Lighting Upgrades
- Motion-activated LED flood lights -- mount one above each window well or group of basement windows. Motion activation means the light only turns on when someone approaches, which draws attention and startles intruders. Solar-powered models require no wiring and cost $15 to $40 each.
- In-well lighting -- a small solar-powered light inside the window well illuminates the well interior, making it impossible to hide there without being seen. These cost $10 to $20 each.
Combined Effect
Clear sightlines plus motion lighting eliminate the two things that make basement windows attractive: concealment and darkness. A burglar who triggers a bright flood light while standing in a window well with no shrubs to hide behind is fully visible to neighbors, passersby, and any security cameras on the property. Most will abort the attempt immediately.
Step 7: Add Detection (Sensors and Cameras)
Electronic detection does not prevent a break-in, but it ensures you know about it the moment it happens. When paired with steel bars that delay entry, detection gives you time to respond -- call police, alert a neighbor, or trigger a monitored alarm.
Glass Break Sensors
These sensors detect the specific sound frequency of breaking glass and trigger an alarm. Position one in each basement room with a window, or one centrally located unit in an open basement. Cost: $15 to $30 per sensor (standalone) or included with most alarm systems.
Window Contact Sensors
Magnetic sensors mounted on the window frame and sash trigger an alert when the window is opened. These work well for hopper and casement windows but are less reliable on slider windows where the gap between the magnets may vary. Cost: $10 to $25 per sensor.
Camera Coverage
A weatherproof camera pointed at the foundation and window wells records activity and can trigger motion alerts. For basement-level coverage, position the camera on the building's exterior at a height of 6 to 8 feet, angled downward to capture the window well area. Cost: $50 to $200 per camera depending on features.
The detection layer is optional but recommended. It does not replace physical barriers (bars and locks), but it completes the security picture by ensuring that any attempt triggers awareness and documentation. For a full breakdown of how physical barriers and detection systems work together, see our guide on burglar-proofing your windows step by step.
Effectiveness Ranking: Every Method Compared
Here is how every basement window security measure stacks up, ranked from most to least effective at preventing actual break-ins.
| Rank | Method | Prevents Entry? | DIY Cost (4 Windows) | Install Time |
|---|---|---|---|---|
| 1 | Steel security bars (SWB Model A) | Yes -- physical barrier | $360 | 1 hour total |
| 2 | Locking window well covers + bars | Yes -- dual barrier | $960-$1,960 | 2-3 hours total |
| 3 | Upgraded window locks | Partially -- delays opening | $32-$100 | 30 minutes total |
| 4 | Security film on glass | No -- delays glass breach only | $80-$200 | 1-2 hours total |
| 5 | Motion-activated lighting | No -- deters but does not prevent | $60-$160 | 1 hour total |
| 6 | Glass break sensors + alarm | No -- alerts only | $60-$120 + monitoring | 30 minutes total |
| 7 | Security cameras | No -- records only | $200-$800 | 1-3 hours total |
| 8 | Landscaping changes | No -- reduces concealment | $0-$50 | 1-2 hours total |
The takeaway is clear: steel security bars are the only standalone measure that physically prevents entry through a basement window. Everything else is supplementary. Start with bars, then add additional layers based on your budget and risk level.
For a complete cost analysis of security bars across every application (not just basements), see our 2026 pricing guide.
Frequently Asked Questions
What is the most effective way to secure basement windows?
The most effective single measure is installing steel security bars. Powder-coated telescopic bars like the SWB Model A (~$90 each) mount directly to the window frame and create a physical barrier that prevents entry even if the glass is broken. Bars are the only measure that physically stops an intruder at the window. Supplementary measures like upgraded locks, security film, motion lighting, and sensors add additional layers but do not replace the barrier provided by steel bars.
Can I secure basement windows without drilling?
Some security measures do not require drilling: security film, window well covers that clip or weight into place, and adhesive-mounted sensors. However, the most effective measure -- steel security bars -- does require drilling pilot holes into the window frame or foundation wall. Drilling is what creates the permanent, tamper-resistant anchor that makes bars impossible to remove from outside. For renters or situations where drilling is not possible, see our guide on installing window bars without drilling for alternative mounting options.
How long does it take to secure all basement windows?
A typical four-window basement can be fully secured in a single afternoon. Steel bar installation takes approximately 15 minutes per window (1 hour for four windows). Adding lock upgrades takes 5 to 10 minutes per window. Applying security film takes 15 to 20 minutes per window. Clearing landscaping and installing motion lights adds another 1 to 2 hours. Total time for the complete security upgrade on a four-window basement: approximately 3 to 4 hours with basic DIY skills.
Do I need to secure basement windows that are very small?
Yes. Law enforcement professionals confirm that intruders can fit through openings as small as 8 by 10 inches. Most basement windows are larger than this, including small hopper windows that homeowners commonly assume are too small for entry. Additionally, even a small window that a person cannot fit through can be used to reach inside and unlock a nearby door or larger window. Secure every basement window regardless of size.
What is the total cost to secure a basement with 4 windows?
A complete DIY security upgrade for a four-window basement costs approximately $450 to $700 depending on the level of protection. The breakdown: steel security bars ($360 for 4 units), lock upgrades ($32 to $100), security film ($80 to $200), and motion lighting ($60 to $160). The bars alone ($360) provide the core protection and are the minimum recommended investment. Professional installation of bars adds $50 to $100 per window for frame mount work.