How to Choose the Right Window Security System for Your Home
Choosing the right window security system is not about buying the most expensive product or copying what your neighbor installed. It is about matching the right solution to your specific situation — your home type, your budget, your risk level, and whether you own or rent. This guide walks you through a structured decision framework so you end up with the protection you actually need instead of the protection some company marketed hardest.
There is no universal "best" window security system. A homeowner in a low-crime suburb with second-floor bedrooms has completely different needs than a renter in a ground-floor urban apartment. A landlord securing a multi-unit investment property faces different requirements than a retiree protecting a single-family home. The right choice depends on your answers to a specific set of questions, and this guide gives you those questions along with clear recommendations for each answer.
Step 1: Assess Your Risk Level
Your risk level determines how much protection you need and how urgently you need it. Not every home faces the same threat. An honest risk assessment prevents two common mistakes: over-investing in security you do not need, or under-investing and leaving real vulnerabilities exposed.
High-Risk Indicators
If three or more of these apply to you, your window security needs are urgent:
- Your home is in a neighborhood with above-average property crime rates (check your city's crime map or NeighborhoodScout)
- You have ground-floor or basement windows accessible from the street, alley, or rear yard
- Your home is frequently unoccupied (travel, dual residences, work schedule)
- You have experienced a break-in or attempted break-in in the past 3 years
- Neighboring homes have been burglarized recently
- Your windows are not visible to neighbors or from the street (secluded)
- You store valuable items that would attract targeted theft (tools, electronics, firearms)
High-risk recommendation: Physical barriers on all accessible windows are the priority. Start with window security bars on every ground-floor and basement window, then add electronic layers (cameras, alarms) as budget allows.
Medium-Risk Indicators
If one or two high-risk indicators apply, or if these describe your situation:
- Your neighborhood is generally safe but not immune to property crime
- You have some accessible windows but they are partially visible to neighbors
- You are home most evenings but travel occasionally
- No personal break-in history but you are aware of incidents in the broader area
Medium-risk recommendation: Targeted physical barriers on your most vulnerable windows (ground floor, rear-facing, basement) combined with basic camera or alarm coverage on primary entry points.
Low-Risk Indicators
- Low crime rate neighborhood with active community watch
- Second-floor or above bedrooms with no accessible windows from ground level
- Home is occupied nearly all the time
- Strong relationship with neighbors who watch each other's properties
- No history of break-ins or attempts in your area
Low-risk recommendation: Basic deterrence measures may be sufficient. Window locks, basic camera coverage, and security lighting address the low-probability scenarios without significant investment. However, even low-risk homes benefit from bars on basement windows and any ground-level windows hidden from view.
Step 2: Identify Your Home Type and Vulnerabilities
Your home's physical layout determines which windows are vulnerable and which security solutions are practical. Different home types have different weak points.
Single-Family Home
| Vulnerable Windows | Why They Are Targeted | Recommended Protection |
|---|---|---|
| Ground-floor rear windows | Hidden from street view, covered by fences | Security bars (Model A or Model A/EXIT for bedrooms) |
| Basement windows | Below grade, often out of sight, typically weaker locks | Security bars (Model A standard) |
| Side-yard windows | Narrow passages between houses provide cover | Security bars + motion-activated lighting |
| Garage windows | Access to tools and vehicles, often unlocked | Security bars or security film |
Apartment (Ground Floor)
| Vulnerable Windows | Why They Are Targeted | Recommended Protection |
|---|---|---|
| All windows facing exterior | Ground-level access, often facing parking areas | Frame-mount security bars (no wall damage) |
| Patio/sliding glass doors | Large opening, weak factory locks | Sliding door bar + window bars on adjacent windows |
| Windows facing shared walkways | Easy access disguised as foot traffic | Security bars + window film as backup |
Apartment (Upper Floor)
Upper-floor apartments (second floor and above) are significantly less vulnerable to window break-ins because of access difficulty. Your primary concern shifts to door security. However, if your building has accessible fire escapes, balconies, or adjacent rooftop access, those windows need protection.
Townhouse / Row House
| Vulnerable Windows | Why They Are Targeted | Recommended Protection |
|---|---|---|
| Rear ground-floor windows | Back alley or shared backyard access | Security bars (standard or egress) |
| Basement windows | Often at sidewalk level in urban settings | Security bars with masonry mount (Model B for brick) |
| Front basement windows | Window wells at street level | Security bars + window well covers |
Step 3: Determine Your Ownership Situation
Whether you own or rent your home significantly affects which security products are practical, which require permission, and which add long-term value.
If You Own Your Home
- Full flexibility: You can install any security product without permission. Wall-mount and frame-mount bars are both options.
- Investment value: Permanent security improvements add to property value, especially in areas where security is a buyer concern.
- Long-term thinking: Choose products with long lifespans (window bars: 10-25+ years) rather than products requiring replacement (cameras: 3-5 years).
- Code compliance: Ensure egress-compliant bars on bedroom windows. As the property owner, you bear liability for code violations.
If You Rent
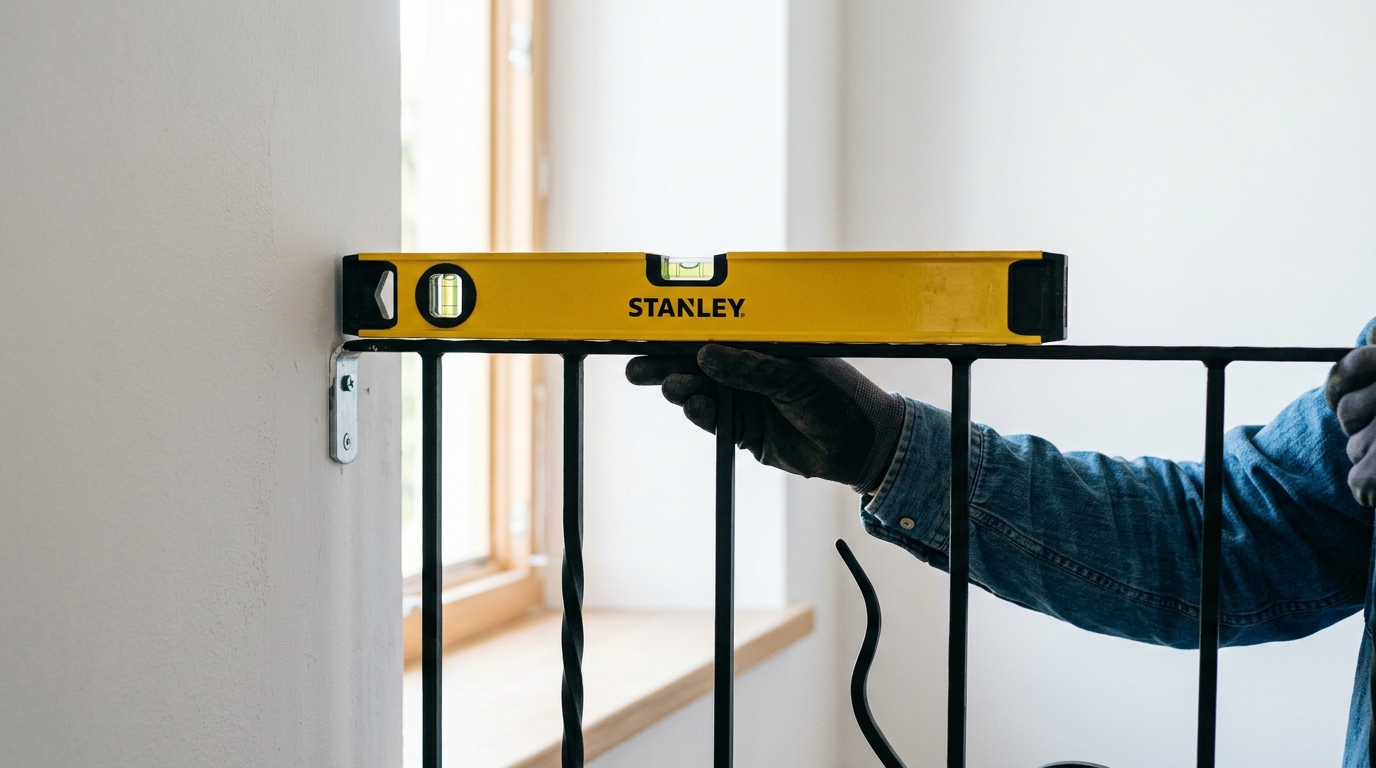
- Landlord approval may be needed: Check your lease for modification clauses. Most landlords approve frame-mount bars because they increase property security and cause minimal wall damage.
- Frame-mount preferred: The SWB Model A installs with frame screws that leave only small holes — equivalent to mounting curtain rods. This makes them removable when you move out.
- Portability matters: Choose products you can take with you. Telescopic window bars adjust to fit different window sizes, so they can move to your next apartment.
- Request from landlord: In many states, landlords are required to provide reasonable security devices on ground-floor windows. Research your state's tenant rights.
- Document everything: Photograph the windows before installation and after removal. Get written landlord approval if required by your lease.
If You Are a Landlord
- Legal obligations: Many jurisdictions require security devices on accessible windows in rental properties. Non-compliance creates liability.
- Egress is mandatory: Any bars on bedroom windows in rental units MUST have quick-release mechanisms. Use the SWB Model A/EXIT on all bedroom windows.
- Tenant notification: In states like California, you must provide written instructions on how to operate quick-release bars.
- Maintenance responsibility: You are responsible for keeping quick-release mechanisms in working order. Include window bar inspection in your annual maintenance routine.
Step 4: Set Your Budget Tier
Security spending should be proportional to your risk level and the value you are protecting. Here are three budget tiers with specific recommendations for each.
Budget Tier: Under $500
Best strategy: Focus on the highest-vulnerability windows only.
- Install bars on the 3-5 most vulnerable windows (rear-facing, basement, hidden from view): $270-$460
- Add aftermarket window locks on remaining windows: $5-$15 each
- Motion-activated exterior lights: $20-$50 each
What you get: Physical prevention on your weakest points plus basic deterrence elsewhere.
Budget Tier: $500-$1,500
Best strategy: Full window bar coverage plus basic electronic monitoring.
- Bars on all accessible windows (6-10 windows): $540-$920
- 1-2 security cameras on primary entry points: $100-$300
- Video doorbell: $100-$250
- Motion-activated lighting on all sides: $80-$200
What you get: Complete physical prevention on windows plus visual deterrence and monitoring on key access points.
Budget Tier: $1,500+
Best strategy: Full layered security system.
- Bars on all accessible windows with egress on bedrooms: $726+
- 4-camera security system: $400-$800
- Monitored alarm system: $200-$600 + monthly
- Smart locks on exterior doors: $300-$800
- Security film on any window without bars: $100-$200/window
What you get: Comprehensive physical prevention, deterrence, detection, and response coverage.
For detailed pricing on window bars specifically, see our cost guide.
Step 5: Rank Your Priorities
Different homeowners value different things. Rank these priorities from most to least important to fine-tune your decision:
| Priority | Best Product Match |
|---|---|
| Maximum physical prevention | Window security bars |
| Visual aesthetics (invisible security) | Security film + smart locks |
| Remote monitoring while away | Security cameras + alarm |
| Lowest total cost | Window bars (one-time, no subscription) |
| Insurance premium reduction | Monitored alarm system |
| Evidence collection | Security cameras |
| Portability (renters) | Telescopic frame-mount bars |
| Zero maintenance | Security film |
| Fire code compliance | Quick-release bars (Model A/EXIT) |
Decision Tree: Your Recommended Solution
Follow this decision tree based on your answers from Steps 1-5 to reach your recommended window security solution.
Question 1: Do you have ground-floor or basement windows accessible from outside?
- YES: You need physical window protection. Proceed to Question 2.
- NO (all windows above second floor, no fire escape access): Your window break-in risk is very low. Focus your security budget on door reinforcement, smart locks, and a basic camera system. Window security is optional for peace of mind.
Question 2: Are any of those accessible windows in bedrooms?
- YES: Those bedroom windows require egress-compliant bars with quick-release (Model A/EXIT, ~$92/window). Non-bedroom windows can use standard bars (Model A, ~$90).
- NO (accessible windows are only in living areas, kitchen, basement): Standard bars without quick-release are sufficient and slightly less expensive. Model A (~$90) for frame or wall mount, or Model B (~$91) for masonry/brick.
Question 3: Do you own or rent?
- OWN: Choose frame-mount or wall-mount bars depending on your wall material and preference. Permanent installation maximizes security.
- RENT: Choose frame-mount telescopic bars (Model A). They install with minimal wall damage, adjust to fit different window sizes, and can move with you to your next home.
Question 4: What is your wall material?
- Wood frame, vinyl, or aluminum siding: Model A (frame or wall mount)
- Brick, concrete, or masonry: Model B (masonry anchors) or Model A (frame mount into the window frame itself)
- Stucco over wood: Model A (frame mount preferred to avoid stucco cracking)
Question 5: How many windows need protection?
- 1-3 windows: Budget approximately $270-$276. Install bars on these windows and add basic window locks on remaining windows.
- 4-8 windows: Budget approximately $360-$736. This covers a typical home's accessible windows comprehensively.
- 9+ windows: Budget $810+. Consider a phased approach: highest-risk windows first, then remaining windows over the following months.
Your Result
Based on this decision tree, most homeowners with ground-floor windows arrive at the same conclusion: install window bars on all accessible windows, using quick-release (Model A/EXIT) on bedrooms and standard (Model A) on everything else. Add cameras and alarms as supplementary layers if your budget allows. This approach provides the strongest physical protection at the lowest total cost.
For a head-to-head comparison of bars versus other products, see our complete comparison guide.
Special Section: Apartment Window Security
Apartment dwellers face unique challenges: landlord approval requirements, lease restrictions, and the need for portability. Here is how to handle each one.
Getting Landlord Approval
- Frame the request in terms of property protection. Window bars protect the landlord's property from break-in damage. Many landlords approve them enthusiastically.
- Show them the product. Frame-mount telescopic bars like the Model A are not permanent modifications. They install with small screws into the window frame — less invasive than mounting a TV bracket.
- Offer to restore on move-out. Commit in writing to fill any screw holes and touch up paint when you leave. This eliminates the landlord's concern about damage.
- Know your rights. In many jurisdictions, landlords are required to provide reasonable security measures on ground-floor units. If your landlord refuses and your state law requires security devices, you may have legal recourse.
Best Products for Apartments
- Model A (frame mount): Telescopic adjustment fits different window sizes. Takes with you when you move. ~$90/window.
- Model A/EXIT (frame mount): Same portability plus egress compliance for bedrooms. ~$92/window.
- Sliding door security bar: For patio/sliding glass doors common in ground-floor apartments.
For more apartment-specific guidance, see our sliding glass door protection guide.
Special Section: Single-Family Home Window Security
Single-family homeowners have maximum flexibility but also face the most complex decision because they typically have more windows and more diverse vulnerabilities than apartment dwellers.
Prioritize Windows by Risk
- Highest priority: Rear ground-floor windows not visible from the street
- High priority: Basement windows (especially window wells)
- Medium priority: Side-yard windows between houses
- Lower priority: Front-facing ground-floor windows (visible, deterrent effect of visibility)
- Optional: Garage windows (valuable tool storage)
Phased Installation Approach
If budget is a constraint, install in phases aligned with the priority list above:
- Phase 1 (immediate): Bars on rear and basement windows (your highest-risk entry points). Budget: $270-$460 for 3-5 windows.
- Phase 2 (within 30 days): Bars on side-yard windows. Budget: $180-$270 for 2-3 windows.
- Phase 3 (within 60 days): Bars on remaining ground-floor windows and garage. Budget: $180-$360 for 2-4 windows.
- Phase 4 (when budget allows): Camera system and/or alarm for electronic monitoring layer.
For a complete product overview, see our 2026 buyer's guide.
Common Mistakes to Avoid
Homeowners frequently make these mistakes when choosing window security. Each one wastes money, leaves vulnerabilities, or creates new problems.
- Spending on cameras and alarms while leaving windows physically exposed. Electronic systems document and alert but do not prevent entry. If your windows are accessible from ground level, physical barriers should come first.
- Installing fixed bars on bedroom windows without quick-release. This violates fire code in every US jurisdiction and creates a life-threatening hazard during fires. Always use egress-compliant bars (Model A/EXIT) on bedroom windows.
- Buying the cheapest bars from a generic marketplace seller. Low-cost imported bars often use thin-gauge steel that can be bent or pried with a standard pry bar. Quality bars use heavy-gauge steel with anti-tamper mounting hardware. The price difference is $20-$30 per window. The protection difference is enormous.
- Securing front windows but ignoring rear and side windows. Burglars prefer entry points hidden from view. Your front windows are visible to neighbors and passersby. Your rear windows are where most break-ins actually happen.
- Relying entirely on one product type. The strongest security strategy layers multiple approaches: physical barriers on windows, reinforced locks on doors, electronic monitoring, and deterrent lighting.
Frequently Asked Questions
What is the best window security option for a rental apartment?
Frame-mount telescopic window bars are the best option for rental apartments. They install into the window frame with small screws (similar to curtain rod mounting), adjust to fit standard window sizes, and can be removed and taken with you when your lease ends. The SWB Model A (~$90) fits most standard windows and installs in about 15 minutes per window without professional help. For bedroom windows, use the Model A/EXIT (~$92) to comply with fire egress codes. Most landlords approve frame-mount bars because they increase property security with minimal structural modification.
How do I know which windows to secure first?
Prioritize windows by accessibility and visibility. Rear ground-floor windows hidden from street view are the highest priority because burglars can work unobserved. Basement windows are second priority because they are below sightlines and often have weaker locks. Side-yard windows between houses are third because narrow passages provide concealment. Front-facing windows are lower priority because they are visible to neighbors and passersby. Garage windows are optional but worthwhile if you store valuable equipment. If budget is limited, secure the highest-priority windows first and add remaining windows over time.
Can I install window security bars myself or do I need a professional?
Most residential window security bars are designed for DIY installation. Frame-mount telescopic bars like the SWB Model A require a drill, a level, and about 15 minutes per window. Wall-mount bars on masonry (like the SWB Model B) require a hammer drill with masonry bits, which adds complexity but is still within DIY capability for handy homeowners. Professional installation is recommended only for large-scale projects (10+ windows), unusual window configurations, or if you are not comfortable using power tools. Professional installation typically costs $50-$100 per window in addition to the product cost.
Should I choose window bars or security film for my home?
Choose window bars if physical prevention is your priority. Bars create an impassable steel barrier that no burglar can defeat without industrial power tools. Choose security film if aesthetics are paramount and you cannot tolerate visible bars on your windows. Film holds shattered glass together and delays entry by 30-90 seconds, but a determined burglar can eventually breach it. For maximum protection, some homeowners use both: bars on the exterior for physical prevention and film on the glass as a secondary delay layer. If you must choose one, bars provide significantly stronger protection.
How much should I spend on window security for my home?
For a typical 3-bedroom home with 6-8 accessible windows, expect to spend $540-$736 for comprehensive window bar coverage (using egress bars on bedroom windows and standard bars elsewhere). This is a one-time investment with no monthly fees and a 10-25+ year lifespan. If your budget is under $500, prioritize the 3-5 highest-risk windows first and add remaining windows later. The average residential burglary results in approximately $2,800 in losses, so even partial window bar coverage pays for itself if it prevents a single break-in attempt.
Your Next Steps
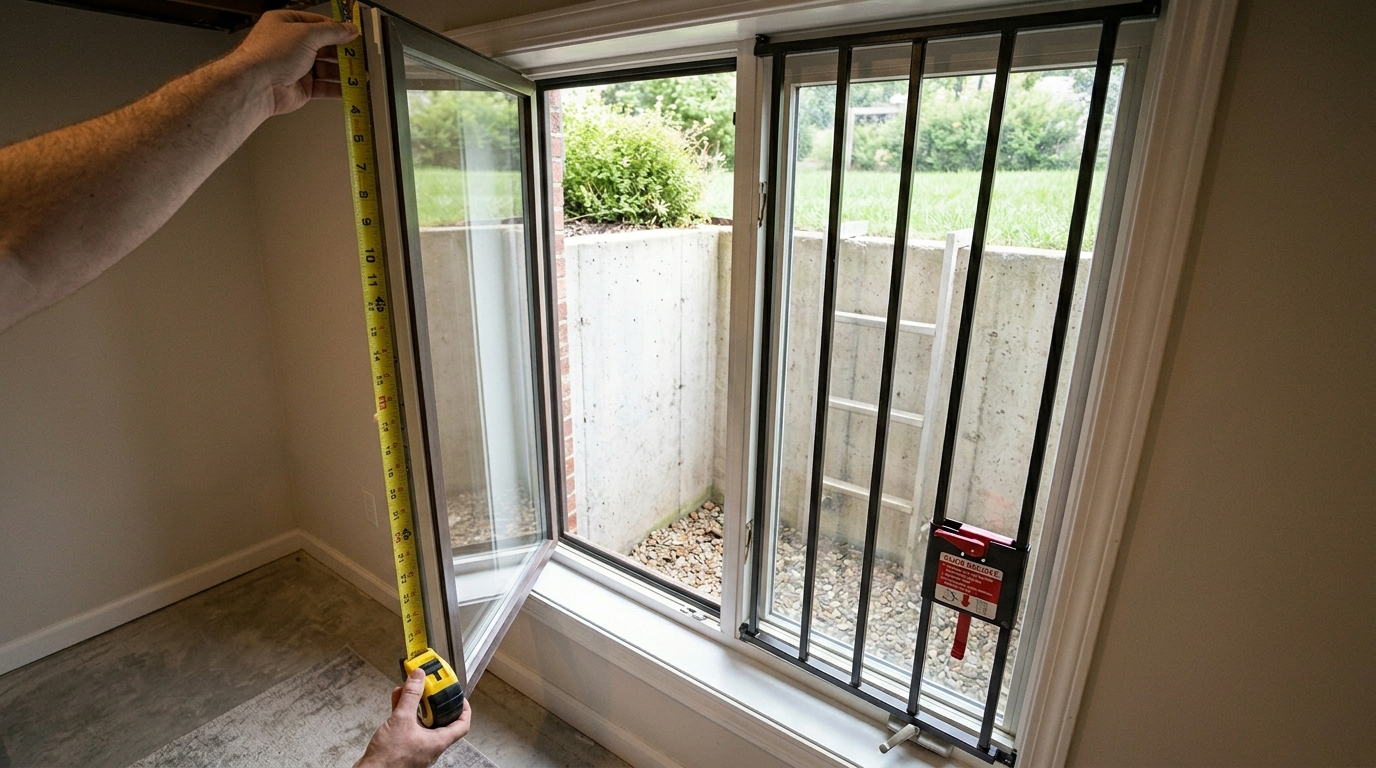
- Walk your property. Identify every window accessible from ground level. Note which are bedrooms (require egress bars) and which are other rooms (standard bars are fine).
- Count your windows. Multiply by $90-$92 per window for your total budget estimate.
- Check your lease or HOA rules if you rent or live in a managed community. Frame-mount bars typically comply with most restrictions.
- Start with your highest-risk windows. You do not need to do everything at once. Install bars on rear and basement windows first, then expand coverage over time.
- 2026 Buyer's Guide — Compare all SWB models in detail
- Pricing Guide — Detailed cost breakdown by home size
- Bars vs Cameras vs Alarms — Full head-to-head comparison