Window Security Bars Budget Planning: How to Protect Your Home Without Overspending
Window security bars budget planning starts with a single question: how much protection can you afford right now, and how do you stretch every dollar to cover the windows that matter most? Whether you are working with $200 or $2,000, this guide gives you a practical framework for allocating your security budget, prioritizing the most vulnerable windows, and avoiding the common spending mistakes that leave homeowners underprotected or overpaying.
Most people approach window security the wrong way. They either try to bar every window on the same day and blow their budget on the cheapest product available, or they buy one premium bar for the kitchen window and call it done. Both strategies leave gaps. A smart budget plan covers your highest-risk windows first with bars that actually work, then scales outward as your budget allows. This guide shows you exactly how to build that plan.
By the end of this article, you will know the real cost ranges for every tier of window bar on the market, how to calculate your total project cost down to the dollar, which windows to prioritize when money is tight, and how to phase your spending so you are never more than one paycheck away from the next level of protection.
Understanding Window Security Bar Costs in 2026
Before you can plan a budget, you need to know what things actually cost. Window security bar pricing falls into four distinct tiers, and the differences between them are not just about brand names. What you pay determines what you get in material thickness, finish durability, tamper resistance, and lifespan.
Tier 1: Budget bars ($15 to $40 per window)
These are the generic bars you find on Amazon, Walmart.com, and discount hardware sites. They are typically made from thin-gauge steel or aluminum with a basic spray-paint finish. Most use standard Phillips-head screws for mounting, which means anyone with a screwdriver can remove them from the outside. Paint begins peeling within two to three years of outdoor exposure. Expected lifespan: three to five years before rust makes them structurally questionable.
What you get: Visual deterrence. A budget bar signals that the window is not completely unprotected, and that alone discourages some opportunistic thieves. But if someone applies real force with a pry bar, thin-gauge aluminum bends like a coat hanger.
Tier 2: Mid-range bars ($45 to $80 per window)
This tier includes brands you find at Home Depot and Lowe's. The steel is thicker than budget models, the paint is slightly better, and some models offer limited telescopic adjustment. A few offer basic egress release mechanisms, though the quality varies. Expected lifespan: ten to fifteen years before the finish deteriorates significantly.
What you get: Moderate deterrence and delay. A mid-range bar resists casual prying but may not hold up against a sustained attack with tools. The finish lasts long enough to look presentable for a decade but rarely beyond that.
Tier 3: Professional-grade bars ($90 to $92 per window)
This is where you find products like the SWB Model A ($90), Model B ($91), and Model A/EXIT ($92). Heavy-gauge cold-rolled steel, multi-stage powder-coat finish rated for 20-plus years of weather exposure, anti-tamper mounting hardware, and telescopic adjustment that fits a wide range of window sizes without custom ordering. Expected lifespan: twenty to thirty years with basic annual maintenance.
What you get: Genuine forced-entry resistance. A professional-grade bar cannot be bent with a standard crowbar. The anti-tamper hardware cannot be backed out with a common screwdriver. The powder coat survives decades of sun, rain, and temperature cycling without peeling or rusting. This is the tier where you stop buying deterrence and start buying actual prevention.
Tier 4: Custom fabrication ($150 to $400+ per window)
Custom bars are welded to your exact window dimensions by a local metalworker or security company. You get a perfect fit and the option for decorative designs. Quality varies dramatically depending on the fabricator's skill and materials. Lead times run two to six weeks, and there are no returns on custom work. Expected lifespan depends entirely on material and finish quality.
What you get: An exact fit with no compromise on sizing. But you pay three to five times more per window than professional-grade adjustable bars, and the security performance is only as good as the specific fabricator's work.
Step 1: Calculate Your Total Project Scope
The first step in any window security bars budget planning process is counting exactly how many windows you need to protect and categorizing them by priority level. Grab a notepad and walk through your entire house, inside and out.
Count every window by floor and accessibility
Go room by room and write down every window. For each one, note:
- Location: Which room and which wall (e.g., "living room, north wall, left window").
- Floor level: Ground floor, basement, second floor, or accessible from a porch, deck, or flat roof.
- Window type: Double-hung, casement, slider, picture window, sliding glass door, basement hopper.
- Size category: Standard (under 36 inches wide), wide (36 to 60 inches), or extra-wide (over 60 inches, such as sliding glass doors).
- Room function: Bedroom (requires egress-compliant bars) or non-bedroom.
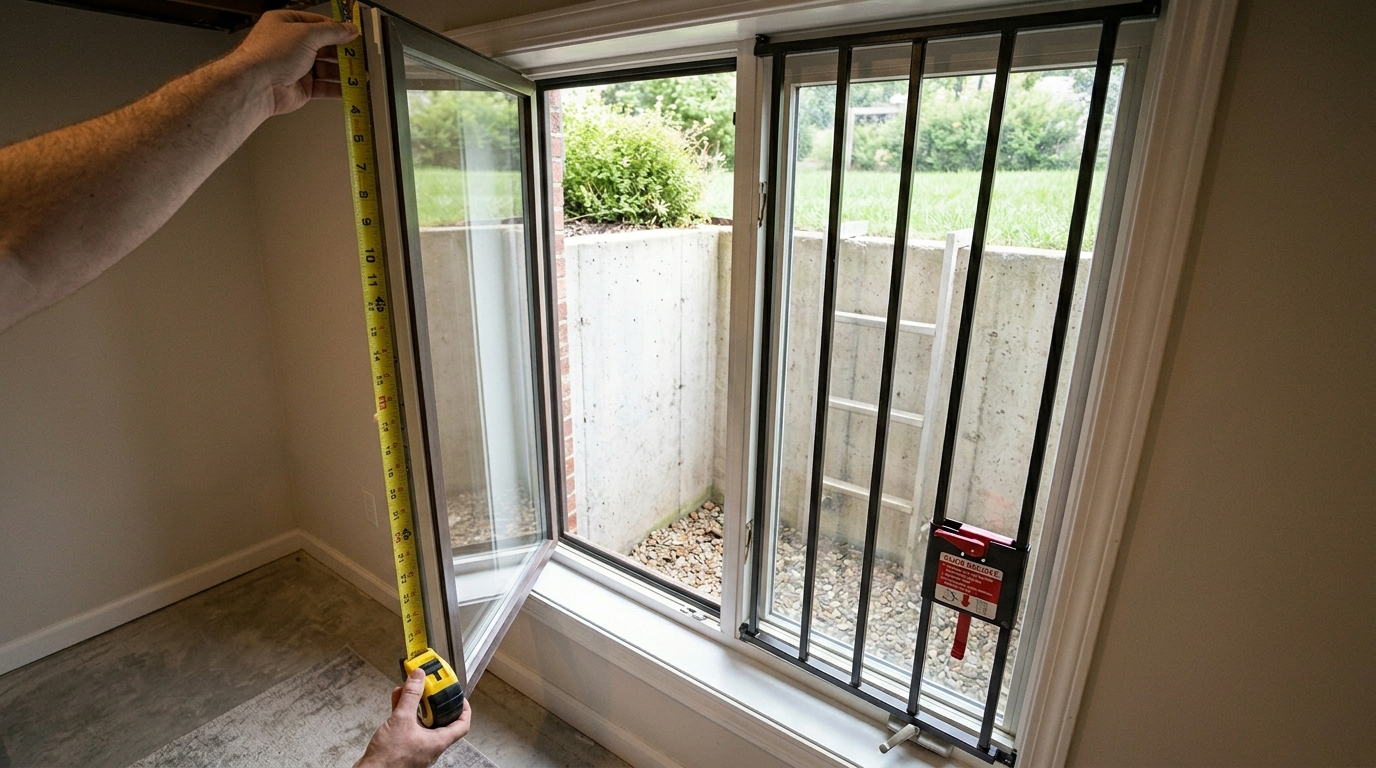
For accurate window dimensions, follow the process in our how to measure windows for security bars guide. You need real measurements to calculate costs accurately, not guesses.
A typical home's window count
Here is what we see in common US residential layouts:
- Small house or condo (1,000 to 1,400 sq ft): 6 to 10 ground-accessible windows
- Average single-family home (1,400 to 2,200 sq ft): 8 to 14 ground-accessible windows, often including 1 sliding glass door
- Larger home (2,200 to 3,000 sq ft): 12 to 20 ground-accessible windows, potentially 2 sliding glass doors
- Basement apartments or walkout basements: Add 3 to 6 basement-level windows
Critical note: You are counting ground-accessible windows, not every window in the house. Second-floor windows that cannot be reached without a tall ladder are low-priority targets. Focus your budget on every window a person could reach from ground level, a porch, a deck, a flat roof, or any adjacent structure.
Step 2: Prioritize Your Windows by Risk Level
When your budget cannot cover every window at once, you need a priority system. Not all windows carry the same break-in risk. Spending $90 on the right window first provides more security than spending $360 on four wrong windows.
Priority A: Protect these first (highest risk)
- Ground-floor windows facing backyards, alleys, or side yards. These are hidden from street view and neighbor sightlines. A burglar can work on these windows for minutes without being seen.
- Basement windows. Below-grade windows are the single most targeted residential entry point. They are low, hidden, and often have older, weaker glass.
- Windows near entry doors. Sidelight windows and windows adjacent to front or back doors are frequently broken to reach interior deadbolt thumb-turns.
- Windows accessible from porches, decks, or flat roofs. Any structure that brings an intruder to window height turns a second-floor window into a ground-floor vulnerability.
Priority B: Protect these second (moderate risk)
- Ground-floor windows facing the street. These are more visible to neighbors and passersby, which reduces their attractiveness to burglars but does not eliminate it. Nighttime break-ins or homes on quiet streets still face real risk.
- Sliding glass doors. Wide-span sliding doors are structurally weak against prying attacks but take more investment to cover (typically two to three modular bar units per door).
- Garage windows. Garages are targeted for tools, electronics, bicycles, and direct access to the house through the interior door.
Priority C: Protect these last (lower risk)
- Second-floor windows with no adjacent climbable structure. Windows that require a 12-foot-plus ladder to reach are rarely targeted by opportunistic burglars.
- Small transom or clerestory windows. Windows too small for a person to fit through are not entry points, though they can be broken for reach-in access to door locks.
- Interior-facing windows such as those opening into enclosed courtyards, sunrooms, or screened porches that already have secured exterior access points.
Bedroom egress overlay
Regardless of the priority level above, every bedroom window that you bar must use egress-compliant bars. This is a fire code requirement under IBC Section 1030 and NFPA 101, not a suggestion. If three of your Priority A windows happen to be bedrooms, those three need the Model A/EXIT ($92) instead of the standard Model A ($90). Build this $2-per-window premium into your budget from the start.
Step 3: Build Your Budget Around Real Numbers
Now that you know your window count and priority order, it is time to match those numbers to actual dollar amounts. Below are four budget scenarios based on common household situations. Find the one closest to yours and adjust from there.
Scenario 1: Tight budget ($200 to $400)
Strategy: Cover only Priority A windows with professional-grade bars. Skip budget bars entirely. Two to four SWB Model A units on your most vulnerable windows provide more real security than eight cheap bars spread across the house.
| Item | Qty | Unit Cost | Total |
|---|---|---|---|
| SWB Model A (non-bedroom Priority A windows) | 2-3 | $90 | $180-$270 |
| SWB Model A/EXIT (if any Priority A are bedrooms) | 0-1 | $92 | $0-$92 |
| DIY installation (your labor) | — | $0 | $0 |
Estimated total: $180 to $362. This covers two to four critical windows with genuine protection. Plan to add two more windows every month or two as your budget allows.
Scenario 2: Moderate budget ($500 to $800)
Strategy: Cover all Priority A windows and begin Priority B. This is the sweet spot for most single-family homes with six to eight ground-floor windows.
| Item | Qty | Unit Cost | Total |
|---|---|---|---|
| SWB Model A (non-bedroom windows) | 4-5 | $90 | $360-$450 |
| SWB Model A/EXIT (bedroom windows) | 2-3 | $92 | $184-$276 |
| DIY installation (your labor) | — | $0 | $0 |
Estimated total: $544 to $726. At this budget level you are covering six to eight windows, which is a complete ground-floor security envelope for most average-sized homes.
Scenario 3: Full-house budget ($800 to $1,500)
Strategy: Cover every ground-accessible window including sliding glass doors. At this level you may also want to factor in professional installation for speed and consistency.
| Item | Qty | Unit Cost | Total |
|---|---|---|---|
| SWB Model A (non-bedroom windows) | 6-8 | $90 | $540-$720 |
| SWB Model A/EXIT (bedroom windows) | 3 | $92 | $276 |
| SWB Model A modular stack (sliding glass door) | 2-3 | $90 | $180-$270 |
| Professional installation (optional) | 10-14 | $50-$75/window | $500-$1,050 |
Estimated total: $996 to $2,316 (depending on whether you DIY or hire out the installation). The product cost alone for a 12-window house with one sliding glass door runs approximately $1,176.
Scenario 4: Masonry home budget ($900 to $1,800)
Strategy: Brick and concrete homes need the SWB Model B for wall-mounted masonry installation. Professional installation with a hammer drill is strongly recommended for masonry work.
| Item | Qty | Unit Cost | Total |
|---|---|---|---|
| SWB Model B (masonry-mount windows) | 6-10 | $91 | $546-$910 |
| SWB Model A/EXIT (bedroom windows, frame mount) | 2-3 | $92 | $184-$276 |
| Professional masonry installation | 8-13 | $75-$100/window | $600-$1,300 |
Estimated total: $1,330 to $2,486. Masonry installations cost more due to specialized drilling equipment and anchor hardware. However, the result is a permanent mount that is stronger than the surrounding wall material itself.
Step 4: Use a Phased Approach When Cash Is Tight
You do not have to secure every window on the same day. In fact, a phased approach often produces better results than a one-shot budget blowout, because it prevents the temptation to buy cheap bars just to cover more windows at once.
Phase 1 (Month 1): Two to three Priority A windows — $180 to $270
Start with the two or three windows that represent your highest break-in risk. These are almost always the ground-floor windows hidden from street view: backyard windows, side-yard windows, and basement windows. Install professional-grade bars on these first. This single step eliminates your most exploitable vulnerability for under $300.
Phase 2 (Month 2 to 3): Remaining Priority A + bedroom egress — $180 to $368
Add bars to the remaining high-risk windows, including any bedroom windows that need egress-compliant units. At this point you should have complete coverage on every window that a burglar would realistically target first.
Phase 3 (Month 4 to 6): Priority B windows and sliding doors — $270 to $540
Expand coverage to street-facing ground-floor windows, the sliding glass door, and garage windows. By the end of Phase 3, every ground-accessible opening in your home has professional-grade protection.
Phase 4 (optional): Priority C and cosmetic upgrades — varies
If your budget allows, add bars to any remaining second-floor windows accessible from adjacent structures, upgrade to custom color powder coats to match your home's trim, or replace any interim budget bars you may have installed temporarily.
The math behind phasing: Spreading a $726 project across three months means roughly $242 per month. That is less than a typical alarm monitoring contract ($25 to $60 per month) would cost over four months, and the bars are a permanent one-time purchase rather than a recurring subscription.
Step 5: Understand Cost vs. Value — Why Cheap Bars Are More Expensive
This is the section that saves you the most money in the long run. Budget bars look like a bargain on the checkout screen, but the total cost of ownership tells a different story.
The replacement cycle trap
A $25 budget bar from Amazon lasts three to five years before rust, peeling paint, and weakened steel make it functionally useless. Over a 20-year period, you will buy and install that bar four to six times. Here is the real math:
- Budget bar (20-year cost): $25 x 5 replacements = $125 per window, plus the time and effort of five separate installations, plus five sets of new screw holes in your window frame
- Professional-grade bar (20-year cost): $90 x 1 purchase = $90 per window, one installation, one set of mounting holes
The professional-grade bar costs $35 less over 20 years and requires one-fifth the labor. That is not a rounding error. That is the difference between a $125 product that was never really protecting anything and a $90 product that delivers two decades of genuine security.
The security gap problem
Every time a budget bar fails and needs replacement, there is a gap period where you have no bar on that window. Maybe it is a week while you wait for the Amazon order. Maybe it is a month because you keep putting off the reinstall. During that gap, the window is completely unprotected. Professional-grade bars eliminate this problem because they do not fail within any reasonable time horizon.
The insurance angle
Some homeowner's insurance policies offer premium discounts for physical security upgrades including window bars. The discount varies by carrier and policy, but reductions of 5 to 15 percent on the burglary/theft portion of your premium are not uncommon. If your annual premium includes $400 in theft coverage and you receive a 10 percent reduction, that is $40 per year back in your pocket. Over 10 years, the insurance savings alone can pay for two or three bars.
Contact your insurance agent before you install bars and ask specifically about premium discounts for physical security improvements. Get the answer in writing so you have documentation for your renewal.
The ROI calculation every homeowner should run
The average property loss from a residential burglary in the United States runs approximately $2,800 in combined stolen property and damage. A complete set of professional-grade window bars for an eight-window home costs approximately $726. One prevented break-in pays for the entire installation nearly four times over. Factor in insurance deductibles, the cost of replacing locks and damaged frames after a break-in, the emotional toll on your family, and the time lost dealing with police reports and insurance claims, and the true ROI is dramatically higher.
For a deeper dive into per-window pricing and installation labor costs across the US market, see our window security bars cost and pricing guide.
Step 6: Account for Hidden Costs Most People Miss
The sticker price on the bar itself is not your only expense. A realistic budget accounts for these commonly overlooked line items.
Installation hardware
Professional-grade bars like the SWB Model A ship with anti-tamper mounting hardware included. Budget bars often ship with generic screws, and you need to buy tamper-resistant fasteners separately ($5 to $15 per set). If you are mounting into masonry, you may need expansion anchors ($2 to $5 each) and a masonry drill bit ($8 to $20 depending on diameter).
Tools you might not own
For standard frame-mount DIY installation, you need a drill, a level, and a tape measure. Most homeowners already have these. For masonry installation (Model B), you need a rotary hammer drill ($80 to $200 to buy, $30 to $60 per day to rent). If you are hiring a professional, tool costs are included in their labor rate.
Professional installation labor
If you choose professional installation, expect $50 to $100 per window for frame-mount work and $75 to $150 per window for masonry-mount work. Some installers offer bulk discounts for projects over eight windows. Always get at least two quotes and verify the installer carries liability insurance.
Egress bar premium
Every bedroom window needs an egress-compliant bar. The SWB Model A/EXIT costs $92 versus $90 for the standard Model A. That $2 difference is trivial, but if you are budgeting for three bedrooms, it is $6 more on your total. On a tight budget, even small amounts matter, so include them in your spreadsheet.
Touch-up paint or sealant
After drilling mounting holes, it is good practice to apply a dab of exterior sealant or touch-up paint around each screw head to prevent moisture infiltration. A tube of exterior silicone sealant costs $5 to $10. Color-matched touch-up paint from the bar manufacturer is usually free or under $10.
Permit and HOA considerations
Most residential window bar installations do not require a building permit. However, some municipalities require permits for exterior-mounted bars, and many homeowner associations have architectural review requirements that may involve an application fee ($25 to $100). Check your local codes and HOA covenants before you start. The last thing you want is to install bars and then be ordered to remove them.
Common Budget Planning Mistakes to Avoid
We see these errors regularly from homeowners planning their first window security project. Each one wastes money or leaves gaps in protection.
- Buying the cheapest bars to cover more windows. This is the number one mistake. Eight budget bars that flex under hand pressure provide less real security than three professional-grade bars on your highest-risk windows. Never sacrifice quality for quantity. Start with fewer better bars and add more over time.
- Ignoring bedroom egress requirements. Installing fixed, non-removable bars on bedroom windows to save the $2 difference between a standard bar and an egress model is a dangerous and illegal shortcut. Every bedroom window must have bars that release from the inside without tools. No exceptions.
- Forgetting the sliding glass door. Homeowners budget for windows and completely overlook the sliding glass door, which is often the weakest entry point in the entire house. A sliding door requires two to three modular bar units, so budget $180 to $270 for this single opening.
- Not measuring before budgeting. If you do not know your exact window dimensions, you cannot confirm that a standard telescopic bar will fit every opening. Some windows may need multiple modular units or a masonry-mount solution. Measure first, budget second. Our window measurement guide takes about 30 minutes for a typical house.
- Comparing only product price without considering lifespan. A $40 bar that lasts five years and a $90 bar that lasts 25 years are not competing at the same price point. The $90 bar costs $3.60 per year. The $40 bar costs $8 per year. Always calculate cost per year of service, not just the sticker price.
- Skipping the insurance call. A five-minute phone call to your insurance agent might reveal a premium discount that effectively pays for one or two bars per year. If you never make the call, you never get the savings.
DIY Installation vs. Professional: What Makes Financial Sense
Installation labor is the largest variable in your total project cost. Here is a straightforward framework for deciding when DIY makes sense and when professional installation is worth the money.
DIY makes sense when:
- You are installing frame-mount bars (Model A or Model A/EXIT) on wood, vinyl, or aluminum window frames
- You own a drill, a level, and a tape measure
- All windows are on the ground floor and easily accessible
- You are comfortable following step-by-step instructions
- Your project involves fewer than 10 windows
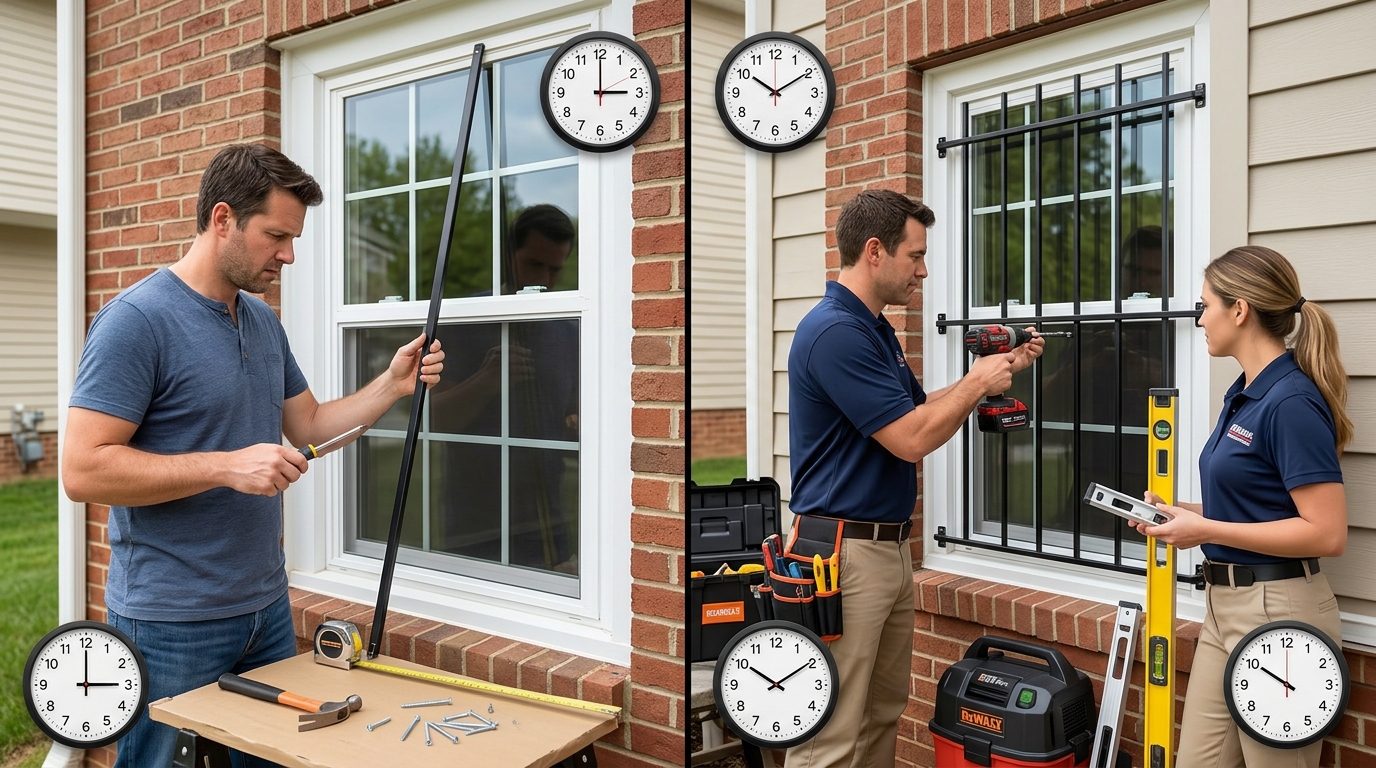
Time estimate: 15 to 20 minutes per window for frame-mount installation. A six-window project takes about two hours including setup and cleanup.
Cost savings: For a six-window project, DIY saves $300 to $600 in labor costs compared to hiring a professional. That savings could fund one or two additional bars.
Hiring a professional makes sense when:
- You are mounting into brick, concrete, or masonry (Model B), which requires a rotary hammer drill and masonry anchors
- You have second-story windows that require ladder work
- You are doing a large-scale project (10+ windows) and want consistent, fast results
- Your landlord or HOA requires documentation of licensed contractor work
- You are not comfortable using power tools or working at height
How to budget for professional labor: Get written quotes from at least two local installers. Specify the number of windows, the mount type (frame vs. masonry), and the product you are supplying. Most installers charge $50 to $100 per window for frame mount and $75 to $150 per window for masonry mount. Some offer package discounts for eight or more windows.
Pro tip: Buying the bars yourself and supplying them to the installer is almost always cheaper than having the installer supply the product. Installers mark up hardware by 20 to 50 percent. Purchase your SWB bars directly, then pay the installer for labor only.
How SWB Products Compare on Long-Term Value
To make your budget planning concrete, here is a side-by-side comparison of cost-per-year across the most common product tiers. This is the number that actually determines which option is the best value for your money.
| Product | Price | Lifespan | Cost Per Year | Replacements Over 25 Years | 25-Year Total Cost |
|---|---|---|---|---|---|
| Amazon generic | $25 | 3-5 years | $6.25-$8.33 | 5-8 | $125-$200 |
| Home Depot mid-range | $60 | 10-15 years | $4.00-$6.00 | 2-3 | $120-$180 |
| SWB Model A | $90 | 25+ years | $3.60 | 1 | $90 |
| SWB Model B | $91 | 25+ years | $3.64 | 1 | $91 |
| SWB Model A/EXIT | $92 | 25+ years | $3.68 | 1 | $92 |
| Local custom weld | $250 | 15-25 years | $10.00-$16.67 | 1-2 | $250-$500 |
The conclusion is unambiguous: professional-grade SWB bars are the cheapest option over any time horizon longer than five years. The higher sticker price is offset by a lifespan that is five to eight times longer than budget alternatives and two to three times longer than mid-range options. When you add the security gap risk that comes with frequent replacements, the value gap widens even further.
For a complete product-by-product feature comparison including SWB versus Grisham, Mr. Goodbar, and generic brands, see our best window security bars for homes in 2026 guide.
Your Budget Planning Worksheet
Use this template to build your own project budget. Fill in each row with your actual window count and the product you plan to use for each group.
Product costs
| Window Group | Product | Qty | Unit Price | Subtotal |
|---|---|---|---|---|
| Priority A — non-bedroom | Model A | ___ | $90 | $___ |
| Priority A — bedroom | Model A/EXIT | ___ | $92 | $___ |
| Priority B — standard | Model A | ___ | $90 | $___ |
| Priority B — masonry | Model B | ___ | $91 | $___ |
| Sliding glass door | Model A (x2-3 modular) | ___ | $90 each | $___ |
Installation costs
| Line Item | Estimate |
|---|---|
| DIY tools you need to buy (if any) | $___ |
| Professional labor (if hiring out) | $___ |
| Masonry drill rental (if needed) | $___ |
| Sealant and touch-up paint | $___ |
| Permit or HOA application (if required) | $___ |
Total project cost
Product subtotal + Installation subtotal = Your total project budget.
Once you have this number, divide it by the number of months you want to spread the project across. That gives you your monthly investment amount. If the monthly number feels too high, extend the timeline by one or two months. The important thing is that you start with the Priority A windows and work outward from there.
Free and Low-Cost Security Upgrades to Pair With Window Bars
While you are phasing in your window bar installations, there are several things you can do right now that cost little or nothing and meaningfully improve your home's security posture.
- Lock every window every time ($0). It sounds obvious, but a significant percentage of residential burglaries involve entry through unlocked windows and doors. Make locking windows part of your daily routine.
- Trim bushes and hedges below windows ($0 to $30). Dense landscaping near windows gives burglars concealment. Trim bushes to below window-sill height so the windows are visible from the street and neighboring properties.
- Add motion-activated lights ($15 to $40 per light). A sudden bright light surprises intruders and alerts neighbors. Solar-powered motion lights require no wiring and install in minutes.
- Use window security film ($30 to $80 per window). Clear safety film holds broken glass together, adding a delay layer even before the bars go up. Film and bars together create a layered defense that is harder to defeat than either one alone.
- Display security signage ($5 to $15). Even a simple "Protected by Security System" sign or window sticker introduces doubt in a burglar's mind. Pair it with visible window bars for maximum deterrent effect.
- Install a peephole or video doorbell ($20 to $100). Many break-ins begin with a knock on the front door to confirm nobody is home. A peephole or video doorbell lets you see who is there without opening the door.
These low-cost measures complement your window bars and provide immediate protection during the weeks or months it may take to complete your phased installation plan.
Frequently Asked Questions About Window Security Bars Budget Planning
How much should I budget for window security bars for my entire house?
For a typical single-family home with 8 to 10 ground-floor windows and one sliding glass door, budget $726 to $1,000 for professional-grade bars with DIY installation. This breaks down to approximately $90 per standard window (SWB Model A), $92 per bedroom window (Model A/EXIT for egress compliance), and $180 to $270 for the sliding glass door (two to three modular units). Add $400 to $800 if you plan to hire a professional installer. The total project cost with professional installation typically falls between $1,126 and $1,800 for an average-sized home.
Are cheap window security bars worth buying to save money?
No. Budget window security bars in the $15 to $40 range are made from thin-gauge aluminum or light steel that can be bent with a standard crowbar. They use removable Phillips-head screws and have a painted finish that peels and rusts within three to five years. Over a 25-year period, replacing a $25 budget bar five to eight times costs $125 to $200 per window, while a $90 professional-grade bar bought once costs $90 total with no replacements. Budget bars provide visual deterrence only and are more expensive in the long run than buying quality bars once.
Which windows should I secure first if I cannot afford to do them all at once?
Start with ground-floor windows that are hidden from street view, such as backyard windows, side-yard windows, and basement windows. These are the highest-risk entry points because burglars can work on them without being seen by neighbors or passersby. Next, secure any windows adjacent to entry doors, as these are commonly broken to reach interior deadbolts. Then move to street-facing ground-floor windows, sliding glass doors, and garage windows. Always use egress-compliant bars on bedroom windows regardless of their priority level.
Can I install window security bars myself to save on labor costs?
Yes. Frame-mount telescopic bars like the SWB Model A are designed for DIY installation and take approximately 15 to 20 minutes per window using a drill, level, and tape measure. DIY installation saves $50 to $100 per window in professional labor fees. For a six-window project, that means $300 to $600 in savings that you can put toward additional bars. Professional installation is recommended for masonry mounts (Model B), second-story windows requiring ladder work, and projects exceeding 10 windows where speed and consistency matter.
Do window security bars increase or decrease home value?
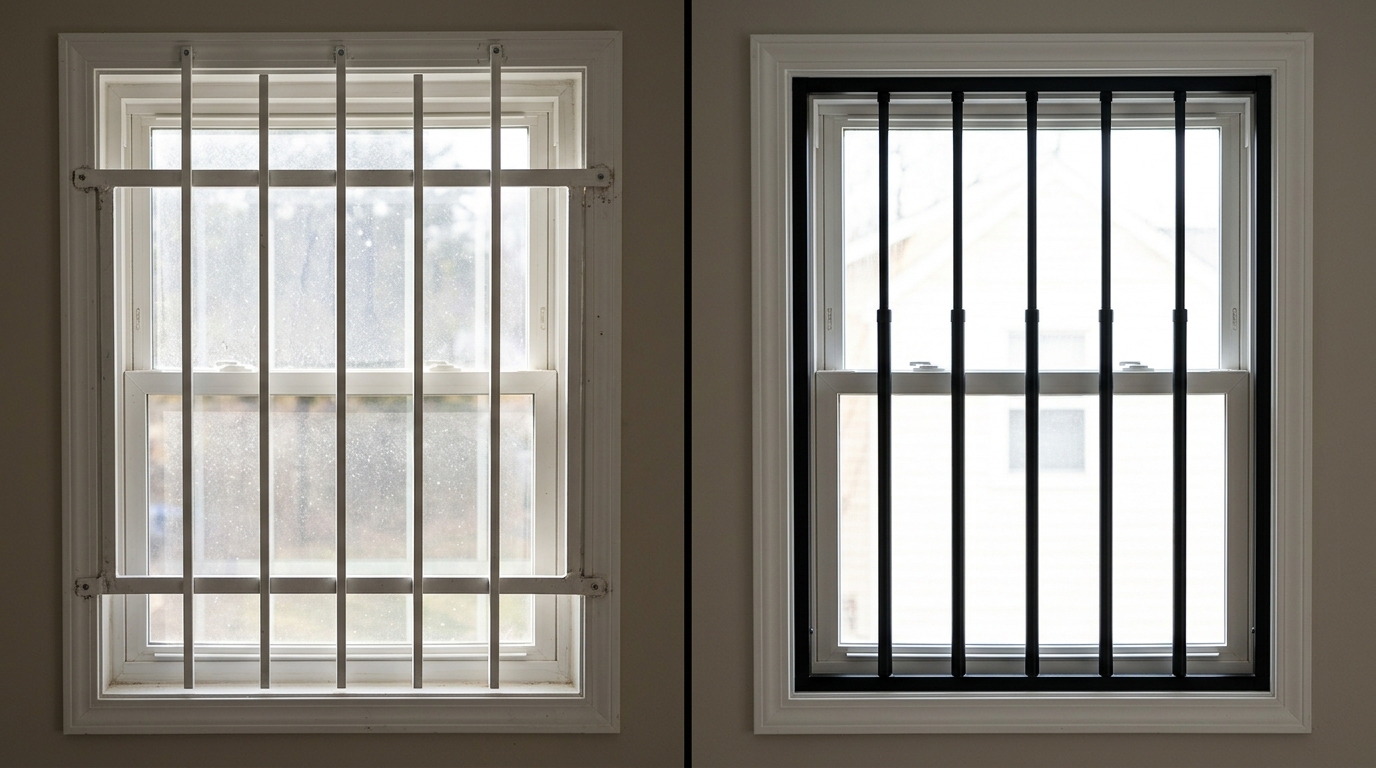
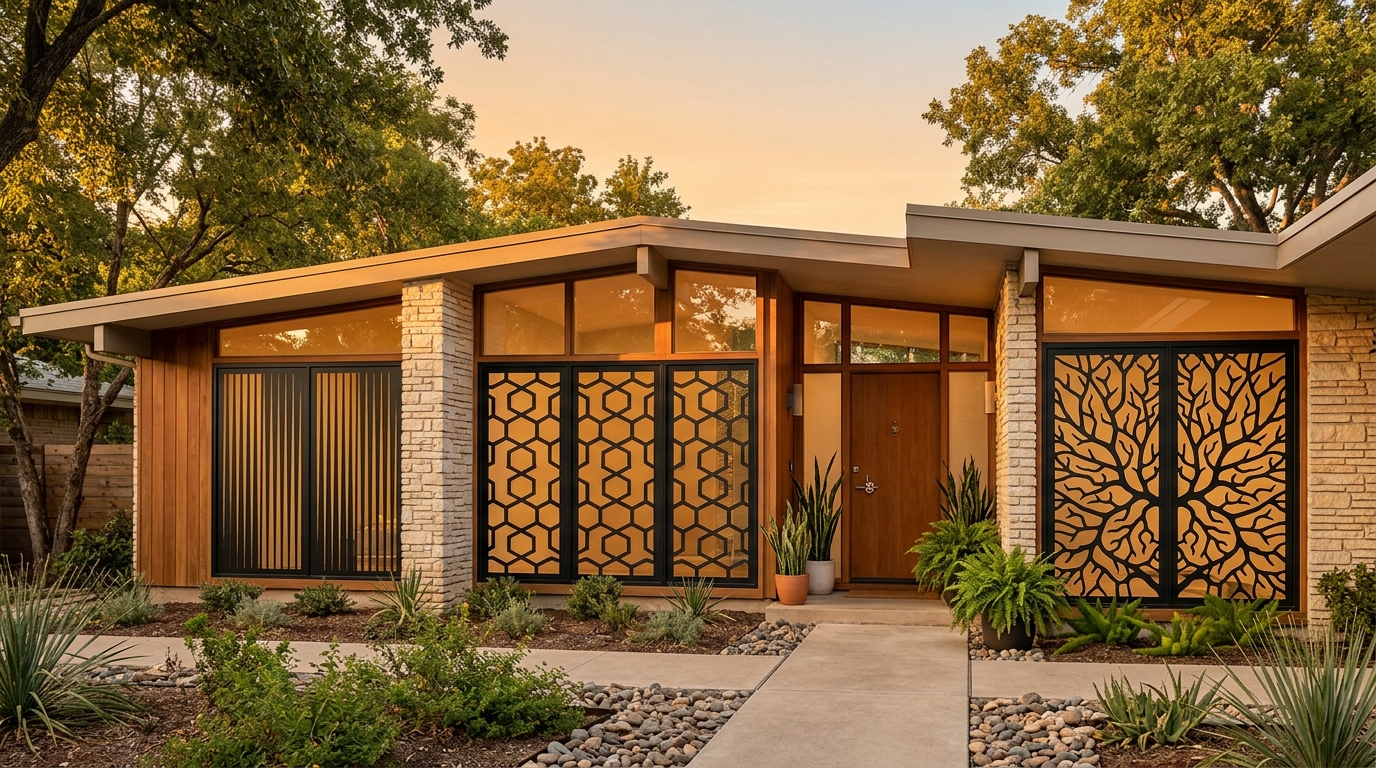
The impact depends on the product quality, the neighborhood, and the local market. Modern, well-installed professional-grade bars with clean aesthetics and powder-coat finishes are generally viewed as a security upgrade that adds value, particularly in neighborhoods where break-ins are a known concern. Budget bars with peeling paint and a prison-cell appearance can reduce curb appeal and perceived value. Additionally, some homeowner's insurance policies offer premium discounts of 5 to 15 percent for physical security improvements, which adds ongoing financial value beyond any effect on sale price.
Wrapping Up: Your Window Security Bars Budget Action Plan
Effective window security bars budget planning is not about spending the most money. It is about spending your money in the right order, on the right products, starting with the windows that pose the greatest risk to your home and family.
Here is your action plan in six steps:
- Count and categorize every ground-accessible window in your home by location, size, and room function.
- Measure every window using the measurement guide to confirm product compatibility and accurate sizing.
- Prioritize windows into A, B, and C tiers based on visibility, accessibility, and break-in risk.
- Build your budget using the worksheet in this guide, starting with Priority A windows and professional-grade bars.
- Phase your spending across two to six months if your budget does not allow a single-purchase installation.
- Start today. Two bars on your two most vulnerable windows, installed this weekend, provide more real security than a perfect 12-window plan that never gets executed.
The cost of a complete window security upgrade for an average home is less than a single month of data from some alarm monitoring contracts, and unlike a subscription, window bars are a permanent, one-time investment that protects your home for decades. Stop paying monthly fees for a system that records break-ins after they happen, and invest in the physical barrier that prevents them entirely.
For a complete comparison of every window bar product on the market, including detailed specs, pricing, and fire code compliance information, read our best window security bars for homes in 2026 buyer's guide.