How Much Does Window Bar Installation Cost? A Complete 2026 Price Guide
Discover how much window bar installation costs in the USA — materials, labor by region, telescopic vs. welded bars, and DIY savings tips from SWB experts.
From our experience protecting thousands of homes across the USA, SWB analyzes the best strategies so you can sleep soundly — starting with the question every homeowner and renter eventually asks: how much does window bar installation cost? The answer depends on several key factors: the type of bars you choose, whether you hire a professional or go the DIY route, your geographic location, and the number of windows you need to secure. According to the FBI's Uniform Crime Report, there are approximately 6.7 million residential burglaries in the United States every year, and 60% of break-ins occur through ground-floor windows and doors. That statistic alone explains why millions of Americans are pricing out window security bars right now. In this comprehensive 2026 cost guide, we break down every expense category — from raw material costs and regional labor rates to the real savings potential of telescopic, no-drill window bars — so you can make the smartest, most budget-conscious decision for your home or rental property.
If you are separating material costs from installation labor, standard pre-fabricated steel window bars typically range from $50 to $350 per unit at the materia…
Average Window Bar Installation Cost in the USA: The Full Price Range
Understanding the national cost landscape is the first step before budgeting for your home's security upgrade. Across the United States, the total cost of window bar installation — including both materials and professional labor — typically ranges from $150 to $1,800 per window, depending on the type of bars installed, the complexity of the job, and your region. When you factor in a full home with five to eight ground-floor windows, a professional installation project can easily reach $3,000 to $8,000 or more in cities like Los Angeles, Chicago, or New York City. The wide range exists because window security bars are not a one-size-fits-all product. A basic telescopic no-drill bar for a standard 22-to-36-inch apartment window sits at the very low end of the cost spectrum. Custom-welded ornamental iron bars for a Victorian-style home in Atlanta or Philadelphia sit at the very high end. Most homeowners in mid-sized American cities — think Houston, Phoenix, Memphis, or Detroit — report spending between $400 and $900 per window when hiring a licensed contractor for permanent steel bar installation. That figure includes materials, labor, and any necessary hardware. The good news: there is a dramatically more affordable alternative that does not sacrifice protection, which we will cover in depth throughout this guide.
Material Costs Alone: What Window Bars Cost Before Labor
If you are separating material costs from installation labor, standard pre-fabricated steel window bars typically range from $50 to $350 per unit at the materials level, depending on gauge, finish, and style. Basic fixed-bar kits from big-box home improvement stores like Home Depot or Lowe's start around $50 to $80 for simple configurations. Mid-grade powder-coated steel bars with a decorative finish run $100 to $200 per window. Premium custom-fabricated wrought iron or tubular steel bars — ordered from a local fabricator or specialty security company — can cost $200 to $350 per window in material costs alone, before a single bolt is set. Telescopic adjustable bars, like those manufactured by Security Window Bars, fall in the $90 to $92 range per unit while delivering the same steel-gauge strength as permanently welded alternatives. This makes them one of the highest-value options available in the American market today.
Labor Costs: What Contractors Charge for Window Bar Installation
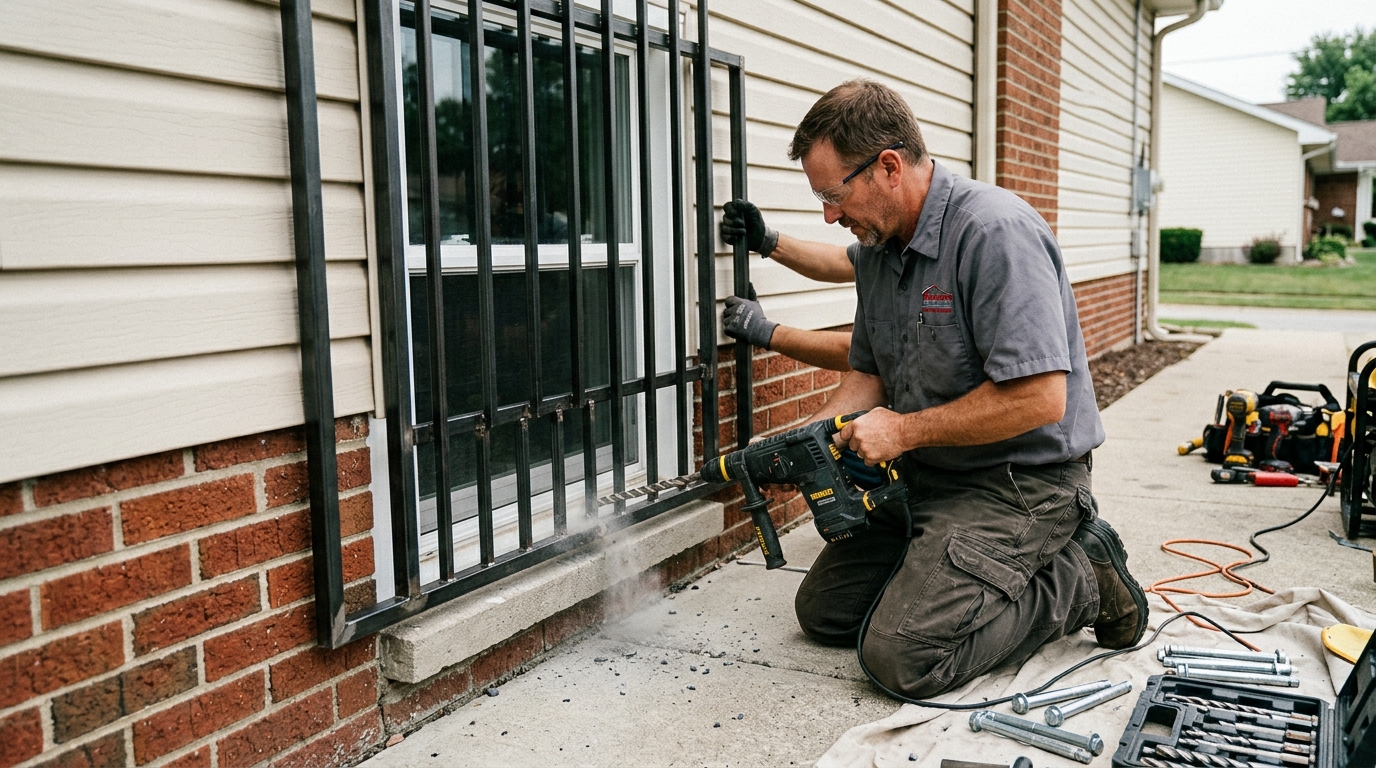
Professional labor is typically the largest single cost factor in window bar installation. Licensed contractors and security installation specialists in the United States charge between $75 and $200 per hour depending on the region, the complexity of the work, and whether wall anchoring or concrete drilling is required. For a single window installation, labor alone often runs $150 to $400. For a full-home project covering six to eight windows, labor costs alone can total $900 to $2,400. Some contractors charge a flat per-window rate rather than hourly — typically $200 to $500 per window installed, all-in. In high-cost-of-living metro areas such as San Francisco, New York City, and Boston, those rates skew considerably higher, sometimes reaching $600 to $800 per window for a professional permanent installation. Always request a written itemized quote from at least three licensed contractors in your area before committing to a project of this scale.
Additional Costs That Most Homeowners Overlook
Beyond the base material and labor costs, several additional line items can push the total price of window bar installation significantly higher. First, concrete or masonry drilling fees: if your home has brick, stucco, or poured concrete walls around the window frame, contractors typically add $50 to $150 per window for the specialized drilling and anchoring required. Second, permit fees: in many US municipalities, including Chicago, Los Angeles, and Houston, installing permanent security bars may require a building permit, which adds $50 to $200 to the project cost. Third, egress compliance modifications: if your bedroom windows require an emergency quick-release mechanism to comply with NFPA 101 Life Safety Code or the International Building Code, this can add $75 to $200 per window to the installation quote. Finally, removal and disposal of existing bars or grilles — common in older homes in Detroit and Philadelphia — can add another $100 to $300 to the total bill.
Window Bar Installation Cost by US Region: How Location Changes Your Price
One of the most significant variables in how much window bar installation costs is simply where you live in the United States. Labor rates, permit requirements, and contractor availability all fluctuate dramatically by region. Understanding these geographic cost differences can help you set a realistic budget before you even pick up the phone to call a contractor. Generally speaking, the Northeast and West Coast have the highest installation costs, while the Southeast and Midwest offer more competitive pricing. Below we break down what homeowners in different US regions typically report paying for professional window bar installation as of 2026.
Northeast (New York, Boston, Philadelphia, Baltimore)
The Northeast is consistently the most expensive region for window bar installation in the United States. In New York City, where Local Law 57 requires window guards in apartment buildings with children under 10 years of age, the compliance market has created a dense but expensive contractor ecosystem. Homeowners and landlords in NYC report paying $400 to $900 per window for professional installation of fixed steel bars, with full-apartment projects often totaling $2,500 to $6,000. In Philadelphia and Baltimore — two cities with persistently high residential burglary rates — mid-range professional quotes run $350 to $750 per window. Boston homeowners report similar figures, typically between $375 and $800 per window. The combination of high labor rates, unionized trades, and strict permitting in these cities makes DIY or renter-friendly telescopic bars a significantly more attractive financial option.
Southeast and Midwest (Atlanta, Chicago, Detroit, Memphis, Houston)
The Southeast and Midwest offer somewhat more competitive pricing for window bar installation, though costs in major urban centers remain substantial. In Chicago — a city with high residential property crime rates according to the Chicago Police Department's annual crime report — homeowners typically pay $250 to $600 per window for professional fixed-bar installation, with full-home projects averaging $1,800 to $4,500. In Atlanta, Memphis, and Detroit, prices are generally lower: expect $200 to $500 per window, with full projects running $1,200 to $3,500. Houston, due to its sprawling geography and competitive contractor market in Texas, tends to land in the $200 to $450 per window range. These mid-range cities represent the largest addressable market for DIY telescopic window bars, where the savings potential versus professional installation is most dramatic.
West Coast (Los Angeles, San Francisco, Seattle, Phoenix)
The West Coast, particularly California, rivals the Northeast for the highest window bar installation costs in the country. In Los Angeles — where the LAPD reports tens of thousands of residential burglaries annually — professional installation quotes for steel window bars typically range from $350 to $750 per window, with multi-window projects averaging $2,000 to $5,500. San Francisco and the Bay Area are even pricier, where contractor rates regularly push individual window installations to $500 to $900. Seattle falls in the $300 to $650 per window range. Phoenix, Arizona, benefits from a more competitive labor market and typically sees prices of $200 to $450 per window for professional steel bar installation. In all West Coast markets, the cost savings from choosing no-drill telescopic bars like SWB's Model A are immediately compelling.
Telescopic Window Bars vs. Welded Steel Bars: A Cost Comparison That Matters
When researching how much window bar installation costs, many homeowners do not initially realize there are two fundamentally different product categories — and that the choice between them dramatically changes both the upfront and long-term cost picture. The two main categories are: (1) permanently welded or fixed steel bars that require professional installation, wall anchoring, and in many cases, permits; and (2) telescopic adjustable window bars that expand to fit the window frame without drilling, which can be installed by any adult with a basic understanding of a tape measure. Security Window Bars specializes in the second category, and the cost difference is not trivial. For a full comparison, reviewing our complete window bars installation guide at https://www.securitywb.com/installation/ will give you detailed step-by-step context for both approaches.
Total Cost of Professionally Installed Welded Bars: The Real Number
When you hire a contractor to install permanent welded or fixed-mount steel window bars, the all-in cost almost never stays below $400 per window once you account for materials, labor, hardware, potential permits, and drilling surcharges. For five windows — a realistic count for a standard American ranch house or ground-floor apartment — the total professional installation bill typically falls between $2,000 and $4,500. For a larger home with eight to ten windows requiring security treatment, that figure can easily exceed $6,000 to $9,000 in high-cost cities like Los Angeles or New York. And that price does not include the cost of removal if you ever move, sell the property, or need to modify the configuration. Removal of welded bars typically costs another $100 to $300 per window in contractor fees. This permanence is also a major issue for renters, as most lease agreements prohibit permanent structural modifications to walls and window frames.
Total Cost of SWB Telescopic Window Bars: The DIY Savings Math
Here is where the cost equation flips entirely. Security Window Bars' Model A Telescopic Window Bars are priced at $90 per unit. The Model B Wall-Mount bars run $91, and the Model A/EXIT egress-compliant bars — which include a patented quick-release mechanism for fire safety compliance — are $92 per unit. For the same five-window project that would cost a Chicago homeowner $2,500 to $4,500 with a professional contractor, five Model A telescopic bars total $450 — plus zero labor cost if you install them yourself. Installation requires no drilling on most window frames, takes 15 to 20 minutes per window, and requires no permit in most US municipalities because no structural modification is made. The savings over professional installation range from $2,000 to $8,000 on a typical whole-home project. You can browse all three models and purchase directly through Amazon USA for fast nationwide shipping at /buy-now/.
Steel Strength Comparison: Are Telescopic Bars as Secure as Welded Bars?
A common question among homeowners evaluating the cost difference is whether telescopic bars provide the same level of physical security as permanently welded steel bars. The honest answer: yes, when properly installed. SWB's telescopic bars are constructed from heavy-gauge steel — the same material standard as welded security bar systems — and when correctly expanded and tensioned against a window frame, they resist the same lateral and prying forces that a fixed-mount bar resists. The key distinction is installation integrity: the telescopic system relies on precise fit and proper tensioning rather than wall anchors. When installed correctly following the step-by-step guidance at https://www.securitywb.com/installation/, SWB bars provide a formidable deterrent that the vast majority of opportunistic burglars — who rely on quick, low-resistance entry — will not attempt to defeat. Independent physical security consultants note that deterrence, not absolute barrier strength, is what prevents 85% of residential break-ins.
How to Save Money on Window Bar Installation Without Sacrificing Security
For the majority of American homeowners and renters, the goal is not simply to install window bars — it is to install effective window bars at a price point that makes financial sense for their household budget. The good news is that the options for saving money on window bar installation have never been more accessible. From choosing telescopic bars that eliminate labor costs entirely, to strategic window prioritization and bulk purchasing, there are several proven approaches that can reduce your total security investment by 60% to 80% compared to a full professional installation project.
Prioritize Your Highest-Risk Windows First
One of the most effective cost-control strategies for window bar installation is to prioritize security coverage based on actual risk, rather than trying to secure every window simultaneously. According to security research published by the University of North Carolina at Charlotte's Department of Criminal Justice, the majority of residential burglars prioritize ground-floor entry points that offer concealment and quick access. This means that securing your ground-floor windows — particularly those facing alleys, side yards, or areas with reduced street visibility — delivers the greatest security return per dollar spent. For a renter in a first-floor apartment in Memphis or Chicago, securing two to three key ground-floor windows with SWB Model A bars at $90 each represents a $180 to $270 investment that dramatically raises the barrier to entry. You can always expand coverage window by window as your budget allows. This phased approach is simply not possible with a professional contractor's all-or-nothing quote.
Choose No-Drill Telescopic Bars to Eliminate Labor Costs Entirely
The single largest cost-saving lever available to American homeowners and renters today is eliminating professional labor costs by choosing no-drill telescopic window bars. As detailed throughout this guide, professional labor accounts for anywhere from 40% to 65% of the total cost of a window bar installation project. When you choose SWB's Model A Telescopic Window Bars at $90 each, you retain 100% of that savings. A solo adult with no construction experience can install a single bar in 15 to 20 minutes following the instructions at https://www.securitywb.com/installation/. There are no tools required beyond a tape measure, no permits needed in most jurisdictions, and no damage to walls, window frames, or trim — a critical advantage for renters who cannot afford to lose their security deposit. For apartment renters across all 50 states, this is arguably the most important home security product decision they will make.
Get Multiple Contractor Quotes If You Do Need Professional Installation
If your situation genuinely requires professionally installed fixed bars — for example, for a commercial property, a ground-floor retail space, or a historic home where aesthetic requirements demand custom ornamental ironwork — then the discipline of getting multiple quotes is non-negotiable. Industry data consistently shows that contractor quotes for the same window bar installation project can vary by 30% to 50% within the same metro area. Request written itemized quotes from at least three licensed contractors, and specifically ask each one to break out: materials cost, labor cost, permit fees, and any drilling or specialty hardware surcharges. For homeowners considering permanent wall-mount bars, SWB's Model B at https://www.securitywb.com/model-b/ provides a cost-effective starting point for the materials component of a fixed-installation project, with heavy-gauge steel construction and a professional powder-coated black finish.
Egress Compliance Costs: What Building Codes Add to Your Budget
One of the most frequently overlooked cost factors in window bar installation projects across the United States is egress compliance. Both the International Building Code (IBC) and NFPA 101 — the Life Safety Code — require that window bars installed in sleeping areas include a quick-release or emergency egress mechanism that allows occupants to exit the building without a key during a fire or other emergency. OSHA also references these standards in commercial and multi-unit residential contexts. Failure to meet egress requirements is not just a code violation — it is a life safety issue that has resulted in tragic fire deaths in cities across America. Understanding the cost implications of egress compliance is essential for any homeowner or landlord planning a complete window bars installation project.
What Egress-Compliant Window Bars Cost from a Professional Contractor
When hiring a professional contractor to install egress-compliant window bars — bars with a quick-release mechanism that allows occupants to open the bars from the inside without a key — expect to pay a premium of $75 to $200 per window above the standard installation quote. This is because egress mechanisms involve additional hardware, more complex installation steps, and in some jurisdictions, a specific permit or inspection. For a home with four bedrooms requiring egress-compliant bars, this compliance premium adds $300 to $800 to the total project cost. In New York City, where the Department of Buildings enforces strict egress requirements for multi-family buildings, non-compliant window bars can result in fines of $250 to $1,000 per violation — making upfront compliance investment clearly the smarter financial choice.
How SWB's Model A/EXIT Delivers Egress Compliance at a Fraction of the Cost
Security Window Bars has directly addressed the egress compliance cost challenge with the Model A/EXIT — a patented egress-compliant telescopic window bar priced at just $92 per unit. This single product combines the adjustable telescopic design of the Model A with a built-in quick-release egress bar that meets IBC, NFPA 101, and IRC emergency egress requirements, including the minimum 20-inch by 24-inch clear opening standard for sleeping areas. For a homeowner or landlord who needs to bring four bedroom windows into egress compliance, four Model A/EXIT units total $368 — compared to the $1,200 to $3,200 that a professional contractor would typically charge for the equivalent egress-compliant fixed-bar installation in a city like Atlanta or Chicago. You can learn more about this model and its compliance certifications at https://www.securitywb.com/model-a-exit/.
Local Code Variations That Affect Installation Cost and Compliance
Building codes and local ordinances governing window bar installation vary significantly from city to city across the United States, and these variations have direct cost implications. New York City's Local Law 57, for example, mandates specific window guard types in apartment buildings with children under 10 — and landlords who fail to comply face significant fines. In California, Title 19 of the California Code of Regulations governs fire safety in residential buildings and requires egress provisions in sleeping areas. Chicago's Building Code, Chapter 13-160, includes provisions for window security devices that intersect with the city's fire code requirements. In Houston and Dallas, Texas follows the International Building Code with local amendments. The practical impact: homeowners and landlords in cities with stricter code enforcement may face higher compliance costs, while those in less regulated rural markets may have more flexibility. Always check with your local building department before beginning a window bars installation project.
Window Bars for Renters: How to Avoid Paying Professional Installation Costs
According to the US Census Bureau's 2023 American Community Survey, there are approximately 44.1 million apartment renters in the United States — and the vast majority of them face a common dilemma: they want the security of window bars, but their lease agreement prohibits permanent structural modifications to walls, frames, or the building's exterior. This prohibition effectively locks renters out of the professional installation market entirely, since virtually every professional window bar installation method involves drilling into wall studs, window frames, or masonry. The result is that tens of millions of American renters have historically gone without window security — not by choice, but by lease restriction. SWB's telescopic window bar system was specifically engineered to close this protection gap.
Why Renters Cannot Use Traditional Professional Installation Methods
Traditional professional window bar installation — whether welded, wall-mounted, or frame-anchored — invariably involves making permanent modifications to the rental unit. Drilling through drywall or stucco to reach wall studs, anchoring lag bolts into window frames, or welding bars to existing structural elements all constitute alterations that most standard lease agreements in the United States explicitly prohibit. Beyond the lease restriction, there is the practical issue of reversal: when a renter moves out, removing professionally installed bars requires another contractor visit at a cost of $100 to $300 per window, and may still result in damage claims from the landlord for wall patching and repainting. The cumulative financial exposure for a renter who installs professional fixed bars and then moves out within a year is easily $500 to $1,500 in removal costs, repairs, and potential security deposit deductions — on top of the original installation cost.
The Renter's Solution: No-Drill Telescopic Bars That Move With You
SWB's Model A Telescopic Window Bars at $90 per unit represent the only practical window security solution for most American renters — and they are significantly superior to the alternative of leaving windows unprotected. The telescopic mechanism expands to fit standard US window widths from 22 to 36 inches, applies firm inward pressure against the window frame without any adhesives, anchors, or drilling, and can be fully removed in under five minutes when moving day arrives. The bars go with you to the next apartment. This portability also makes them ideal for short-term rental situations — AirBnB hosts, for example, can install bars between guest stays and remove them as needed. For renters in high-crime urban neighborhoods across Chicago, Los Angeles, New York, Philadelphia, and Memphis, this is not a compromise solution — it is the optimal solution.
DIY Window Bar Installation Cost: What You Actually Need to Budget
Choosing to install window bars yourself rather than hiring a contractor is the single most powerful cost-reduction decision you can make in this entire purchasing process. But even DIY installation has a real cost structure that deserves careful budgeting. Below is a complete breakdown of what you should expect to spend when taking the DIY approach, whether you choose SWB's telescopic bars — which require essentially no additional tools or hardware — or opt for a more involved DIY project using fixed bars that you purchase and mount yourself.
DIY Cost Breakdown for SWB Telescopic Window Bars (No-Drill Approach)
For a standard five-window DIY security project using SWB Model A Telescopic Window Bars, here is the complete cost breakdown as of 2026. Five Model A bars at $90 each: $450 total. A tape measure (which you almost certainly already own): $0. Time investment: approximately 75 to 100 minutes for five windows, including measuring and adjusting each bar for a secure fit. Permit fees: $0 in virtually all US jurisdictions, since no structural modification is made. Contractor fees: $0. Total all-in cost: $450. Compare that to the $2,500 to $4,500 a professional contractor would charge for the same five-window project in a mid-tier US city, and the financial case for DIY telescopic installation is self-evident. If you need egress compliance in sleeping areas, simply substitute Model A/EXIT bars at $92 each — the total cost difference is just $10 for a five-window project.
DIY Cost Breakdown for Fixed-Mount Bars (Wall-Anchor Approach)
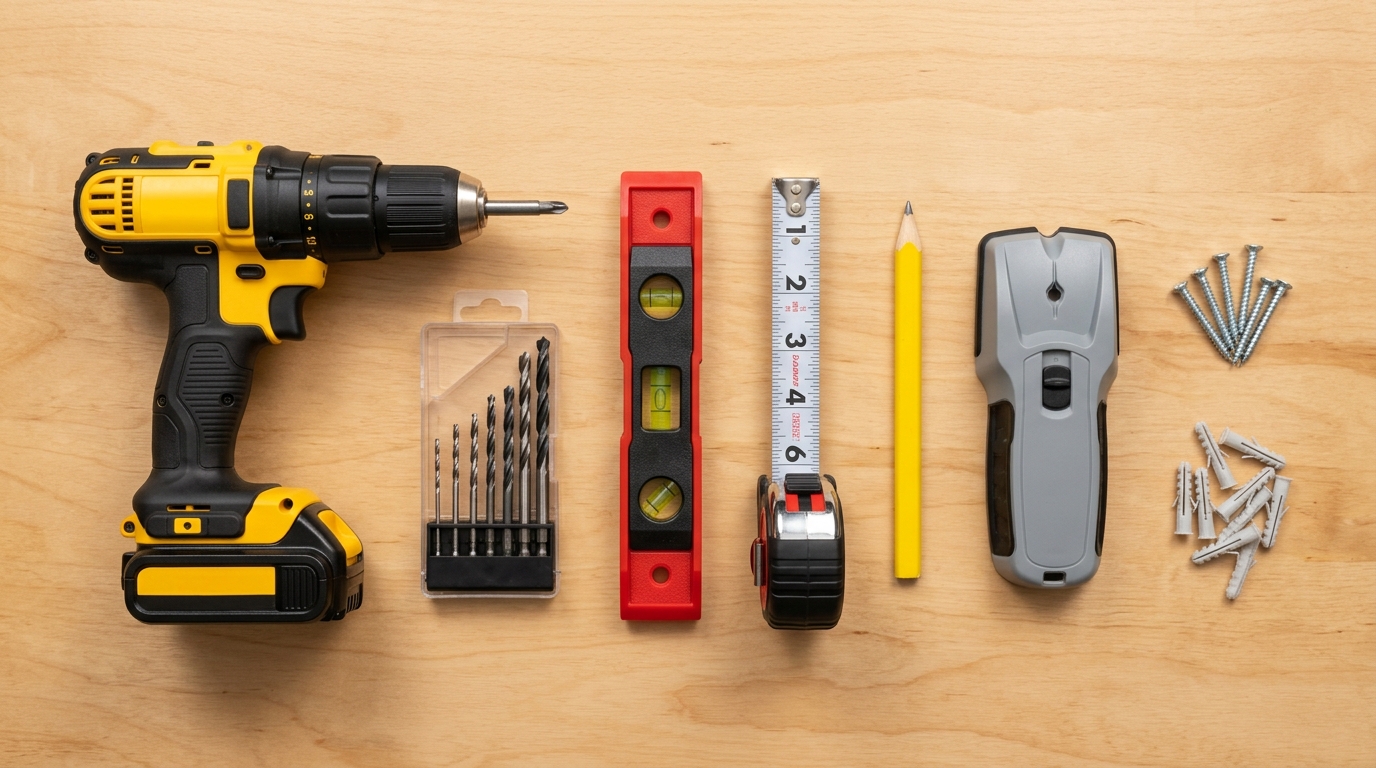
If you choose to DIY-install fixed wall-mount security bars rather than telescopic bars, the cost structure changes significantly. You will need: the bars themselves ($50 to $350 per window depending on brand and gauge), a power drill with masonry or wood drill bits ($40 to $120 if you do not already own one), lag bolts and anchors appropriate for your wall type ($15 to $40 per window), and potentially a level and stud finder ($25 to $50 one-time purchase). Total materials cost for a five-window DIY fixed-bar project: $350 to $2,100 depending on bar quality, plus $80 to $170 in tools if starting from scratch. This approach still saves you the professional labor cost of $900 to $2,400 for five windows, but it is considerably more complex, more time-consuming (2 to 4 hours per window for a novice), and may still require a permit in some jurisdictions. SWB's Model B Wall-Mount Bars at $91 each represent an excellent cost-efficient starting point for this approach — visit https://www.securitywb.com/model-b/ for full product specifications.
Hidden Savings of DIY: No Scheduling, No Waiting, No Disruption
Beyond the pure dollar savings, DIY window bar installation eliminates several non-financial costs that American homeowners frequently underestimate. First, scheduling: in high-demand urban markets like New York City, Los Angeles, and Chicago, experienced security contractors can be booked two to six weeks out during peak seasons — meaning your home is unprotected in the interim. Second, disruption: a professional installation on six to eight windows typically takes a full day and requires someone to be home throughout. Third, trust: inviting a contractor into your home, particularly in a ground-floor apartment in a dense urban area, involves its own security considerations. DIY installation with SWB bars eliminates all three friction points. Order through Amazon, receive within one to two business days via Amazon FBA, and install the same weekend. The entire project is done before a contractor could even return your call.
Is the Cost of Window Bar Installation Worth It? The ROI of Home Security
When evaluating how much window bar installation costs, it is important to place that investment in the context of what you are protecting against. The FBI's Uniform Crime Report consistently shows that the average loss per residential burglary in the United States is approximately $2,800 — and that figure does not include the psychological impact of a home invasion, increased homeowner's insurance premiums following a claim, or the cost of replacing irreplaceable personal items. From a pure financial return-on-investment standpoint, window bars are one of the most cost-effective security measures available to American homeowners. A $450 investment in five SWB telescopic bars — protecting an entire ground floor — costs less than 17% of the average single burglary loss. If those bars deter even one break-in attempt over a five-year period, the return on investment is well over 500%.
Insurance Premium Impact: How Window Bars Can Lower Your Homeowner's Insurance
Many American homeowners are unaware that installing certified window security bars can qualify them for discounts on their homeowner's insurance or renter's insurance premiums. According to the Insurance Information Institute, visible physical security deterrents — including window bars, deadbolt locks, and alarm systems — can reduce homeowner's insurance premiums by 5% to 20% depending on the insurer and the nature of the security upgrade. For a homeowner paying $1,500 per year in homeowner's insurance premiums, even a 5% discount represents $75 per year — meaning a $450 investment in SWB telescopic bars could pay back its full cost in insurance savings within six years, in addition to the security protection it provides from day one. Always contact your insurance provider directly to confirm eligibility for security-related discounts before and after installation.
Property Value and Neighborhood Safety: The Broader Investment Case
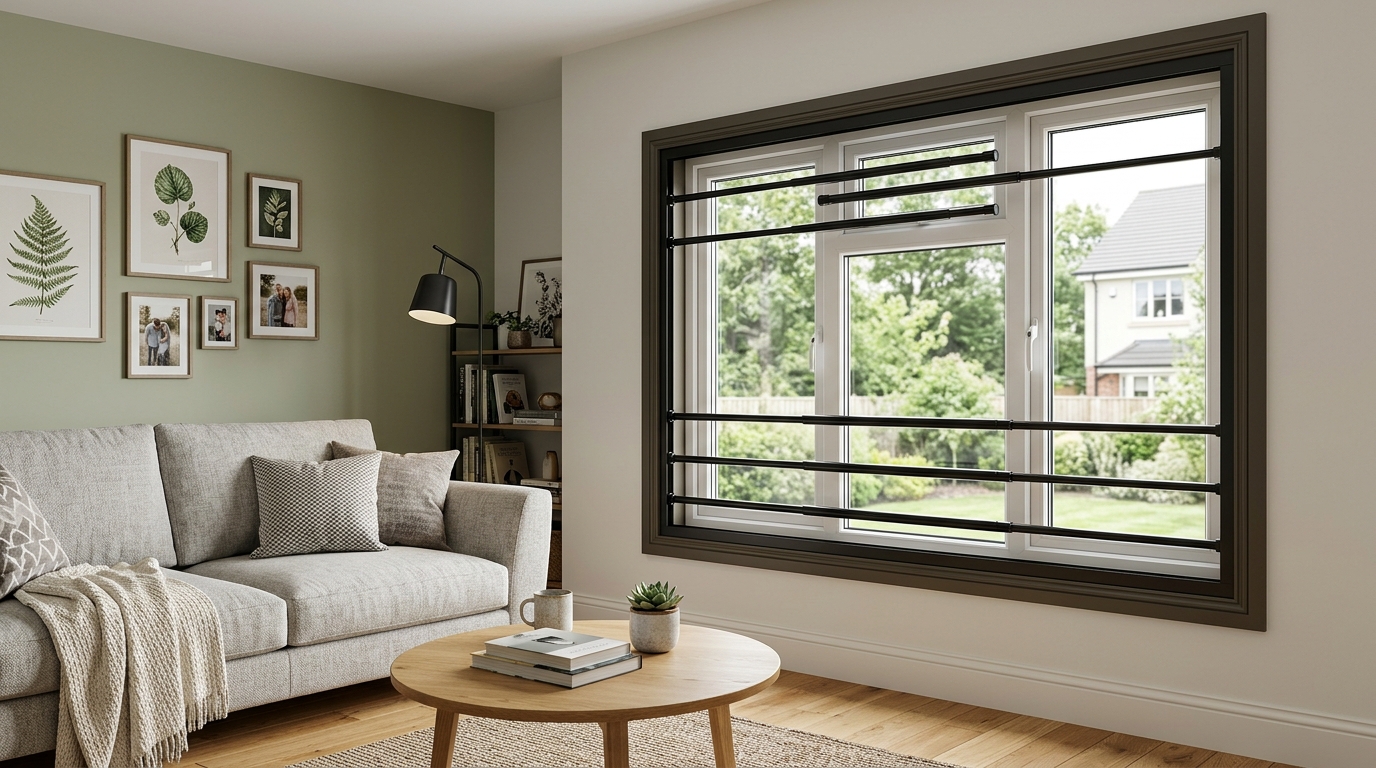
For homeowners and real estate investors — including landlords and AirBnB property managers — window bar installation carries an additional dimension of financial return: property value protection and tenant attraction. In urban neighborhoods across cities like Detroit, Philadelphia, and Memphis where residential burglary rates are statistically elevated, visibly secured properties command stronger tenant interest and lower vacancy rates. Landlords who provide secure, bar-protected ground-floor units report that tenants are more likely to renew leases, reducing costly tenant turnover. For real estate investors managing multi-unit properties, the per-unit cost of SWB telescopic bars is minimal relative to the annual rental income those units generate. And because SWB's bars feature a clean matte black finish that complements modern home aesthetics, they add a sense of security without the institutional look of older-style cage bars that can detract from curb appeal.
🏆 Conclusion
Understanding how much window bar installation costs is the essential first step toward making a smart, financially sound home security decision. The range is wide — from $90 per window for a DIY telescopic bar solution to $1,800 or more per window for a custom professional installation in a high-cost US metro area — but the right choice for most American homeowners and renters is clear. Security Window Bars' telescopic and egress-compliant models deliver industrial-grade steel protection at a fraction of the cost of professional installation, with zero drilling required, full renter-friendliness, and the flexibility to move your security investment with you when you relocate. Whether you are a first-floor apartment renter in Chicago, a homeowner in Memphis looking to secure your basement windows, or a landlord managing multiple properties in Los Angeles, SWB offers the most cost-effective path to genuine window security available in the US market today. Do not wait until a break-in forces the decision. Invest now, install this weekend, and sleep soundly knowing your windows are protected by the same steel strength that professionals use — at the price that makes sense for real American families.
Security Window Bars · USA
Secure Your Home Today
Ready to secure your home without the contractor bill? Shop all three SWB window bar models — Model A (Telescopic), Model B (Wall Mount), and Model A/EXIT (Egress Compliant) — with fast Amazon FBA shipping to all 50 states. Shop Security Window Bars on Amazon or visit securitywb.com for personalized guidance from our security experts.
Shop on Amazon →Frequently Asked Questions
The national average for professional window bar installation in the United States ranges from $150 to $1,800 per window, including materials and labor. For a full home with five to eight windows, the total professional installation cost typically runs $2,000 to $8,000 depending on your region, the type of bars, and contractor rates. In contrast, DIY installation using telescopic no-drill bars like SWB's Model A at $90 per unit can secure five windows for just $450 — a savings of up to 90% compared to professional rates in high-cost cities like New York or Los Angeles.
Yes, absolutely — and for most American homeowners and renters, DIY installation is both the most cost-effective and most practical option. SWB's telescopic window bars are specifically engineered for DIY installation without drilling, special tools, or contractor experience. Each bar installs in 15 to 20 minutes and fits standard US window widths from 22 to 36 inches. By installing yourself, you eliminate the labor cost that typically accounts for 40% to 65% of a professional window bar installation project. Detailed step-by-step guidance is available at securitywb.com/installation/.
Professionally installed egress-compliant window bars — which include a quick-release mechanism required by the International Building Code and NFPA 101 for sleeping areas — typically cost $250 to $750 per window when installed by a contractor, including the compliance premium for the egress hardware. SWB's Model A/EXIT egress-compliant telescopic bars offer a dramatically more affordable alternative at just $92 per unit. This patented product includes a built-in quick-release egress bar that meets IBC, NFPA 101, and IRC emergency egress requirements, making it the most cost-efficient path to bedroom window code compliance available in the US market.
Yes — window bars deliver an exceptionally strong return on investment compared to most other home security measures. The FBI reports the average residential burglary causes approximately $2,800 in losses. A five-window DIY installation with SWB telescopic bars costs $450 — less than 17% of the average single burglary loss. Additionally, visible physical security deterrents like window bars can reduce homeowner's insurance premiums by 5% to 20% according to the Insurance Information Institute, providing ongoing financial returns year after year. Alarm systems, by comparison, often cost $300 to $600 upfront plus $20 to $50 per month in monitoring fees — a higher long-term cost with no physical barrier benefit.
Permit requirements for window bar installation vary by municipality across the United States. In general, no-drill telescopic bars that make no permanent modifications to walls or structures do not require a permit in most US jurisdictions. Permanently fixed or welded bars that require wall anchoring may require a building permit in cities like Chicago, Los Angeles, or New York City, typically adding $50 to $200 to the project cost. Egress compliance inspections may be required in some cities for bars installed in sleeping areas. Always check with your local building department or code enforcement office before beginning a permanent installation project.
Traditional professionally installed fixed window bars almost always violate standard lease agreements because they require permanent structural modifications — drilling, wall anchoring, or welding — that damage the rental unit. However, SWB's telescopic no-drill window bars are specifically designed to be renter-compliant. They apply tension against the existing window frame without any drilling, adhesives, or permanent alterations. They can be fully removed in minutes when moving out, leaving zero damage to walls, frames, or trim. This makes them the only practical window security bar solution for most of America's 44.1 million apartment renters.
Professional window bar installation costs vary significantly by US city due to differences in labor rates, permit requirements, and contractor availability. In New York City, professional installation typically runs $400 to $900 per window — among the highest in the country. Chicago homeowners report $250 to $600 per window. In Los Angeles, quotes range from $350 to $750 per window. Cities like Atlanta, Memphis, and Houston tend to be lower, at $200 to $500 per window. These geographic differences make the cost advantage of DIY telescopic bars most pronounced in high-cost Northeast and West Coast markets.
Basement and ground-floor window bar costs depend on the window size and installation method. Professionally installed bars for standard basement windows — which are often smaller and set into concrete or masonry frames — typically cost $200 to $600 per window, with masonry drilling surcharges of $50 to $150 per window adding to the total when concrete walls are involved. SWB's Model A Telescopic Window Bars at $90 each fit standard US window widths from 22 to 36 inches and require no drilling even in masonry-framed windows, making them an especially practical and affordable solution for basement window security in homes across the Midwest and Northeast.