How to Remove Window Security Bars Safely: Complete Step-by-Step Guide
Removing window security bars is a straightforward process that takes 10-20 minutes per window when you use the right tools and follow the correct steps. Whether you are removing bars for seasonal maintenance, preparing for a move, replacing old bars with new ones, or painting the window frame behind them, the process is the same: identify the mounting type, select the right tools, and work methodically to avoid damaging the window, the wall, or yourself.
This guide covers the removal process for every common mounting type — frame-mount, masonry-mount, interior-mount, and quick-release egress bars. We also cover how to patch mounting holes and restore the surface after removal.
Before You Start: Safety and Preparation
Window security bars are heavier than they look. A standard-width telescopic bar like the SWB Model A weighs approximately 10-15 pounds. Wider modular configurations or heavy-gauge masonry-mount bars can weigh 20-30 pounds. Always have a plan for supporting the bar's weight as the last fastener comes out.
Safety Checklist
- Work with a partner for bars on second-floor windows or bars wider than 40 inches — one person holds the bar while the other removes fasteners
- Wear safety glasses — metal debris, rust particles, and dust can fall during fastener removal
- Wear work gloves — bar edges and mounting brackets can have sharp points, especially on older installations
- Clear the area below the window — have a soft landing spot (blanket or cardboard) for the removed bar
- If working from a ladder — ensure stable footing, never lean, and have someone hold the base
- Exterior bars above ground floor — consider hiring a professional for elevated removal
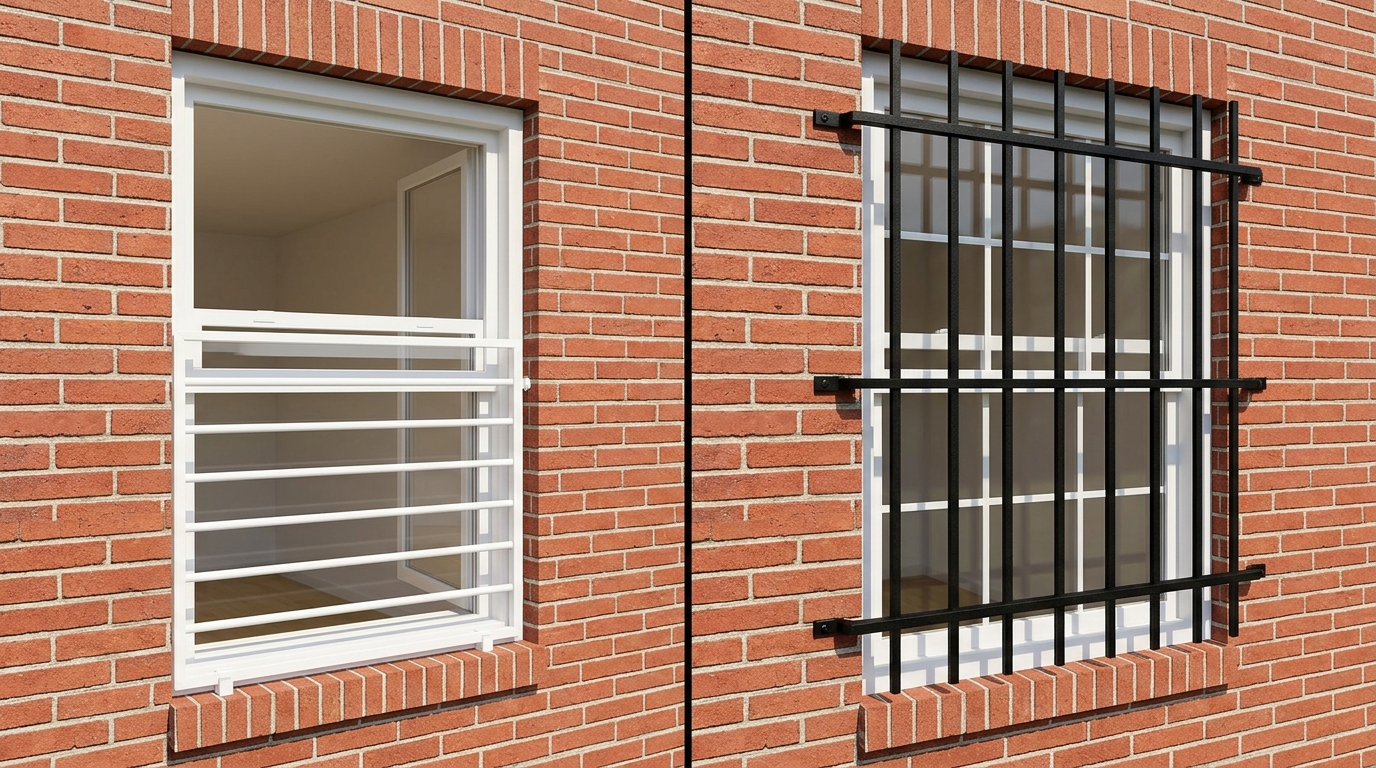
Step 1: Identify Your Mounting Type
The removal process depends entirely on how the bars were installed. Look at where the mounting brackets connect to the building and what type of fasteners were used.
| Mount Type | Attached To | Fastener Type | Removal Difficulty | Time Per Window |
|---|---|---|---|---|
| Frame mount | Window frame (wood, vinyl, aluminum) | Lag screws or anti-tamper screws | Easy | 10-15 minutes |
| Masonry mount | Brick, concrete, or block wall | Expansion anchors or Tapcon screws | Moderate | 15-25 minutes |
| Quick-release (egress) | Frame or wall | Release lever + standard mount | Very easy (release) or same as mount type (full removal) | 5 seconds (release) or 10-25 min (full) |
| Welded/permanent | Steel frame or embedded in wall | Welds or embedded anchors | Difficult — may require cutting | 30-60 minutes |
Step 2: Gather the Right Tools
For Frame-Mount Bars
- Cordless drill/driver with appropriate bit (Phillips, hex, or security Torx depending on fastener)
- Anti-tamper bit set (if security screws were used — SWB includes the matching bit with the product)
- Flat-head screwdriver or pry bar (for stuck screws)
- Penetrating lubricant (WD-40 or similar) for corroded fasteners
For Masonry-Mount Bars
- All of the above, plus:
- Socket wrench or adjustable wrench (for expansion anchor nuts)
- Hammer and cold chisel (for stuck expansion anchors)
- Masonry patch compound (for filling anchor holes after removal)
Removing Frame-Mount Security Bars
Frame-mount removal is the simplest process. The bars are attached to the window frame with screws — remove the screws and the bar comes free.
Step-by-Step Process
- Identify the fastener type. Look at the screw heads on the mounting brackets. Standard Phillips or hex-head screws require the corresponding bit. Anti-tamper security screws (one-way, security Torx, or pin-hex) require the matching security bit. SWB products include the removal bit with the bar.
- Apply penetrating lubricant to any fastener that shows signs of corrosion or rust. Let it soak for 5 minutes before attempting removal.
- Support the bar. Before removing the last fastener, have a hand on the bar or have a partner hold it. The bar will drop once the final screw is out.
- Remove fasteners starting from the bottom. This keeps the bar gravity-held against the upper fasteners while you work. Remove the bottom-left, then bottom-right, then top-left, then top-right (or reverse if you prefer).
- Lift the bar away from the window and set it down on a padded surface.
- Inspect the window frame for damage. If the screw holes are in good condition, you can reinstall the same bar later without re-drilling.
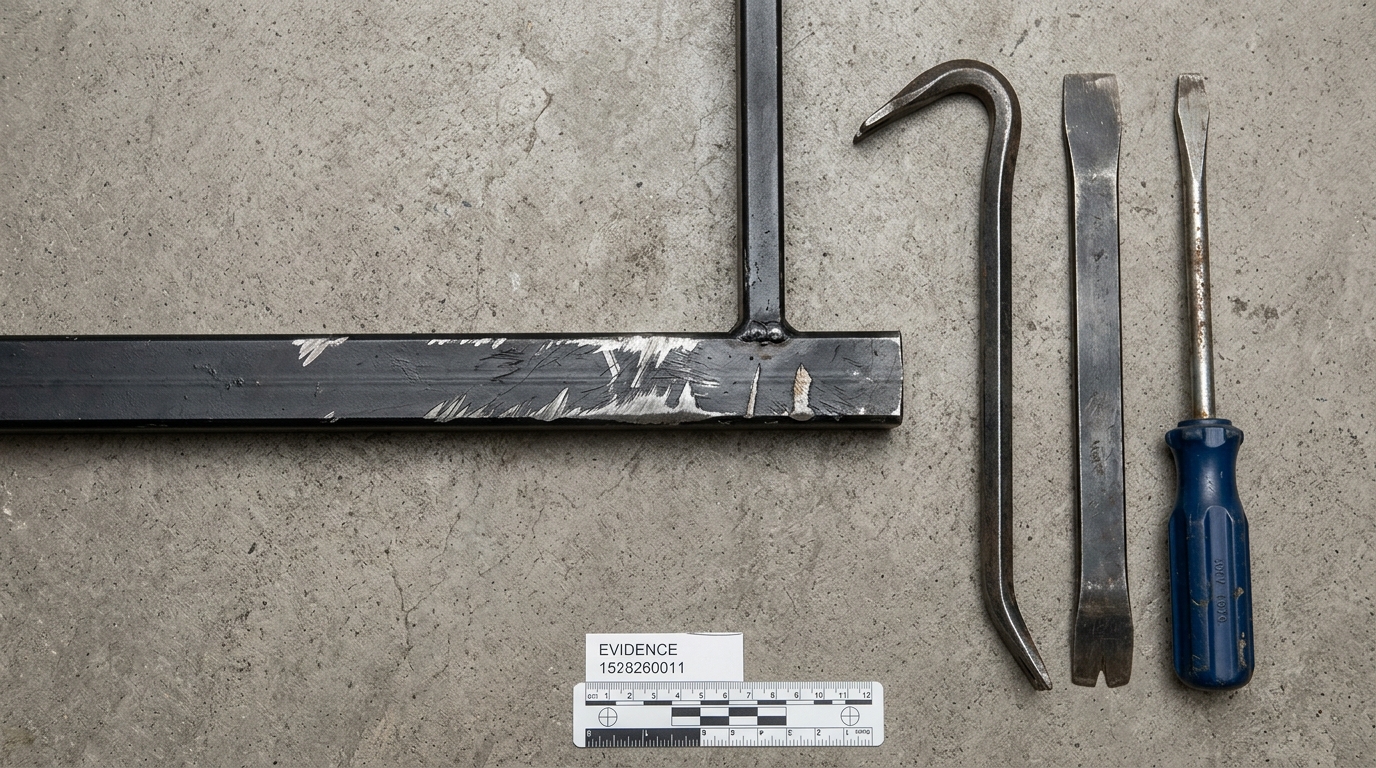
Dealing with Stuck or Stripped Screws
If a screw will not back out:
- Apply more penetrating lubricant and wait 15-30 minutes
- Try a manual screwdriver — sometimes a hand tool provides better torque control than a drill
- Use a screw extractor bit — these grip into damaged screw heads and back them out
- As a last resort — drill out the screw head with a metal-cutting bit, remove the bar, then extract the screw shaft with pliers
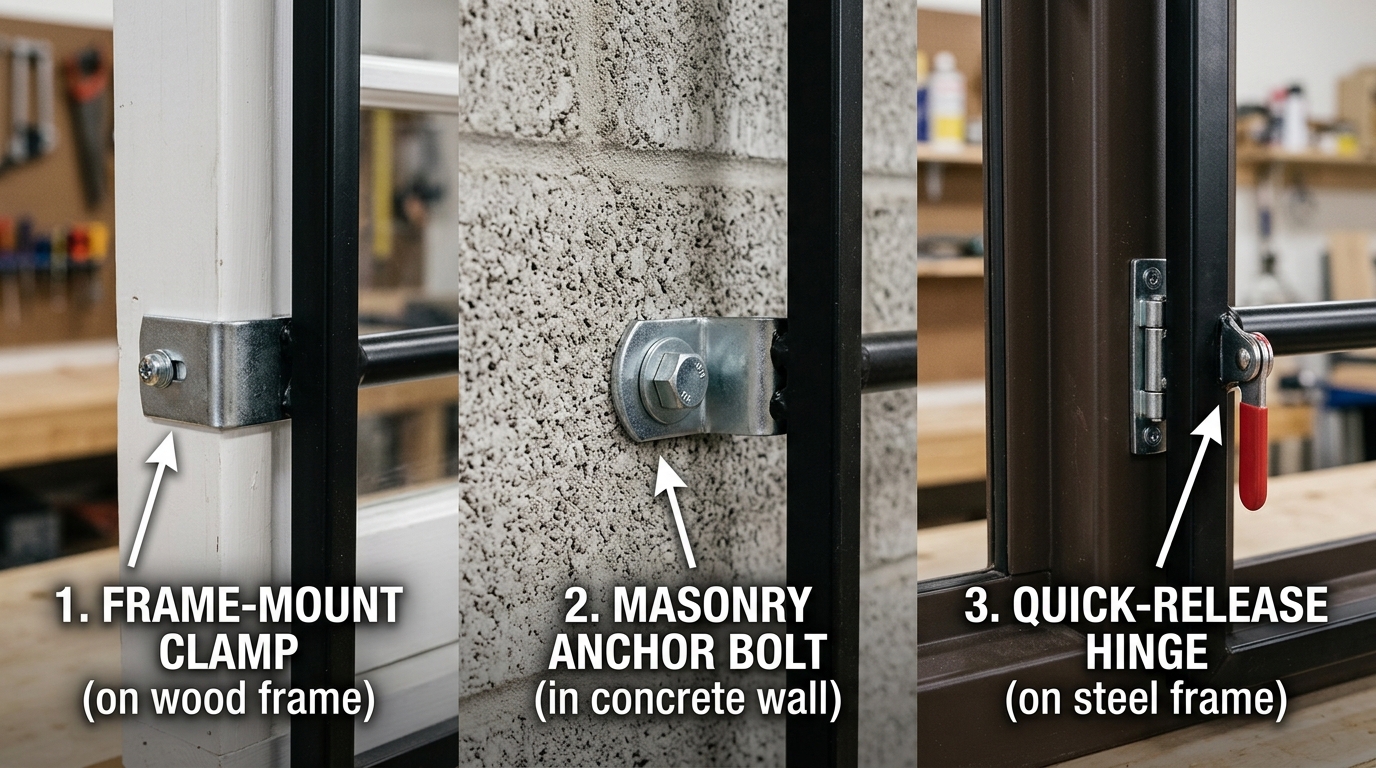
Removing Masonry-Mount Security Bars
Masonry-mount bars like the SWB Model B anchor into brick, concrete, or block walls using expansion anchors or Tapcon masonry screws. Removal requires slightly more effort than frame-mount but follows the same basic logic.
Step-by-Step Process
- Identify the anchor type. Expansion anchors typically have a hex nut on the face of the bracket. Tapcon screws have a hex-head or Phillips-head that drives directly into the masonry.
- For expansion anchors: Use a socket wrench to remove the nut. Once the nut is off, the bracket slides free. The expansion sleeve remains embedded in the masonry — this is normal. You can either leave it in place (flush or below surface) or tap it deeper with a hammer and cold chisel, then patch over it.
- For Tapcon screws: Back them out with a drill/driver and the matching bit. Tapcon screws can be difficult to remove if they have been in place for years — apply penetrating lubricant and use slow, steady reverse rotation. Do not use excessive force or you risk snapping the screw in the wall.
- Support the bar weight as you remove the final fastener, just as with frame-mount bars.
- Patch the holes with masonry repair compound (see the patching section below).
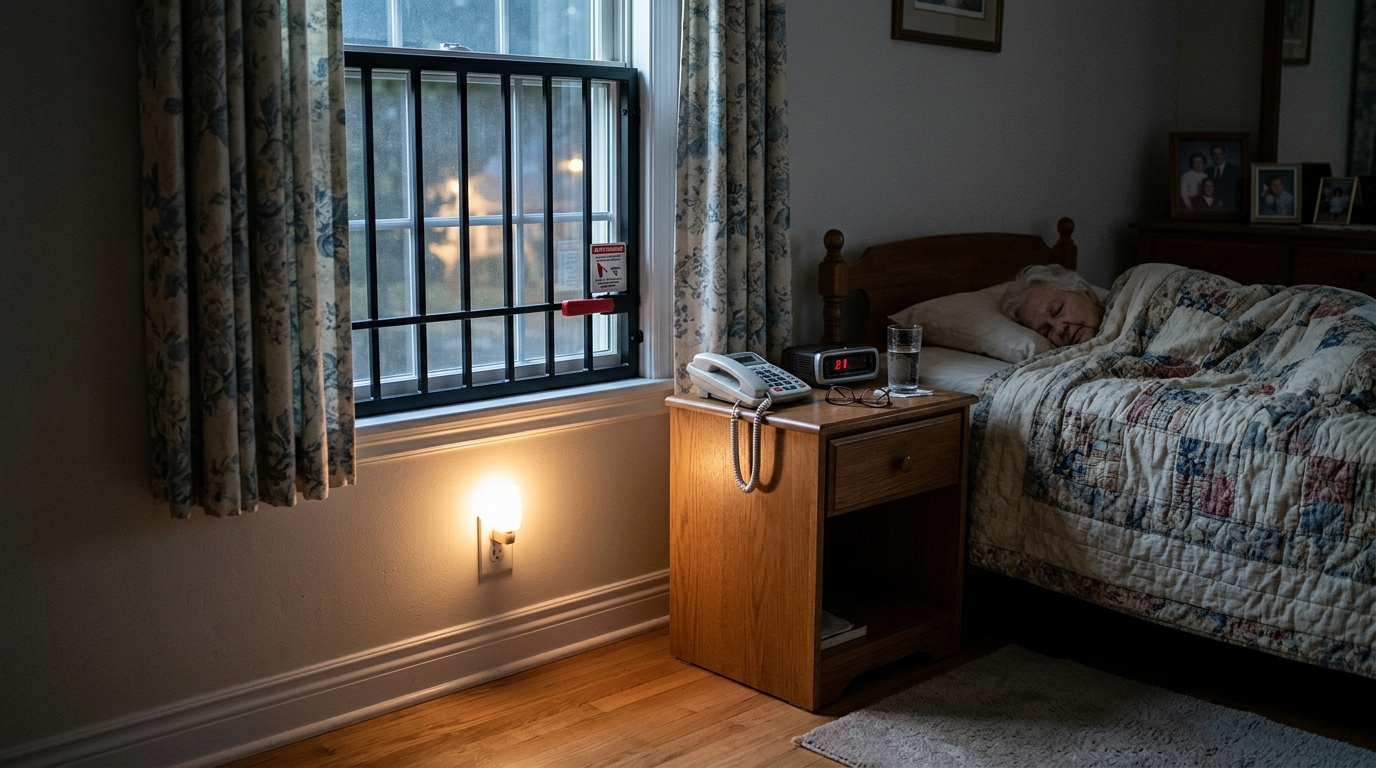
Removing Quick-Release (Egress) Bars
Quick-release bars like the SWB Model A/EXIT have two removal modes: emergency release and full removal.
Emergency Release (Seconds)
This is the fire-code-compliant quick-release that every household member should know how to operate. Pull or push the interior release lever — the bars swing open or detach from one side, creating a clear egress path. No tools needed. This is not "removal" in the permanent sense — the bars remain attached at one end and can be re-secured after the emergency.
Full Removal (Maintenance or Replacement)
To completely remove quick-release bars from the window, follow the same frame-mount or masonry-mount removal process described above. The quick-release mechanism adds no complexity to the full removal process — you are simply removing the same mounting screws.
How to Patch Mounting Holes After Removal
If you are removing bars permanently and want to restore the surface, patching the screw holes takes 10-15 minutes per window plus drying time.
Wood Frames
- Clean debris from the screw holes with a small brush or compressed air
- Fill each hole with exterior-grade wood filler (available at any hardware store, $5-$8)
- Smooth the surface flush with a putty knife
- Let dry per manufacturer instructions (typically 2-4 hours)
- Sand smooth with 120-grit sandpaper
- Touch up with matching exterior paint
Vinyl Frames
- Clean the holes
- Fill with a color-matched vinyl patch compound or white silicone caulk
- Smooth flush with a damp finger or putty knife
- Let cure for 24 hours
Brick or Concrete
- Remove any expansion anchor sleeves by tapping them deeper with a cold chisel (or leave them below surface)
- Fill the hole with hydraulic cement or masonry repair compound
- Smooth the surface to match the surrounding wall texture
- Let cure for 24-48 hours before painting or sealing
Reinstalling Bars After Maintenance
If you removed bars temporarily for window painting, frame repair, or seasonal maintenance, reinstallation is faster than the original install because the mounting holes already exist.
- Inspect the mounting holes — if they are still tight and the surrounding material is solid, you can reuse them
- If holes are stripped or enlarged in wood frames — fill with wood filler, let dry, re-drill pilot holes slightly smaller than the original, then reinstall
- If masonry anchors were removed — you may need to drill new holes offset by 1-2 inches from the originals
- Test the bar for rigidity after reinstallation — it should not flex, rattle, or move when pushed
For full installation instructions, see our DIY installation guide.
Frequently Asked Questions
Can I remove window security bars myself or do I need a professional?
Most homeowners can remove frame-mount window bars themselves with a cordless drill and the matching screwdriver bit. The process takes 10-15 minutes per window. Masonry-mount removal is moderately harder and may require a socket wrench and hammer. The only situations where a professional is recommended are: welded or permanently embedded bars that require cutting tools, bars on elevated windows that require ladder work above one story, and bars with heavily corroded fasteners that resist removal with standard tools.
Will removing window bars damage my window frame?
Proper removal should not damage the window frame beyond the existing screw holes. The holes can be patched with wood filler, vinyl patch compound, or masonry repair compound depending on the frame material. If screws are stuck and excessive force is applied, there is some risk of splitting wood frames or chipping vinyl. Use penetrating lubricant on stuck fasteners and work slowly to minimize frame damage.
How do I remove anti-tamper security screws from window bars?
Anti-tamper screws require a matching security bit for removal. SWB products include the appropriate removal bit with every bar. If you have bars from another manufacturer and do not have the matching bit, security bit sets are available at hardware stores for $10-$20 and include pin-Torx, one-way removal, security hex, and other specialty patterns. For one-way screws that have no reverse-drive profile, you may need a screw extractor or a left-handed drill bit to back them out.
Can I reuse security bars after removing them?
Yes. Quality security bars like SWB models are built to last 20-30 years and can be removed and reinstalled multiple times. Inspect the bars after removal for any damage, corrosion, or bending. Check that the telescopic adjustment mechanism still locks securely if applicable. Replace any fasteners that are damaged, corroded, or stripped. As long as the bar is structurally sound and the powder coat finish is intact, it is fully reusable.
How long does it take to remove all window bars from a house?
For a typical home with 6-10 frame-mount window bars, expect 1.5-3 hours for complete removal including hole patching. Frame-mount bars take 10-15 minutes each, masonry-mount bars take 15-25 minutes each. Add 5-10 minutes per window for patching screw holes. A home with all frame-mount bars can be completely debarred and patched in a single afternoon.