
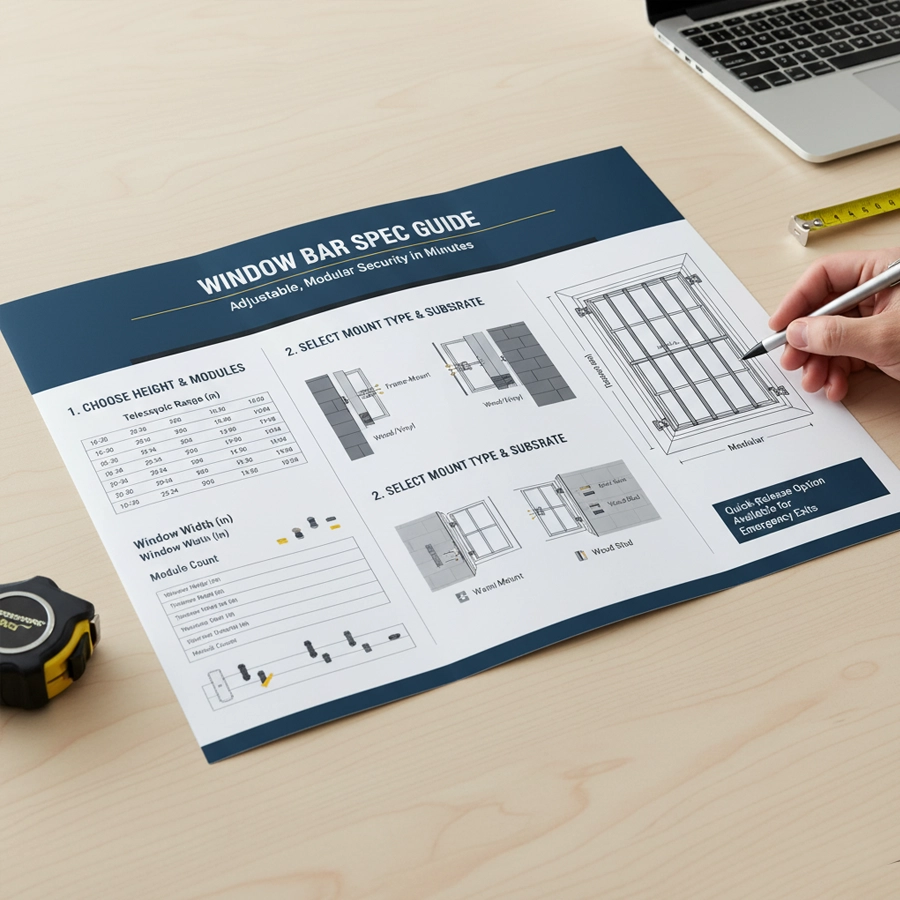
This quick-reference guide helps you spec adjustable, modular window bars in minutes. Use the charts below to match telescopic height ranges, choose module counts by clear width, and decide between frame-mount and wall-mount for different substrates. We’ve also included an egress decision check, a mount selection matrix, and a printable cheat sheet for job folders. The examples are written for SWB (Security Windows Bars) systems—Model A, Model B, and Emergency-Exit—but the process works broadly. If you’re unsure about modules or mounts, send your measurements and a quick photo and we’ll spec it for you.
Measure the clear opening: width × height (inches). Record the smallest numbers.
Pick a telescopic height range that comfortably covers your height (avoid maxing out the adjustment if possible).
Plan width with modules: start with one core module and add modules until you reach your span. Center the assembly visually.
For measurement details, see How to Measure.
Use this chart to land in a comfortable range. Always confirm the exact range on the model page before ordering.
| Height band (H, in) | Recommended approach | Notes |
|---|---|---|
30-40″ |
Short-range telescopic setting |
Common for small baths & utility windows |
41-52″ |
Mid-range telescopic setting |
Typical for many basements & bedrooms |
53-65″ |
Tall-range telescopic setting |
Suited to tall openings; consider Model A/Emergency-Exit |
>65″ |
Validate case-by-case |
Consider split assemblies or layout changes; contact support |
Start with one core module. Add side-by-side modules to reach width W. Center the assembly.
For spans wider than ~79″, use two adjacent assemblies (left/right) or contact us for a layout.
| Clear width (W, in) | Typical configuration | Notes |
|---|---|---|
25-35″ |
Core only (or Core + small module for centering) |
Narrow openings |
36-48″ |
Core + 1 module |
Common bedrooms/basements |
49-60″ |
Core + 1–2 modules |
Wide single windows |
61-72″ |
Core + 2 modules |
Two-panel sliders (many cases) |
73-79″ |
Core + 3 modules |
Max typical span for one assembly |
>79″ |
Two assemblies (split span) |
For three-panel sliders or grouped panes |
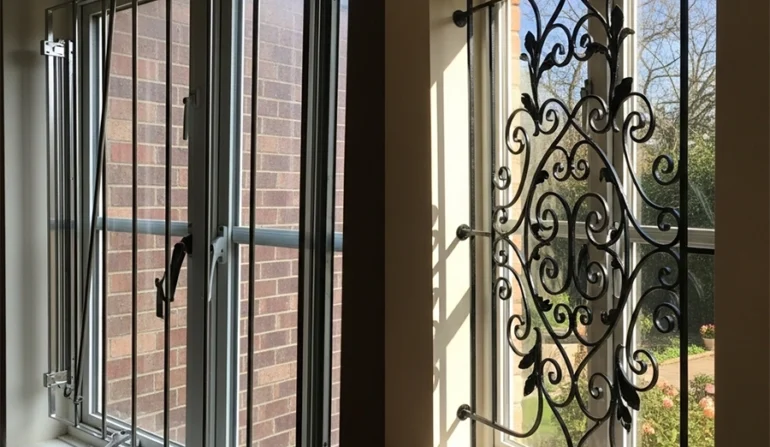
Choose the mount based on structure—not just appearance.
| Opening / Substrate | Frame condition | Recommended mount | SWB model notes |
|---|---|---|---|
Wood/jambs (interior) |
Plumb & solid |
Frame-mount |
Model A or B |
Brick/block/stucco |
Masonry or uneven |
Wall-mount |
Model B preferred |
Out-of-square frames |
Twisted/irregular |
Wall-mount |
Model B to keep runs straight |
Wide sliders (60–79″) |
Long span |
Wall-mount |
Model B or Emergency-Exit if egress |
Mixed openings (portfolio) |
Varies |
Mix per window |
Standardize on A/B + EXIT where needed |
Deep dives: Wall-Mount Window Bars • Interior vs Exterior
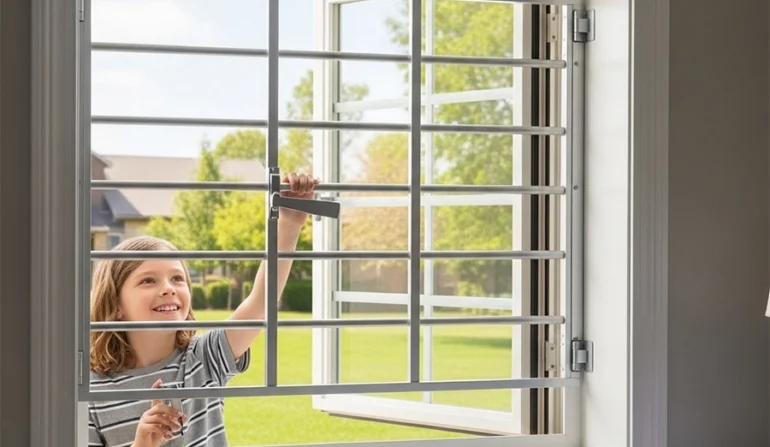
s the window a required emergency exit? Bedrooms and many basements are—check your local rules.
If Yes → choose Emergency-Exit. Plan an interior-operable release and a swing test after install.
Keep the release accessible (no furniture/blinds blocking). Test monthly.
If No → fixed/standard models may be appropriate (still verify local requirements).
Learn more: Quick-Release Guide.
Height: Mid-range telescopic.
Width: Core + 1 module.
Mount: Frame-mount (jambs are plumb).
Model: Emergency-Exit (quick-release).
Note: Verify swing clears blinds; perform release test.
Height: Mid-range telescopic.
Width: Core + 2 modules.
Mount: Wall-mount for long, straight span.
Model: Model B (or Emergency-Exit if treated as egress).
Note: Maintain slight standoff; keep weep paths clear.
Height: Short-range telescopic.
Width: Core only (add small module if centering needed).
Mount: Frame-mount.
Model: Model A.
Interior: easiest quick-release access, less weather exposure.
Exterior: stronger visual deterrence; use proper anchors; inspect finish after storms.
Full pros/cons: Interior vs Exterior.
Record clear width × height (smallest values)
Identify egress status (Yes/No)
Choose telescopic height range (avoid max extension)
Plan module count to reach span (center assembly)
Select mount: frame vs wall (consider substrate & squareness)
Choose location: interior vs exterior
Verify obstructions: handles, blinds, sensors, trim
If Emergency-Exit: plan swing path & post-install test
Choose anchors per substrate (wood / brick / block / studs)
Add to order: core module + modules + mount hardware
Batch orders for multiple windows to reduce shipping and keep spare modules.
Buy direct for the best pricing and same-day sizing help.
Include photos (front, angle, and substrate close-up) with your measurements—this speeds our recommendation.
Spec’ing adjustable, modular window bars is straightforward: measure, pick a comfortable telescopic height, and add modules to reach your width. Choose the mount that matches your structure and use Emergency-Exit for egress windows. With SWB, you can standardize across real-world openings without custom ironwork—and finish installs faster.
Next steps: Buy Direct or send measurements for a same-day module recommendation. Review How to Measure and DIY Installation before you start.
EMAIL ADDRESS: sales@securitywb.com
SITE: www.securitywb.com
PHONE:
CDMX: +52 (55) 5272 3355 USA: +1 (650) 4371 575

COOKIES POLICY
Security Window Bars LLC ("SWB") uses cookies and similar technologies to improve your browsing experience and enhance the functionality of our website www.securitywb.com (the “Website”). This Cookies Policy explains what cookies are, how we use them, and how you can manage your cookie preferences.
By using our Website, you agree to our use of cookies as described in this policy.
Last Updated: 01/01/25