BLOG

security window bars
quick-release window bars opening from inside for emergency egress

How to Install Window Bars: The 2025 Step-by-Step Guide (Quick-Release, Masonry & Wood)

Installing window bars is one of the fastest ways to boost security—without relying on power, Wi-Fi, or subscriptions. However, the details matter. A bar that isn’t measured correctly can bind. A latch that isn’t reachable can delay egress. And the wrong anchors can loosen over time. This step-by-step window bar installation guide walks you through measuring, mounting on wood and masonry, choosing and setting up quick-release window bars, and finishing everything cleanly so your home looks designed, not improvised.

Why Install Security Window Bars in 2025?

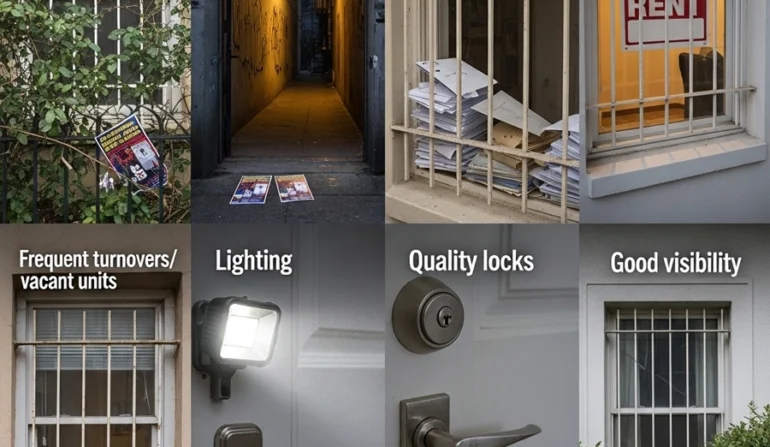
Most break-ins test windows first. Security window bars deliver visible deterrence, real resistance to prying, and peace of mind even during blackouts. Add a quick-release and you keep a fast, tool-free exit in bedrooms and finished basements. Paired with good lighting and locks, bars reduce risk affordably—and permanently.

Safety First: Egress and Window Bars That Open from Inside

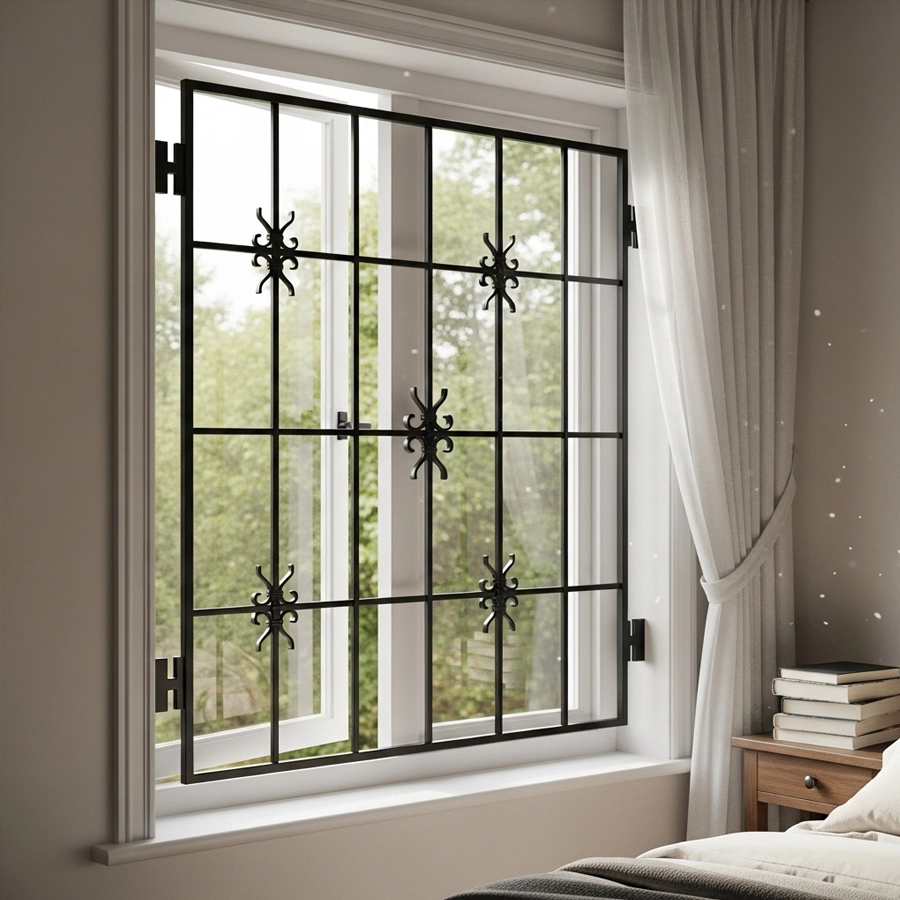
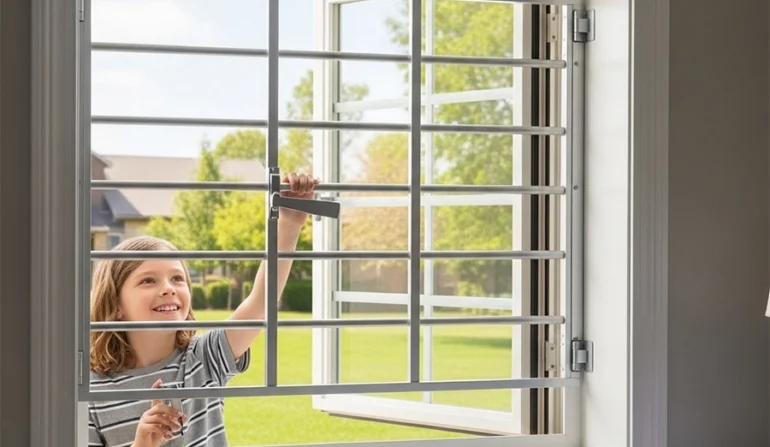
In rooms used for sleeping, plan for emergency egress. Choose window bars that open from inside with a one-hand, one-motion quick-release—no keys, no tools, no secret steps. Mount the release at a reachable height for kids and seniors, keep blinds and furniture out of the swing path, and test monthly. Safety isn’t an add-on; it’s the core requirement.

Non-negotiables

  • Tool-free, one-hand operation from the inside only.
  • Smooth swing with no binding.
  • Clear egress zone around the window.
  • Everyone in the home knows and practices the release.

Tools & Materials Checklist (by Substrate)

Universal

  • Tape measure, pencil, level, masking tape
  • Drill/driver; hammer drill for masonry
  • Bits: wood, masonry, and driver bits for security heads (as supplied)
  • Vacuum (clear dust from masonry holes)
  • Anchors/fasteners matched to substrate (see below)
  • Shims, washers, touch-up paint
  • Weather-rated sealant/caulk (silicone or polyurethane)
  • Safety glasses, hearing protection, gloves
  • Dry PTFE spray (hinges/latch pins)

Wood Framing

  • Lag screws with washers (length to engage studs)
  • Stud finder or small pilot drill to locate framing
  • Countersink bit (optional)

Brick / Block / Concrete

  • Sleeve or wedge anchors sized to tabs/holes
  • Tapcon-style masonry screws (for certain applications)
  • Blow-out bulb or vacuum nozzle to clear dust
  • Depth stop or tape flag for drill bit

For Hinged / Quick-Release Bars

  • Full-length piano hinge or heavy-duty butt hinges (often pre-installed)
  • Quick-release hardware kit with template
  • Low-force lever or lift handle (child-friendly)

Pre-Install Planning and Measuring for Window Bars

Precise measurements make installation easier—and safer.

A) Decide the Mount

  • Interior: best for bedrooms and quick-release usability; protected from weather; cleaner façade.
  • Exterior: strong on masonry; aligns depth across a façade; plan weather sealing.

B) Measure the Opening

  1. Width: measure inside-to-inside at top, middle, bottom. Use the smallest number.
  2. Height: measure left, center, right. Use the smallest number.
  3. Diagonals: measure both; a difference indicates racking (bars may need shimming or adjustable tabs).
  4. Depth & Obstacles: note jamb depth, cranks, locks, shade rails, and AC brackets.
  5. Hinge Side & Swing: pick the side with the clearest arc; confirm no collisions with blinds or well covers.
  6. Child Reach: set the quick-release handle where kids can operate it without climbing.

C) Dry-Fit Template (Optional but Helpful)

  • Use painter’s tape to outline the frame on the wall/jamb.
  • Mark hinge side, release handle, and mounting tabs.
  • Stand back; confirm alignment with window muntins for a clean look.

Window Bar Installation on Wood Framing (Interior Mount)

This is the most common and DIY-friendly path for window bar installation.

Step 1 — Dry-Fit & Mark Pilot Holes
Hold the frame in place with a helper. Center it visually and confirm the hinge side and swing. Mark tab holes with a pencil through the pre-drilled tabs.

Step 2 — Locate Studs
Use a stud finder or a tiny test pilot to ensure fasteners will bite solid wood. Avoid only trim or drywall.

Step 3 — Pre-Drill
Drill pilot holes undersized for the lag screws. Undersizing increases holding power and reduces splitting.

Step 4 — Set the Frame
Start with two opposite corners. Loosely snug the lags with washers, then check level and plumb. Shim as needed to avoid racking the frame.

Step 5 — Torque Sequence
Tighten in a cross pattern (top-left, bottom-right, top-right, bottom-left). Don’t over-torque—warping causes latch binding.

Step 6 — Install Quick-Release (if applicable)
Mount the lever or lift handle using the template. Test repeatedly; the bar should swing free with one hand.

Step 7 — Finish
Cap fasteners (if included), caulk any visible gaps, and touch up paint so the installation reads as built-in.

Installing Security Window Bars on Masonry (Brick, Block, Concrete)

Masonry requires the right anchors and clean holes.

Step 1 — Position & Mark
Dry-fit the frame; mark holes through tabs. For exterior installs, check standoff depth and reveal alignment.

Step 2 — Drill Masonry
Use a hammer drill with the correct bit. Drill to full depth and vacuum the dust from each hole—dust is the #1 reason anchors loosen.

Step 3 — Set Anchors
Insert sleeve or wedge anchors as specified. For Tapcon-style screws, keep holes to exact diameter and depth.

Step 4 — Mount & Level
Hang the frame on two anchors. Check level/plumb; shim where needed. Install remaining anchors and tighten evenly.

Step 5 — Quick-Release & Swing Test
Install interior-only release hardware. Swing the bar open ten times to confirm no binding. Children should open it easily.

Step 6 — Weather Seal
Seal exterior penetrations with the proper sealant. On interior mounts, seal if drafts are present.

Block/CMU Notes
Hollow block needs sleeve anchors or fasteners rated for hollow substrates. Where possible, target filled cells or add backing.

Hinged & Quick-Release Setup (One-Hand Egress)

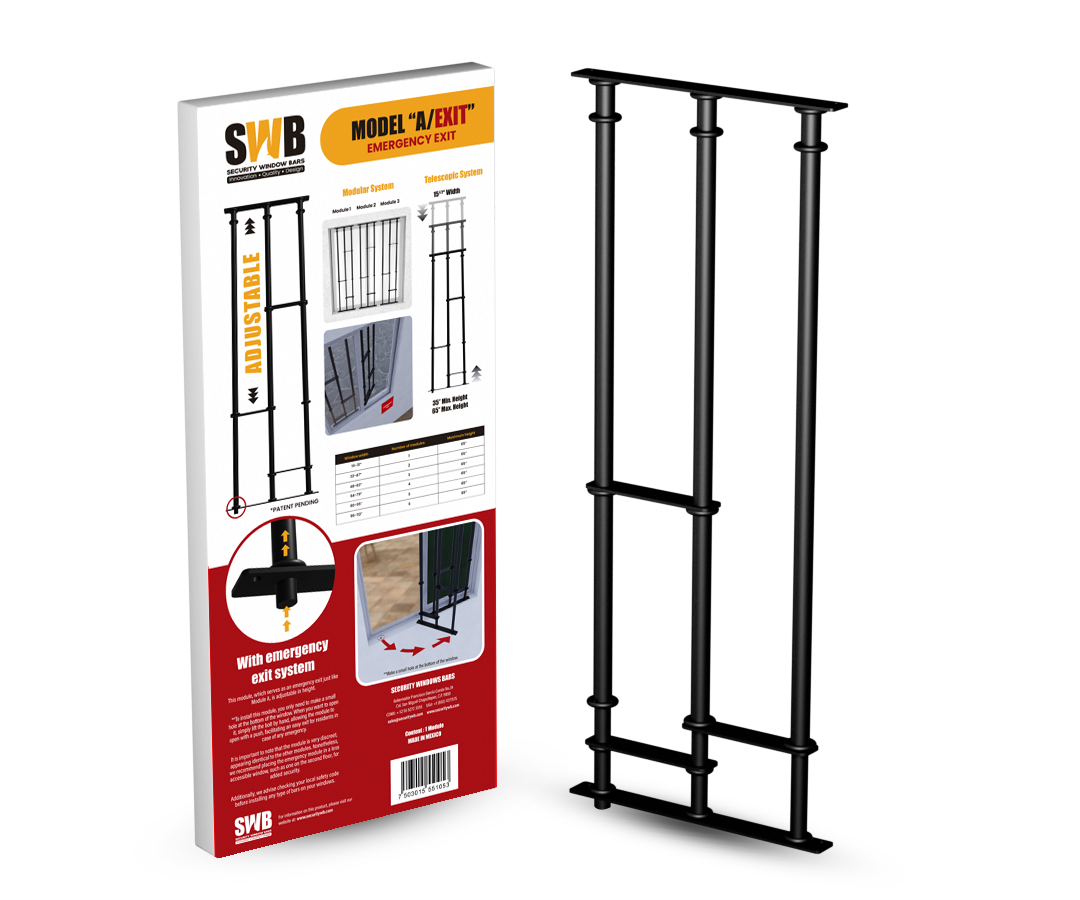
Why hinge + quick-release?
Because fixed bars in egress rooms are unsafe. A hinged frame with a quick-release is the gold standard for bedrooms and finished basements.

Mounting the Release

  • Follow the included template and keep handle placement kid-reachable.
  • The mechanism must open with one motion, no keys or tools.
  • From outside, the release is unreachable and shielded against tampering.

Fine-Tuning for a Smooth Swing

  • If the bar rubs at one corner, loosen the opposite anchor slightly and re-shim.
  • Ensure hinge pins are straight and lubricated with dry PTFE.
  • Confirm blinds, shades, cords, and AC parts don’t foul the arc.

Monthly Drill

  • Lights off. Everyone opens the bar and exits the room.
  • Time the drill. Fix anything that slows you down.

Exterior vs Interior Mounting: Which Should You Choose?

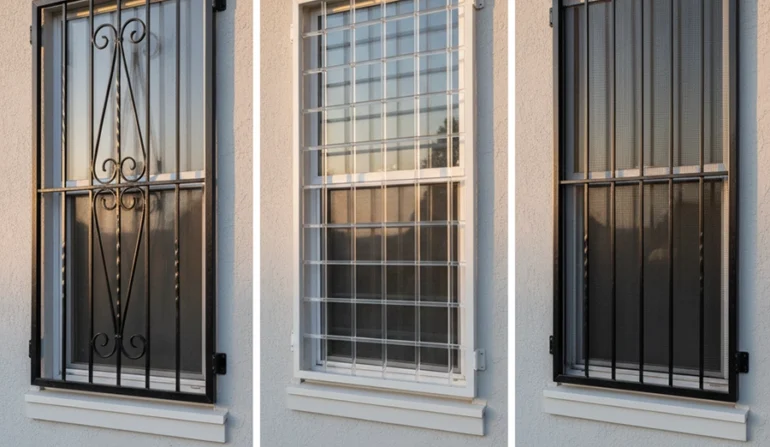
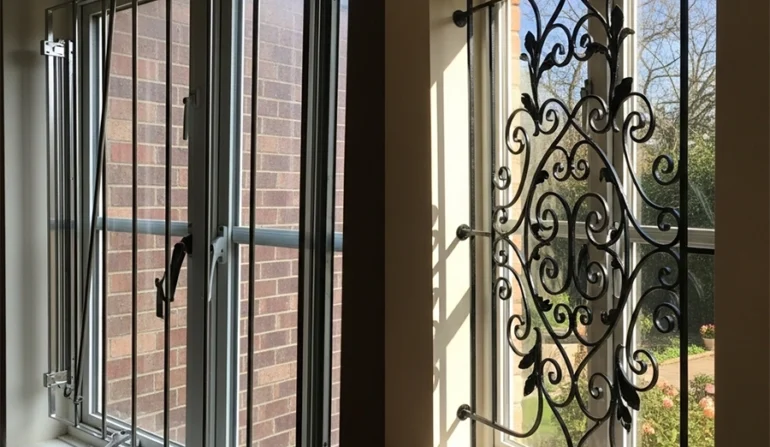
Interior Window Bars

  • Pros: Best for quick-release usability; protected from weather; minimal exterior impact.
  • Cons: Slight reduction of interior sill space; careful routing of blinds needed.

Exterior Window Bars

  • Pros: Great strength on masonry; cohesive façade depth; easy to align across windows.
  • Cons: Weather exposure; more sealing; release must remain interior-only.

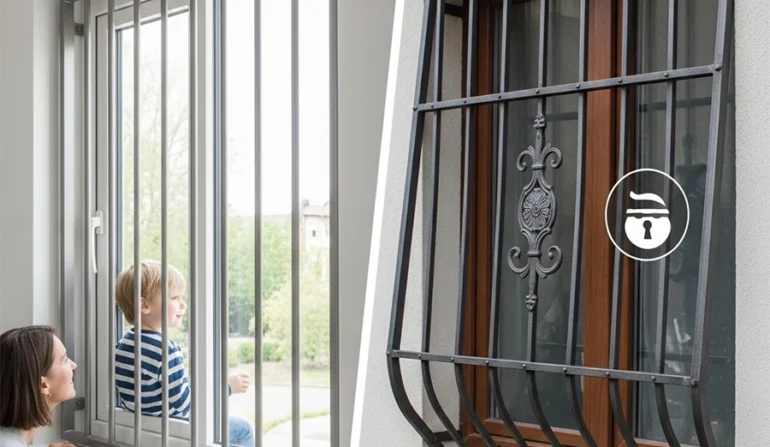
Guideline: For sleeping areas, favor interior hinged quick-release. For utility rooms and non-egress openings on masonry, exterior fixed can make sense.

Finishing & Sealing for Durability and a Clean Look

  • Seal penetrations with weather-rated sealant; keep beads neat and continuous.
  • Touch up small chips with matching enamel; rust creeps from small points.
  • Cap fasteners or use color-matched heads.
  • Align rails with window muntins so the composition feels intentional.
  • Keep a consistent reveal around the frame for a refined look.

Troubleshooting: Fit, Binding, and Latch Issues

Problem: Latch hard to open or bar binds on swing.
Fix: Loosen opposite corner, re-shim, and re-level. Check hinge alignment and lubricate pins.

Problem: Masonry anchors spin or pull.
Fix: Hole may be oversized or dusty. Reset with a larger sleeve anchor or chemical anchor where appropriate; always clear dust before setting.

Problem: Interior quick-release obstructed by blinds or furniture.
Fix: Re-route cords; raise shade rails; move furniture; label the handle discreetly.

Problem: Visible gaps or uneven reveal.
Fix: Loosen, shim, and re-square. Small adjustments make a big visual difference.

Problem: Drafts around exterior install.
Fix: Backer rod + sealant; verify no voids; re-seat where needed.

Maintenance & Monthly Egress Drill

  • Monthly: open the bar; confirm smooth one-hand release; re-train kids and guests.
  • Seasonal: dry PTFE on hinges and latch pins; rinse dust and salt; touch up chips.
  • Post-storm: inspect for impact marks and fastener movement.
  • Always: keep the swing path clear—plants and décor drift over time.

Design Tips for Decorative Window Security Bars

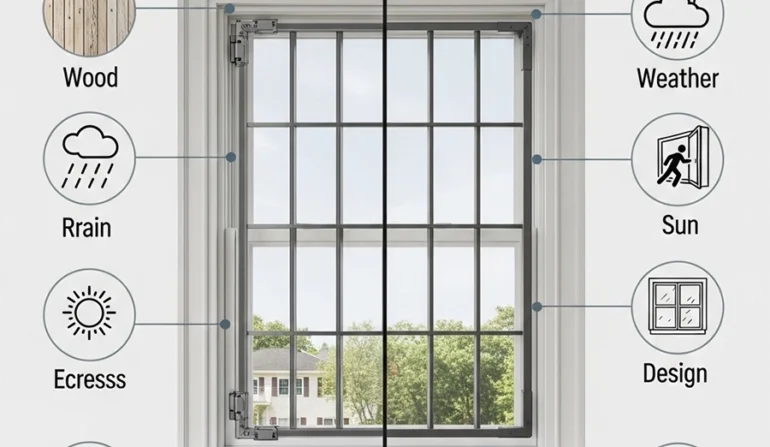
Security can look refined. To keep aesthetics high:

  • Echo your architecture: modern grids, craftsman symmetry, or soft Spanish arches.
  • Choose finish wisely: satin black for contrast; white to blend.
  • Align rails to window muntins.
  • Match projection depth across adjacent windows.
  • Avoid “ladder effect” on ground-floor exteriors by limiting long horizontals.

Common Mistakes to Avoid

  • Installing fixed bars in egress rooms (bedrooms, finished basements).
  • Overtightening lags and warping the frame (causes latch binding).
  • Anchoring into weak substrates (mortar joints only) without proper hardware.
  • Skipping dust removal in masonry holes (anchors loosen).
  • Mounting releases too high for children to reach.
  • Letting blinds, cords, or AC parts block the swing.
  • Ignoring seasonal maintenance and drills.

Buying & Install Day Checklists

Buying Checklist

  1. Room type (egress?): bedroom, nursery, basement, utility.
  2. Mount: interior vs exterior; recess vs surface.
  3. Configuration: fixed, hinged, quick-release.
  4. Material/finish: powder-coated steel (galv + powder for coastal) or aluminum.
  5. Measurements: width/height at 3 points; diagonals; depth; obstructions.
  6. Hinge side & swing: clear arc with blinds and furniture.
  7. Substrate & anchors: wood studs, brick, block, or concrete.
  8. Design: decorative grid or simple pickets; color (black/white/custom).
  9. Child ergonomics: release height and force.
  10. Accessories: AC security bar, rigid side inserts, tamper caps.

Install Day Checklist

  • Tools staged; bits and anchors matched to substrate.
  • Dry-fit complete; holes marked; stud locations verified.
  • Pilot holes drilled; masonry dust cleared.
  • Frame hung on two points; level/plumb checked; final torque in cross pattern.
  • Quick-release installed; 10 open/close cycles tested by an adult and a child.
  • Sealant applied; touch-ups finished; photos taken for records.

FAQs

How hard is it to handle a DIY window bar installation?


Interior mounts on wood framing are well within reach for confident DIYers. Masonry, arched windows, and multi-unit projects benefit from professional help.

Can I install window bars on vinyl windows?


Yes. You attach to surrounding framing or masonry—not to the sash. Use the correct anchors and avoid weep paths.

Do quick-release window bars weaken security?


No. The release is accessible only from inside. From outside, the latch remains concealed and tamper-resistant.

What if my window has an AC unit?


Pair a window AC security bar (sash lock) with an interior hinged grille. Maintain a clear egress swing and route cords so they can’t snag.

Will bars make my room darker?


With slim pickets and smart spacing, light loss is minimal—especially when rails align with muntins.

How often should I test the release?


Monthly. Also test after furniture moves or new blinds to ensure nothing blocks the handle.

What anchors should I use for hollow block?


Use sleeve anchors or hollow-rated fasteners. Where possible, target filled cells or solid backing for higher pull-out strength.

Ready to Install Window Bars the Smart Way?

With careful measuring, the right anchors, and a quick-release tuned for kids and guests, installing security window bars becomes a straightforward project that delivers years of protection. If you’d like help choosing hardware or confirming your substrate and swing, our specialists can walk you through every step.

EMAIL ADDRESS: sales@securitywb.com
SITE: www.securitywb.com
PHONE:
CDMX: +52 (55) 5272 3355  USA: +1 (650) 4371 575

COOKIES POLICY

Security Window Bars LLC ("SWB") uses cookies and similar technologies to improve your browsing experience and enhance the functionality of our website www.securitywb.com (the “Website”). This Cookies Policy explains what cookies are, how we use them, and how you can manage your cookie preferences.

By using our Website, you agree to our use of cookies as described in this policy.

Last Updated: 01/01/25