How to Install Window Bars Inside Your Home: Complete DIY Guide
Step-by-step guide on how to install window bars inside your home DIY. Tools, measuring tips, anchoring methods & fire-code compliance for US homeowners.
More than bars, SWB offers peace of mind. We understand security at a structural level to explain it to you at a home level. Knowing exactly how to install window bars inside your home DIY can mean the difference between a secured household and an easy target for burglars. According to the FBI’s Uniform Crime Reports, more than 6.7 million residential burglaries occur across the United States every year, and a full 60% of those break-ins happen through ground-floor windows and doors. Whether you live in a ground-floor apartment in Chicago, a townhome in Houston, or a standalone house in Atlanta, interior window bars are one of the most cost-effective, code-aware security upgrades available. Professional installation of fixed window bars typically runs between $600 and $1,800 per window — a steep price tag for most families. The good news: modern telescopic and adjustable steel bar systems let determined homeowners complete a secure, code-compliant installation in under 20 minutes, using basic household tools and zero contractor fees. This guide walks you through every step.
Exterior window bars are exposed to the elements year-round and can be attacked with bolt cutters or angle grinders before a burglar even enters your property.…
Why Installing Window Bars Inside Your Home Makes Sense for American Families
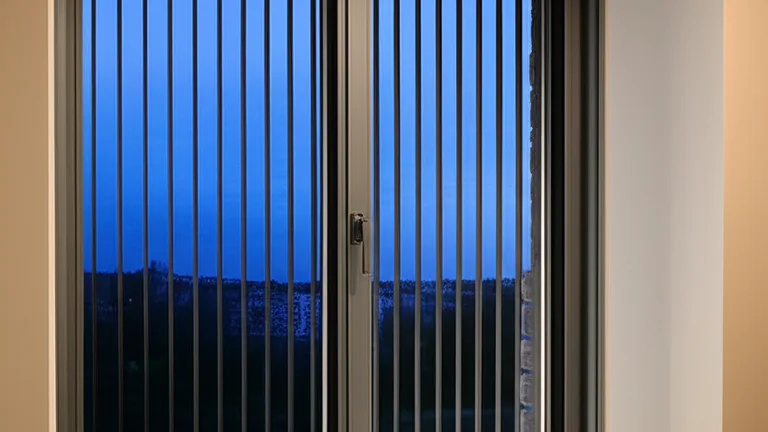
Before diving into the mechanics, it is worth understanding why interior-mounted window bars outperform exterior solutions for most American homeowners and renters. Interior bars are mounted on the inside of the window frame or surrounding wall, which means they are protected from weather-related corrosion, vandalism, and bolt-cutting from the outside. They are also significantly harder for a burglar to defeat because any tampering attempt must occur from inside an already-secured living space.According to the U.S. Census Bureau’s 2023 American Community Survey, approximately 44.1 million Americans live in rented apartments — a population segment that overwhelmingly cannot drill through exterior masonry or modify building facades without landlord approval. Interior bars solve this problem elegantly: many telescopic models require no permanent wall anchors whatsoever, relying instead on tension-based pressure mounting that leaves zero damage behind when removed.From a purely statistical standpoint, the National Institute of Justice has confirmed that visible physical barriers — including window bars and door grilles — are among the top deterrents cited by convicted burglars during post-arrest interviews. Burglars consistently choose the path of least resistance. A window with visible interior metal bars is passed over in favor of an unprotected one roughly 80% of the time, according to studies referenced by the National Criminal Justice Reference Service. Understanding this psychology reinforces why learning how to install window bars inside your home DIY is a genuinely high-return investment of your time.
Interior vs. Exterior Window Bars: Which Offers Better Protection?
Exterior window bars are exposed to the elements year-round and can be attacked with bolt cutters or angle grinders before a burglar even enters your property. Interior window bars, by contrast, are only accessible once the intruder has already broken the glass — adding a second critical barrier that dramatically slows entry. Most burglars abandon a break-in attempt if it takes longer than 60 seconds, according to security research cited by the RAND Corporation. Interior bars effectively guarantee that additional time penalty. For renters and condo owners in cities like Los Angeles, New York, or Philadelphia, interior mounting is also the only legally permissible option under most lease agreements.
Legal Landscape: Window Bar Regulations Across US States
Window bar regulations in the United States vary significantly by jurisdiction. New York City’s Local Law 57 mandates that landlords install window guards in any unit where children under 10 reside, specifying maximum bar spacing of no more than 4.5 inches. California’s Title 24 Building Code requires that bars installed in sleeping rooms include a quick-release mechanism operable from the inside without tools or a key. The International Building Code (IBC) and NFPA 101 Life Safety Code both require egress-compliant openings in all sleeping areas. Before you install any interior window security bars, check your city and state codes — and always prioritize egress-capable models for bedrooms. The Security Window Bars Model A/EXIT was specifically engineered to meet these exact requirements.
Tools and Materials You Need Before You Begin
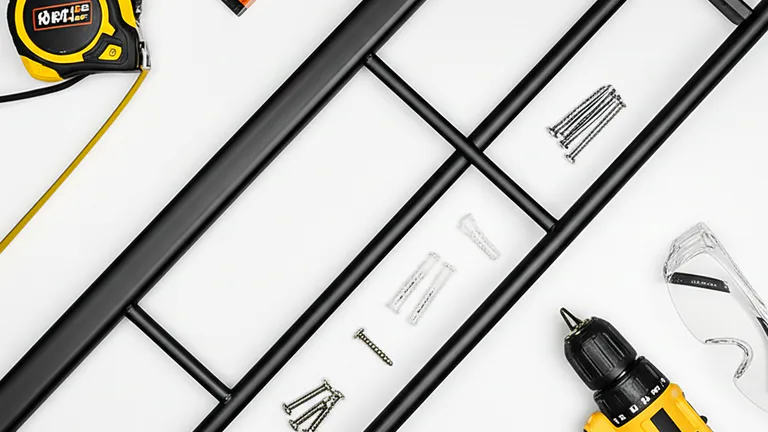
A successful DIY window bar installation starts with assembling the right tools before you touch a single bracket. Going in unprepared is the number-one reason homeowners end up with misaligned bars, stripped anchors, or — worse — a bar system that fails under pressure. The great advantage of modern telescopic interior window bars is that the required toolkit is minimal and almost universally available in any American household or local hardware store.Here is what you need to gather before starting:— Tape measure (25-foot, locking blade) — Pencil or chalk marker — Power drill with drill bits sized for wood (5/32″) and masonry (3/16″ carbide-tipped) if anchoring to masonry — Level (24-inch torpedo level preferred) — Stud finder (essential for wood-frame walls) — Phillips head and flathead screwdrivers — Lag screws or toggle bolts (typically included with your bar set) — Wall anchors appropriate to your substrate (wood, drywall, brick, or concrete block) — Safety glasses and work gloves — Your Security Window Bars unit (Model A, Model B, or Model A/EXIT depending on your window type)If you are installing bars in a basement or on a ground-floor window where masonry walls are common — as is typical in older Chicago two-flats, Detroit bungalows, or Philadelphia rowhomes — you will specifically need that carbide-tipped masonry bit and appropriate concrete anchors. Do not attempt to use standard wood screws in concrete or brick: they will pull out under lateral force.
Choosing the Right Security Window Bar Model for Your Window Type
Not every bar system suits every window. The SWB Model A Telescopic Window Bar is ideal for standard single-hung or double-hung windows measuring 22 to 36 inches wide — covering the vast majority of US residential window sizes. It requires no drilling for many installations, making it the preferred choice for renters. The SWB Model B Wall-Mount Window Bar uses heavy-gauge steel anchored directly into the wall framing or masonry, delivering a permanently fixed solution best suited for ground-floor windows, garages, and commercial properties where maximum rigidity is non-negotiable. For any bedroom or sleeping area — which is a legal requirement in most US states — the SWB Model A/EXIT with its patented quick-release egress mechanism is the only fully code-compliant interior option. Selecting the wrong model can create both security gaps and fire-safety liabilities, so match your bar to the window location and occupancy type before purchasing.
Substrate Identification: Wood Frame vs. Masonry vs. Vinyl Windows
Your window frame substrate determines your entire fastening strategy. Wood-frame windows — found in most homes built before 1980 and common across the Midwest and Northeast — accept lag screws directly into the frame or surrounding stud wall with excellent holding strength. Vinyl-frame windows, prevalent in homes built after 1995, are too soft and hollow to accept screws reliably; in this case, you must anchor into the surrounding drywall and wall studs using a stud finder to locate solid framing. Masonry openings — typical in basements, brick-faced urban rowhouses in Baltimore or Boston, or concrete-block construction — require carbide masonry bits, sleeve anchors or Tapcon screws, and a hammer drill for clean penetration. Identifying your substrate before drilling prevents stripped holes, wasted anchors, and weak mounting points that could fail during an actual forced-entry attempt.
How to Measure Your Windows Correctly Before Installing Security Bars
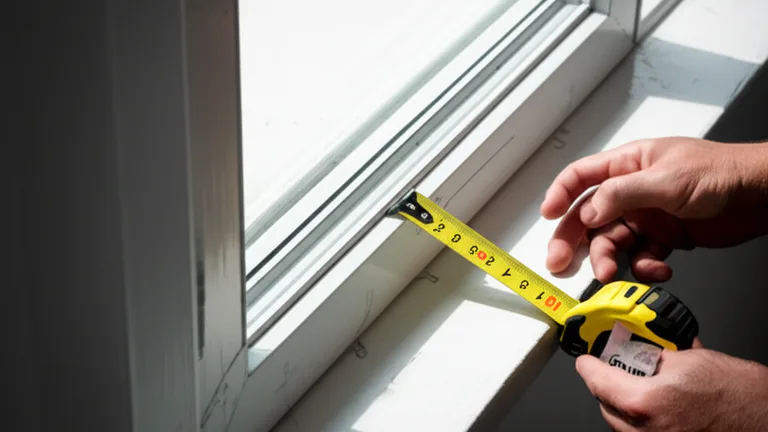
Accurate measurement is the single most important preparatory step when you are learning how to install window bars inside your home DIY. An improperly measured bar will either fall short of the frame — leaving exploitable gaps — or extend too far, making installation physically impossible. Take your time here; a five-minute measuring session prevents an hour of frustrating troubleshooting later.The golden rule of window bar measurement: always measure the inside dimension of the window opening, not the outside or the glass pane itself. You want the bar to span the full clear opening from one side of the interior frame reveal to the other.Step 1: Measure the clear width of the window opening at three points — top, middle, and bottom. Windows in older American homes are rarely perfectly square. Record the narrowest measurement; your bar must never exceed this width.Step 2: Measure the clear height of the opening. For multi-bar installations using horizontal bars, this tells you how many bars you need and at what spacing.Step 3: For telescopic models like the SWB Model A, confirm your measurement falls within the 22″–36″ adjustment range. If your window is narrower or wider, you will need a different configuration.Step 4: Note the depth of your window sill and the presence of any handles, locks, or cranks that project into the opening. Your bar system must clear these protrusions or your window will be permanently locked shut — a fire safety hazard.
Standard US Window Sizes and How They Affect Bar Selection
According to industry standards published by the Window and Door Manufacturers Association (WDMA), the most common single-hung and double-hung window widths in American residential construction are 24″, 28″, 30″, 32″, 36″, and 48″. The SWB Model A covers the 22″–36″ range with its telescopic design, which accounts for the majority of standard bedroom and living room windows found across the country. Wider picture windows or specialty bay windows — common in Midwest ranch-style homes — may require two side-by-side bar units or a custom wall-mount solution. Always verify your specific measurement before ordering to avoid returns and installation delays.
Marking Anchor Points with Precision
Once you have your bar unit in hand and your window measured, hold the bar assembly up to the window opening at your intended mounting height. Use a pencil to mark the exact center of each mounting hole or bracket footprint on the wall or frame surface. Then use your torpedo level to confirm the marks are perfectly horizontal — a bar installed even slightly off-level will bind in its telescopic mechanism over time and may fail to extend smoothly for egress use. For wall-anchored systems, use your stud finder to verify whether your pencil marks fall over solid framing or hollow drywall cavity. Solid stud contact is always preferred; if none is available, use heavy-duty toggle bolts rated for a minimum 200 lbs. pull-out strength.
Step-by-Step Installation Process for Interior Window Security Bars
With your tools assembled, substrate identified, and anchor points marked, you are ready for the actual installation. The following process applies to wall-mounted and frame-mounted interior bar systems. Telescopic no-drill models follow a simplified version of these steps focused on tension adjustment rather than fastening.This walkthrough is specifically designed for American homeowners tackling a DIY interior security bar installation without professional assistance. Estimated total time: 15–30 minutes per window for most installations.
Step-by-Step: Drilling and Anchoring into Wood Frame Walls
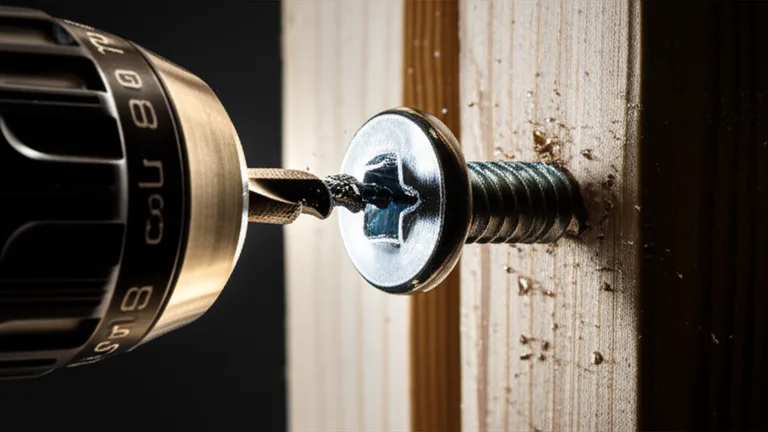
Step 1 — Pre-drill pilot holes: Using a 5/32″ wood drill bit, bore pilot holes at each marked anchor point to a depth of at least 1.5 inches into the stud or frame material. Pilot holes prevent wood splitting and ensure your lag screws thread cleanly without stripping.Step 2 — Position the bracket or mounting plate: Hold the bracket against the wall, aligning it with your pilot holes. Have a second person assist if the bar assembly is heavy or awkward.Step 3 — Drive the lag screws: Insert the provided lag screws or 3/8″ x 2.5″ structural lag bolts and drive them in with your drill using a socket bit. Do not overtighten — snug plus a quarter turn is sufficient. Overtightening can crack wood frames in older homes.Step 4 — Install the bar: Slide or snap the bar unit into the mounted brackets according to your model’s specific bracket design. For the SWB Model A, this means inserting the telescopic bar into both side brackets and expanding it until it contacts both sides of the frame with firm tension.Step 5 — Test rigidity: Apply firm lateral and downward pressure to the installed bar. There should be no perceptible movement or play. A properly installed bar should resist 200+ lbs of lateral force without shifting.
Step-by-Step: Anchoring into Masonry or Concrete Walls
Masonry installation requires a few additional steps compared to wood framing, but delivers the highest possible pull-out strength — critical for basement windows and ground-floor commercial applications.Step 1 — Mark and center-punch: Use a nail set or masonry center punch to create a starting dimple at each anchor mark. This prevents your drill bit from skating across the hard surface.Step 2 — Drill with a carbide-tipped masonry bit: Set your hammer drill to hammer-drill mode and bore 3/16″ holes to a depth of at least 1.75 inches into the masonry. Clear dust from the hole with a can of compressed air.Step 3 — Insert sleeve anchors or Tapcon screws: For concrete block or poured concrete, use 3/16″ x 1-3/4″ Tapcon concrete screws or equivalent sleeve anchors. Drive them until the head sits flush against your mounting bracket.Step 4 — Mount and test: Follow the same bracket-mounting and bar-installation sequence described above for wood installations. Concrete anchors properly installed into solid masonry should achieve pull-out strengths exceeding 500 lbs — more than sufficient to defeat a forced-entry attempt.For detailed installation diagrams specific to each SWB model, visit the official Window Bar Installation Guide on the SWB website.
Installing Telescopic No-Drill Bars: The Renter-Friendly Method
For the millions of American apartment renters who cannot drill into walls or modify their window frames, the SWB Model A telescopic system offers a pressure-tension mounting method that requires zero permanent alteration. To install: extend the bar to slightly less than the full width of the window opening. Position both rubber-tipped ends against the interior face of the window stop on each side — the narrow vertical strip of wood that the window sash slides against when closed. Rotate the central tension adjustment collar clockwise until the bar is firmly wedged in place with strong lateral tension. There should be absolutely no lateral movement. For additional security, many renters add a second bar at a different height. When moving out, simply reverse-rotate the collar to release tension and remove the bar without a single mark left behind. This method is also ideal for landlords managing turnover between tenants, as described throughout our complete guide to window bars inside and interior window security options.
Fire Code Compliance and Egress Requirements for DIY Window Bar Installations
This is the section that separates responsible DIY installers from those who unknowingly create fire hazards. In the United States, building codes at both the national and state level impose clear egress requirements for windows in sleeping areas — and ignoring these rules can be fatal.The International Residential Code (IRC) Section R310 requires that every sleeping room have at least one emergency escape and rescue opening. This opening must have a minimum net clear opening of 5.7 square feet (or 5.0 sq ft for ground-floor windows), with a minimum clear height of 24 inches and minimum clear width of 20 inches. NFPA 101 Life Safety Code Chapter 24 reinforces these requirements for residential occupancies nationwide.What this means for your DIY installation: any window bar system installed in a bedroom, basement sleeping area, or any room used for sleeping MUST include a quick-release or quick-open mechanism operable from the inside without tools, keys, or special knowledge. A permanently welded or locked bar across a bedroom window is not just a code violation — it is a life-threatening obstruction in the event of a house fire.According to the National Fire Protection Association, roughly 2,500 Americans die in home fires every year. Many of those fatalities occur when occupants cannot escape through blocked or obstructed windows. This is not a theoretical risk.
How the SWB Model A/EXIT Meets IBC and NFPA 101 Egress Standards
The SWB Model A/EXIT Egress-Compliant Window Bar was engineered specifically to address the egress compliance gap in the DIY security bar market. Its patented quick-release mechanism allows any occupant — including children and elderly adults — to open the bar from the inside in under three seconds without any tools, keys, or combination codes. This mechanism meets the requirements of IBC Section 1010.2.4, NFPA 101 Section 24.2.2, and OSHA standard 1910.37(a)(3) for means of egress. The telescopic frame then collapses to one side, delivering a clear egress opening that meets the IRC’s minimum 20″ x 24″ net clear dimension requirement. For bedrooms in any US state, the Model A/EXIT is the only SWB bar that should be installed — full stop. It delivers the same steel strength and burglar deterrence as fixed bars while eliminating the life-safety liability.
Bar Spacing, Child Safety, and NYC Local Law 57 Compliance
Beyond egress, bar spacing is a child safety issue governed by specific codes. New York City’s Local Law 57 — one of the most detailed window guard ordinances in the country — requires that window guard bars be spaced no more than 4.5 inches apart in any residential unit where children under 10 years old reside. The intent is to prevent a child from squeezing through the bars or getting their head trapped between them. The ASTM F2090 standard for window fall prevention devices echoes similar spacing requirements. When installing your interior window bars, check that horizontal or vertical bar spacing never exceeds 4 inches in any home where young children are present. Most SWB models are factory-set to safe spacing dimensions. If you are a parent installing window bars primarily for fall prevention rather than burglary deterrence — a common scenario in upper-floor urban apartments — ensure your chosen model is specifically certified for child fall prevention in addition to security.
Common DIY Installation Mistakes and How to Avoid Them
Even experienced homeowners make installation errors that reduce the effectiveness of their interior window bars or create compliance problems. Knowing the most common pitfalls before you begin is your best defense against repeating them.Mistake #1 — Anchoring into drywall only: Drywall provides essentially no structural pull-out resistance for a security application. If your lag screws do not catch solid wood framing or masonry, a determined intruder can pull the entire bar assembly off the wall with a single hard push. Always use a stud finder and verify solid contact before driving fasteners.Mistake #2 — Measuring the window glass instead of the opening: The glass pane is smaller than the clear opening. Bars sized to the glass will be too short and will not span the full security gap.Mistake #3 — Ignoring egress requirements for bedrooms: As detailed in the previous section, a non-egress bar in a sleeping room is both a code violation and a life-safety hazard. Always use the Model A/EXIT or equivalent egress-compliant product for any sleeping area.Mistake #4 — Installing bars without testing the window operation: After installation, fully open and close your window to confirm the bar does not obstruct normal operation. A window that cannot open for ventilation is a habitability problem — especially in summer months across the South and Southwest.Mistake #5 — Skipping the level check: A bar installed even a few degrees off horizontal will bind in its telescopic mechanism and may fail to release quickly in an emergency egress scenario.
Testing Your Installation: The 200-lb Force Test
Once your bars are fully installed, conduct a structured load test before considering the job complete. Apply firm lateral pressure — approximately 50 lbs — toward the exterior of the window while gripping the bar at its center. Then push upward and downward. There should be zero deflection, zero movement of mounting brackets, and no creaking or shifting sounds. A properly anchored interior window security bar system should resist lateral forces far exceeding what an unaided human can generate by hand. If you detect any movement, remove the bar immediately, re-evaluate your anchor points, and re-install using larger fasteners or a different substrate strategy. Never leave a bar installed that you are not fully confident in — a false sense of security is more dangerous than no security at all.
Maintenance After DIY Installation: Keeping Your Bars Secure Long-Term
Interior window security bars require minimal but consistent maintenance to remain effective over time. Every three to six months, inspect all mounting hardware for signs of loosening — wood frame screws can work loose due to seasonal expansion and contraction of the frame, especially in climates with significant humidity variation like the Gulf Coast states or the Pacific Northwest. Tighten any fasteners that have developed play. For telescopic models, inspect the tension collar adjustment for wear or corrosion and apply a small amount of dry graphite lubricant to keep the mechanism sliding smoothly. For powder-coated steel bars, inspect the coating annually for chips or scratches and apply a small amount of rust-inhibiting touch-up paint to any bare metal spots — particularly important in high-humidity environments. A well-maintained bar system will deliver decades of reliable security with minimal ongoing investment.
Cost Comparison: DIY Window Bar Installation vs. Professional Installation
One of the most compelling arguments for tackling this project yourself is the dramatic cost difference between DIY and professional installation. Understanding the full cost picture helps you make a confident, financially sound decision.Professional window bar installation by a licensed contractor or security company in the United States typically costs between $600 and $1,800 per window, according to HomeAdvisor and Angi pricing data for 2024. This figure includes materials (usually fixed welded bars), labor, and any wall repair for patching around anchors. For a home with six windows — a very modest US single-family home — professional installation across all ground-floor windows could run $3,600 to $10,800.By contrast, the SWB Model A Telescopic Window Bar costs $90 per unit. The Model B Wall-Mount is $91, and the Model A/EXIT egress-compliant version is $92. With the tools described in this guide — most of which you likely already own — your total per-window cost stays well under $100. For that same six-window home, DIY installation with SWB bars costs under $600 total — less than the professional quote for a single window.Beyond direct cost, DIY installation delivers same-day security. Professional installation schedules in high-demand urban markets like Los Angeles, New York, and Chicago routinely run two to four weeks out. With SWB bars available through Amazon FBA with fast nationwide delivery, you can order today and have bars installed tomorrow.
Why Renters Save the Most with DIY Telescopic Window Bars
Renters face a unique financial double jeopardy with professional window bar installation: they pay the full installation cost and then pay again — in the form of security deposit deductions — when they move out and the bars must be removed. Permanent bars drilled into rental unit frames are an almost universal lease violation. The SWB Model A’s no-drill tension mounting eliminates both problems entirely. Renters pay $90 once, install in 15 minutes, live with enhanced security for the duration of their lease, and remove the bars damage-free on move-out day. The bar then travels with them to their next apartment. For a renter in a high-crime neighborhood of Memphis, Philadelphia, or Baltimore — cities consistently appearing in the FBI’s top 20 for property crime rates — this $90 investment delivers the same deterrence value as a $1,200 professional installation, fully portable and fully refundable on demand.
Landlords and Property Managers: Bulk DIY Installation Strategies
For landlords managing multiple units — whether in a Chicago three-flat, a Houston apartment complex, or a portfolio of Baltimore rowhomes — the economics of DIY window bar installation become even more attractive at scale. A property manager securing 20 ground-floor windows with SWB Model B wall-mount bars spends approximately $1,820 in materials plus perhaps four to six hours of skilled handyman labor billed at $50/hour. Total cost: under $2,200 for 20 windows. The equivalent professional installation quote at the low end of the market ($600 per window) would exceed $12,000 for the same scope. Beyond cost, landlord-installed window bars demonstrably reduce property insurance premiums in many US states and can serve as a documented risk-mitigation measure in liability proceedings following a tenant burglary. Contact your insurer before installation to document the upgrade. To explore the full range of interior and exterior security solutions including metal bar windows, window grates, and security bars that open for ventilation, visit our complete guide to window security bars that open and interior window bar options.
Choosing the Right Security Window Bar for Every Room in Your Home
A comprehensive DIY window security strategy does not treat every window in your home identically. Different rooms present different risk profiles, different occupancy concerns, and different code requirements. Matching the right SWB bar model to the right room is the final step in building a truly complete interior security system.Ground-floor living room and dining room windows represent the highest burglary risk points in any American home. These windows are large, typically unoccupied at night, and accessible without any climbing. Here, the SWB Model B Wall-Mount Bar — permanently anchored into the wall framing or masonry — delivers maximum rigidity and deterrence. There is no egress requirement for non-sleeping rooms, so a fixed system is fully appropriate.Ground-floor and basement bedroom windows combine high burglary risk with strict egress requirements. The only compliant choice here is the SWB Model A/EXIT with its patented quick-release mechanism. Do not compromise on this point.Upper-floor bedroom windows in homes with young children carry fall prevention as the primary concern rather than burglary deterrence. The SWB Model A or Model A/EXIT provides the necessary barrier while the quick-release feature ensures adult emergency egress capability is preserved.Basement utility and storage windows are often the most overlooked entry points in American homes. They are small, dark, and frequently hidden from street view — ideal conditions for a slow, quiet forced entry. A permanently mounted SWB Model B wall-mount bar on every basement window closes this gap completely.For a comprehensive view of all interior window security bar options — including metal bar windows, clear bars, window grates, patio door bars, and door grilles — explore the full product family at Security Window Bars on Amazon USA.
Patio Door Security: Extending Your DIY Bar Strategy Beyond Windows
Sliding patio doors represent a significant and frequently underestimated entry point. A standard patio door can be defeated in seconds by simply lifting the door off its track — a technique requiring no tools and less than 10 seconds. A patio door bar (also called a door security bar or sliding door bar) braced against the floor of the door track prevents this lift-off attack and also prevents the door from being forced open laterally. For homeowners who have completed their window bar installation, extending the same security logic to patio doors with a purpose-built door bar is a natural and cost-effective next step. Many SWB customers secure both their windows and their patio door as part of a single afternoon DIY security project, achieving comprehensive ground-floor perimeter protection for well under $300 total.
Window Grates and Door Grilles: Fixed Security for High-Risk Properties
For commercial property owners, ground-floor retail operators, or residential property owners in the highest-crime US urban markets, fixed window grates and door grilles provide a level of security beyond what standard residential bars offer. These heavier-gauge welded steel systems cover the full window or door opening with a grid pattern that is essentially impenetrable without power tools. When code-compliant quick-release panels are incorporated into the grate design — a requirement in most US commercial occupancies under IBC Chapter 10 — they provide both maximum security and emergency egress capability. The SWB Model B wall-mount system serves as the residential-grade equivalent of this approach, offering the closest thing to professional grate-level security available in a DIY-installable package. For properties in Detroit, Memphis, Baltimore, or other cities consistently ranked for high property crime rates, this level of hardening is not paranoia — it is prudent risk management backed by FBI crime data.

🏆 Conclusion
Learning how to install window bars inside your home DIY is one of the most impactful physical security upgrades available to American homeowners, renters, landlords, and property managers. With the right SWB model selected for each room, proper measurement and anchoring technique, and full compliance with IBC, IRC, and NFPA 101 egress requirements, you can achieve professional-grade interior window security at a fraction of the cost of hiring a contractor. The FBI’s data on residential burglaries makes one thing crystal clear: physical barriers work. They deter, they delay, and they deny access in ways that alarm systems alone cannot. From a ground-floor apartment in Houston to a basement in Chicago to a ranch home in suburban Atlanta, interior window bars are a universally applicable, budget-friendly, and code-compliant solution for every American household. Security Window Bars builds every product in its lineup to meet the specific needs of the US market — adjustable sizing, egress compliance, renter-friendly installation, and steel strength that does not compromise on aesthetics. Secure your home this weekend. It takes less time than you think.
Security Window Bars · USA
Secure Your Home Today
Protect your home today. Shop Security Window Bars on Amazon for fast delivery to all 50 states — or build your complete interior security system at securitywb.com. Choose from the Model A Telescopic Bar, the Model B Wall-Mount Bar, or the Model A/EXIT Egress-Compliant Bar — all starting at $90. Shop Now on Amazon | Contact SWB
Shop on Amazon →Frequently Asked Questions
It depends on the installation method. If you use the SWB Model A telescopic no-drill bar, which mounts using pressure tension against the window stop and requires zero drilling or permanent wall modification, most lease agreements permit installation without landlord approval because no damage is caused. However, any installation that requires drilling into walls, window frames, or masonry — such as the Model B wall-mount system — typically constitutes a lease modification and requires written landlord consent. Always review your lease agreement before drilling, and document any landlord-approved modifications in writing to protect your security deposit.
Non-egress window bars installed in a bedroom do violate the International Residential Code (IRC) Section R310 and NFPA 101 Life Safety Code requirements, which mandate at least one operable emergency escape opening in every sleeping room. However, egress-compliant bars like the SWB Model A/EXIT — which feature a patented quick-release mechanism operable from the inside without tools or keys — fully satisfy these requirements. The Model A/EXIT delivers IBC, NFPA 101, and IRC compliance while maintaining the same burglary deterrence as fixed bars. For any sleeping room, the Model A/EXIT is the only appropriate choice.
A properly installed SWB interior window bar — anchored with 3/8″ lag screws into solid wood framing or 3/16″ Tapcon screws into masonry — should withstand lateral pull-out forces exceeding 200 lbs per anchor point. With four anchor points per installation (two per side bracket), total system resistance can exceed 800 lbs before fastener failure — far beyond what an unaided burglar can generate. Concrete sleeve anchors in solid masonry deliver even higher values, often exceeding 500 lbs per anchor. The bar’s telescopic steel body is rated to withstand equivalent bending forces. Always conduct a manual push test after installation to verify zero movement before considering the job complete.
New York City’s Local Law 57 — the most specific child window guard ordinance in the country — requires that bars in any residential unit housing children under 10 be spaced no more than 4.5 inches apart. This prevents a child’s head from passing through the gap. ASTM F2090, the standard for window fall prevention devices, specifies a maximum opening width of 4 inches for fall prevention applications. SWB recommends maintaining a maximum 4-inch spacing for any home with young children, regardless of local code jurisdiction. If your bar system has wider factory spacing, install additional intermediate bars or choose a model with appropriate spacing built in.
You should not anchor directly into vinyl window frame extrusions, as vinyl is too soft, hollow, and structurally weak to hold lag screws under lateral security loads. For vinyl-framed windows, you have two options: use the SWB Model A telescopic no-drill bar, which mounts using tension pressure against the window stop rather than screw anchors, or anchor the Model B wall-mount brackets into the surrounding drywall and wall studs — bypassing the vinyl frame entirely. Use a stud finder to locate framing on each side of the window opening, then position your brackets to catch solid wood studs. This approach provides the same structural integrity as a wood-frame installation.
For the SWB Model A telescopic no-drill bar, most first-time installers complete a single window in 10 to 15 minutes, including measuring and tension adjustment. The SWB Model B wall-mount bar — which requires drilling pilot holes, anchoring brackets, and mounting the bar — typically takes 20 to 30 minutes per window for a beginner with basic power tool experience. A homeowner securing all six ground-floor windows in a typical American single-family home can realistically complete the entire project in a single afternoon. Having the right tools assembled before you start — tape measure, drill, level, and stud finder — is the single biggest factor in keeping installation time short.
Physical barriers and alarm systems serve complementary but fundamentally different security functions. Alarm systems detect a breach after it begins and notify responders — but average police response time in American urban areas ranges from 7 to 11 minutes, according to FBI and PERF data. A determined burglar can complete a smash-and-grab in under three minutes. Interior window bars physically prevent entry rather than merely detecting it, forcing a burglar to spend minutes — not seconds — defeating the barrier. Research cited by the National Criminal Justice Reference Service indicates that burglars consistently bypass hardened targets in favor of easier opportunities. The most effective residential security strategy combines physical barriers like SWB window bars with alarm systems and exterior lighting.
In most US jurisdictions, DIY installation of interior window bars in a single-family home does not require a building permit, as it is classified as a minor home improvement rather than structural construction. However, regulations vary by city and state. New York City requires window guards meeting specific standards in residential rentals with young children, with installation documented to the landlord. Some California jurisdictions require that any security bars installed in sleeping rooms be specifically egress-compliant as a condition of lawful occupancy. Commercial properties governed by IBC typically require permitted egress-compliant security bar systems in any occupied space. Check with your local building department before installation, particularly for commercial applications or multi-family rental properties.