BLOG

security window bars
commercial window security bars aligned with storefront mullions on retail façade

Commercial & Storefront Window Bars: The 2025 Guide for Retail, Offices, and Restaurants

Smash-and-grab attempts happen fast. A rock, a hammer, or a pry bar can defeat unreinforced storefront glass in seconds—long before alarms bring help. The right commercial window security bars stop the breach at the opening, protecting merchandise and staff while keeping your brand’s look intact. In this guide, you’ll learn how storefront window bars work with modern glazing systems, which mounts make sense for aluminum vs masonry, how to balance security with visibility, and what to include in an RFP so quotes are accurate the first time.

Share

Why Storefronts Need a Different Plan

Retail and street-level offices face risks that homes rarely do: large panes, predictable closing hours, and repeated attempts on the same façade. Traditional fixes—thicker glass, sensors, and cameras—help, but window bars add what electronics can’t: a physical barrier that works during power or network failures.

Key advantages for businesses

  • Visible deterrence that reduces attempts.
  • Real delay against prying and push-ins while alarms dispatch.
  • After-hours protection without shutters or roll-downs that can hurt curb appeal.
  • Low operating cost—no subscriptions, little maintenance.

Commercial Window Security Bars vs Other Solutions

  • Bars/Grilles (this guide): fixed or hinged steel/aluminum frames anchored to the opening; can be decorative and low-profile; interior or exterior.
  • Roll-down shutters/gates: strong, but bulky and often restricted in historic or design districts; operational upkeep required.
  • Security films and laminated glass: resist shatter but still allow cut-through or push-in over time; best when layered with bars.
  • Security screens/mesh: hard to notice from a distance; cutting resistance varies; repairs can be specialized.

The winning approach for many stores: laminated glass + sensors + lighting plus interior window bars behind the glass. From the sidewalk, your brand stays visible; after hours, the opening is physically blocked.

Interior vs Exterior Storefront Window Bars (What Works Where)

Interior Commercial Window Bars

Best for: design districts, modern aluminum storefronts, professional offices, and retailers that prioritize brand visibility.
Pros: weather-protected hardware, clean exterior lines, easier quick-release for staff egress if required, and simpler permitting in many areas.
Cons: requires coordination with displays, blinds, and sprinklers; plan clearance from shelving and signage.

Exterior Commercial Window Bars

Best for: brick/block façades, rear alleys, warehouse windows, and high-risk zones where “overt deterrent” is desired.
Pros: anchors bite directly into masonry; crisp shadow lines; leaves interior displays untouched.
Cons: exposure to weather; may require design approvals; egress linkage must remain interior-only where exit paths are involved.

Quick rule: if you have a modern aluminum storefront system, favor interior window bars that anchor into surrounding structural elements—not thin face caps. For masonry openings, exterior or interior can both be excellent; pick based on egress and branding needs.

Safety & Egress in Commercial Spaces

Employees and customers must be able to exit quickly during emergencies. If a barred window is part of an occupied area or an egress path, choose window security bars that open from inside with a one-hand, one-motion quick-release—no keys or tools. Keep the swing path clear of displays and shades, and include bars in your fire drills.

Always coordinate with your local Authority Having Jurisdiction (AHJ). Even when storefront window bars aren’t on an egress route, documenting staff-side quick-release locations and drills is smart risk management.

Store Types & Use-Case Patterns

  • Jewelry & high-value retail: layered defense; interior hinged bars behind laminated glass; discrete, satin finish.
  • Pharmacies & medical: interior security window bars for side/rear windows; cleanable finishes; minimal dust traps.
  • Electronics & bike shops: exterior fixed bars at alleys; interior hinged bars at display windows for after-hours.
  • Restaurants & cafés: decorative storefront window bars that echo brand geometry; preserve daylight and sightlines.
  • Professional offices & salons: slim, modern patterns that read architectural—not industrial.

Design That Protects and Sells

Your windows market your brand. Bars should disappear into the composition from 15–20 feet away, then communicate “do not try” up close.

Design principles

  • Align rails to mullions and sign bands so the grid feels intentional.
  • Choose satin black to match door hardware/lighting or white to blend with frames; custom bronze/charcoal for premium storefronts.
  • Keep projection depth consistent across a run of windows.
  • Prefer capped or concealed fasteners; blended welds and rounded edges look premium.
  • Use decorative security window bars that mirror your brand’s geometry (modern grids for tech; soft arches for cafés).

Materials & Hardware for Commercial Duty

  • Powder-coated steel: superior stiffness; supports slim sightlines; great value.
  • Aluminum: lighter and corrosion-resistant; size up profiles to match strength.
  • Coastal/damp packages: galvanized steel under powder, stainless hinge pins, and sealed penetrations.
  • Hinges: full-length piano hinges distribute loads and keep long bars aligned; heavy butt hinges also work for modular panels.
  • Tamper resistance: security heads, pinned set screws, and interior-only release hardware.

Anchoring to Different Storefront Conditions

1) Aluminum Storefront Systems (Curtain Wall / Stick-Built)

  • Never rely on thin face caps for structural anchoring.
  • Tie into tubes, jamb receptors, or adjacent framing where loads can be carried.
  • Use through-bolts with backing plates where accessible, or mount to surrounding wall structure (wood/block/steel) rather than the mullion cover.
  • Avoid drilling into glazing pockets; maintain thermal breaks and weeps.

2) Brick & Stone Veneer

  • Target brick/stone units (not soft mortar) with sleeve or wedge anchors sized to tab holes.
  • Pre-drill with a hammer drill and vacuum dust; dust is the #1 cause of loose anchors.
  • Keep holes a safe distance from edges to avoid spalls; seal penetrations.

3) Concrete / CMU Block

  • For CMU, aim for filled cells or use anchors rated for hollow block; consider chemical anchors for high loads.
  • In poured concrete, wedge anchors provide robust pull-out; verify rebar locations where drilling deep.

4) Wood Framing (Infill or Historic Retrofits)

  • Find studs; pre-drill undersized for lags and use washers.
  • Historic trim: use spacers to preserve reveals and avoid crushing profiles.

Configurations for Business Hours vs After Hours

  • Hinged interior panels: stay open during business hours for an unobstructed view; close and lock after hours (with interior quick-release for staff).
  • Fixed exterior grilles: ideal for alleys and non-display windows that aren’t part of customer experience.
  • Modular sections: allow selective protection (e.g., cash-wrap window only) with fast service access.
  • Hybrid: interior bars at the main display; exterior bars at side/rear openings.

Measuring & Specifying (So Quotes Are Apples to Apples)

  1. Draw the elevation with mullion locations and sign bands.
  2. List each opening with clear width/height (3-point method) and substrate at every anchor point.
  3. Note obstructions: shades, sprinklers, signage, transoms, security devices, AC sleeves.
  4. Mount & configuration: interior/exterior; fixed/hinged; quick-release locations.
  5. Finish & color: black, white, or custom (sheen level).
  6. Reveal plan: target visual gaps and projection depth across all windows.
  7. Access: ladder/scissor lift, store hours, loading/parking constraints.
  8. Compliance: egress considerations; AHJ contacts if needed.
  9. Photos: day and night, near and far, inside and out.

Installation Workflow (Commercial)

Pre-job

  • Confirm substrate, hidden utilities, and storefront framing details.
  • Stage panels by bay; protect floors and displays.

Mounting

  • Start at a reference bay; set two anchors; level/plumb; then complete the pattern.
  • Torque fasteners in a cross sequence to avoid frame warp.
  • For long runs, snap a control line for consistent projection depth.

Quick-release setup

  • Place handles reachable by staff; label discreetly (“Lift to Open”).
  • Train team leads and include bars in closing procedures and fire drills.

Finish & turnover

  • Cap fasteners, seal exterior penetrations, touch up finish, and document with photos.

Maintenance Plan (Fast, Low Effort)

  • Monthly: cycle quick-release on occupied-area bars; verify nothing blocks swing (new displays move!).
  • Quarterly: wipe dust, check anchor torque, apply dry PTFE to hinge pins.
  • After storms: inspect exterior frames for chips; touch up promptly.
  • Annually: review layout vs new fixtures; confirm egress signage and train new staff.

Costs & Budgeting (What to Expect)

Pricing depends on panel length, material, finish, mount, and substrate access. In general:

  • Interior commercial window bars on wood or interior masonry: most economical to install; premium finish adds modestly.
  • Exterior bars on brick/block: higher labor for drilling, dust control, sealing, and lift access.
  • Hinged/quick-release adds hardware cost but simplifies staff egress and nightly lockup.
  • Decorative patterns and custom colors add fabrication and finishing time.

ROI lens: preventing a single smash-and-grab—glass, downtime, merchandise loss—often offsets the entire project.

Brand-Forward Design Tips (So Security Looks Like Architecture)

  • Align bar rails with mullions and signage baselines.
  • Pick a sheen (usually satin) that matches door hardware and light fixtures.
  • Keep module repeats identical across bays; mix-and-match reads “patched.”
  • For cafés and showrooms, consider decorative security window bars with a minimal grid that frames products rather than hiding them.

RFP / Spec Sheet

Project: Commercial/Storefront Window Security Bars
Location: _____________ Target Install Date: _____________

Openings & Substrates

  • Bay # / Width x Height / Substrate at anchors (aluminum tube, brick, block, concrete, wood):
    1. ___ / ___ × ___ / __________
    2. ___ / ___ × ___ / __________
    3. ___ / ___ × ___ / __________

Mount & Configuration

  • Interior Exterior Fixed Hinged Quick-Release (staff-side)
  • Hinge side: L R Projection depth target: ___ in (all bays)

Finish

  • Color: Black White Custom (RAL/Pantone): __________ Sheen: Satin Other: __________
  • Coastal package (galv + powder, stainless pins): Yes No

Constraints

  • Ladder / lift access: __________
  • Business hours & noise limits: __________
  • Egress considerations (AHJ contact if needed): __________

Attachments

  • Photos (day/night), elevation sketch with mullions, floor plan snippet if available.

Common Mistakes to Avoid on Storefronts

  • Anchoring into aluminum face caps instead of structural tubes or surrounding wall.
  • Installing fixed bars where staff egress is needed.
  • Mismatched projection depths across bays—reads sloppy from the sidewalk.
  • Skipping dust removal in masonry holes (anchors loosen).
  • Allowing shades, signage, or fixtures to block quick-release handles.
  • Mixing gloss levels/colors across a façade.

Buying Checklist for Owners & GCs (Print This)

  1. Risk profile (smash-and-grab history, alley windows, police response times).
  2. Mount (interior vs exterior) and configuration (fixed/hinged/quick-release).
  3. Substrate at each anchor location (aluminum tube, brick, block, concrete, wood).
  4. Measurements (3-point width/height; diagonals), plus photos.
  5. Design (align with mullions; decorative or minimal).
  6. Finish & sheen (black/white/custom; coastal package if needed).
  7. Projection depth and visual reveals—consistent across bays.
  8. Access & schedule (ladders/lifts; off-hours work allowed?).
  9. Egress & training (staff drills; discreet labels).
  10. Maintenance plan (monthly release test; quarterly torque check).

FAQs

Will storefront window bars make my shop look closed or unsafe?


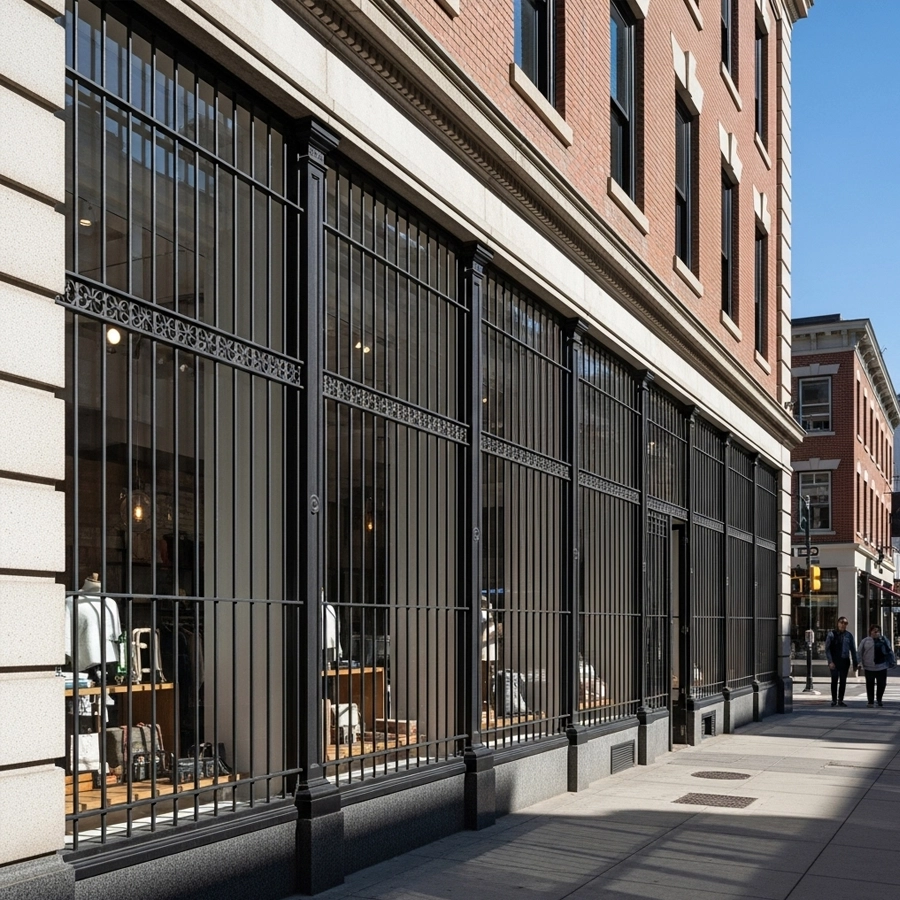
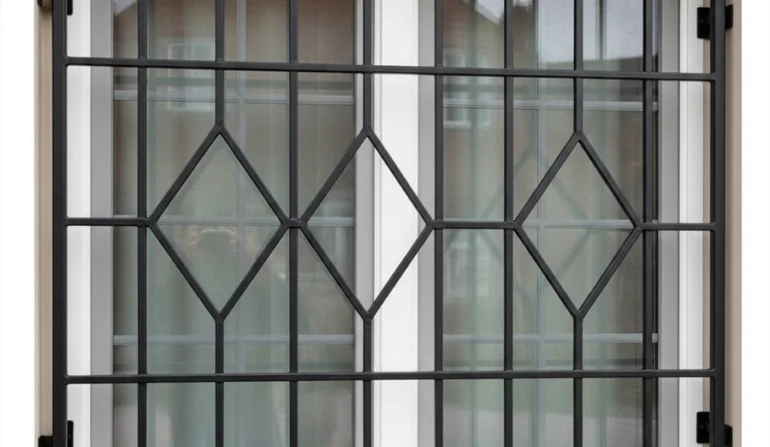
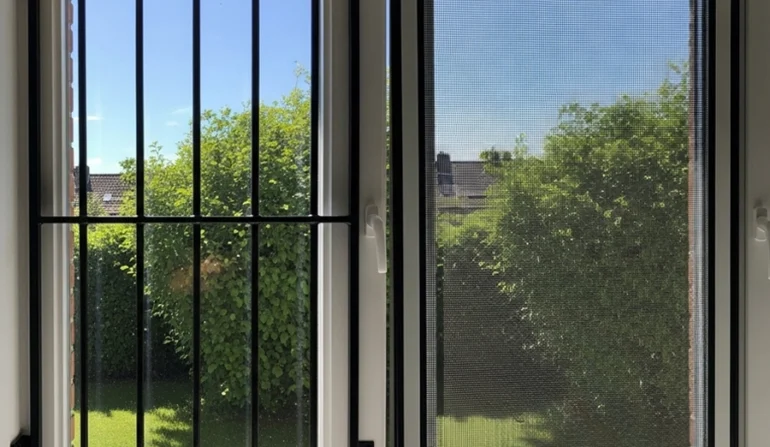
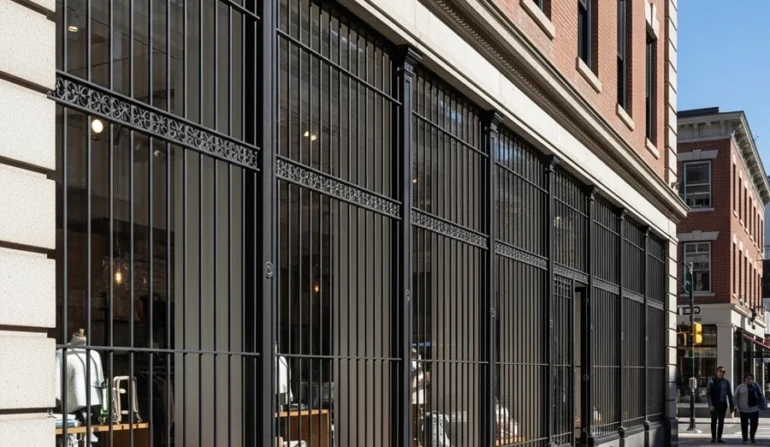
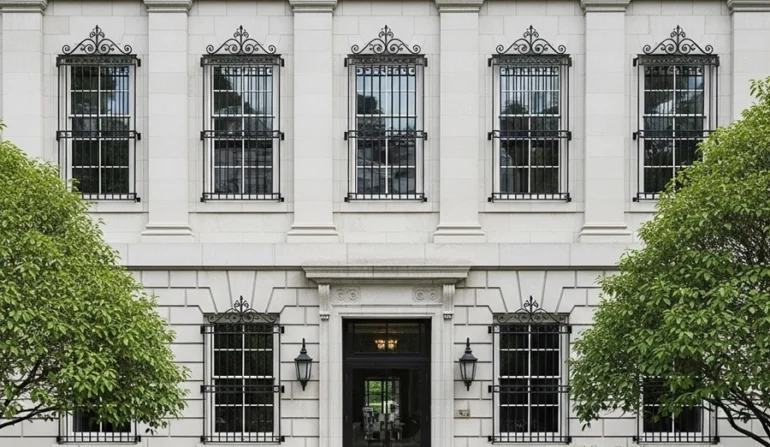
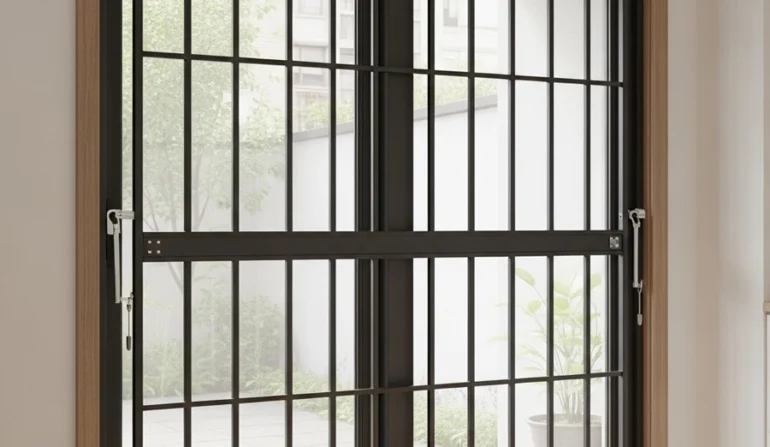
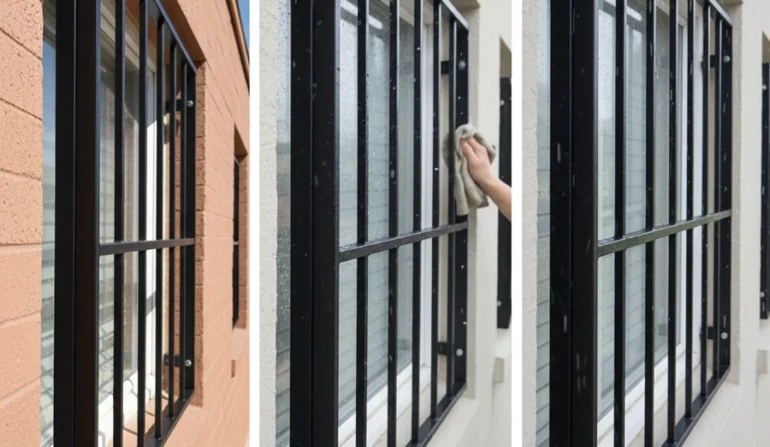
Not when you use decorative commercial window security bars with slim profiles, satin finishes, and rails aligned to mullions. From a few steps back, they read as part of the architecture.

Are interior bars strong enough for retail?


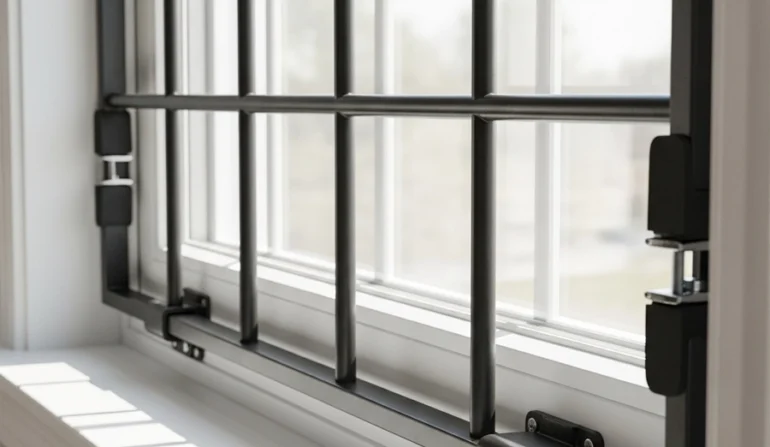
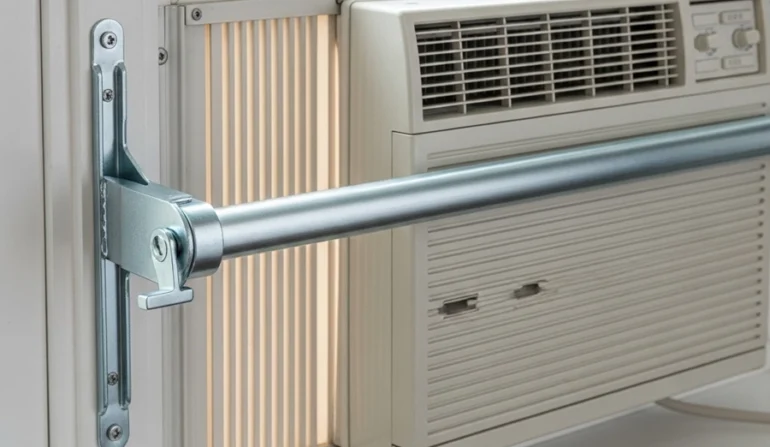
Yes—when anchored to structural tubes or surrounding framing. Interior mounts also protect hardware from weather and keep the exterior clean for branding.

Can staff still get out quickly?


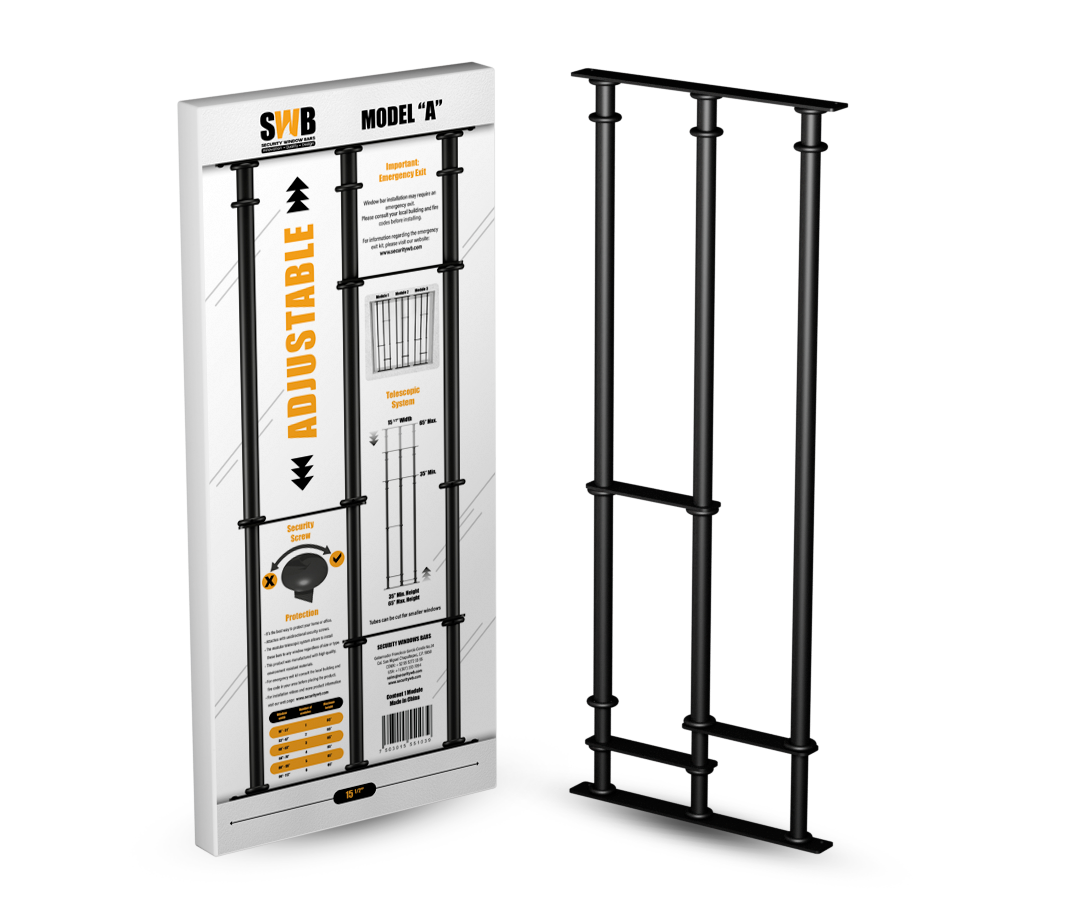
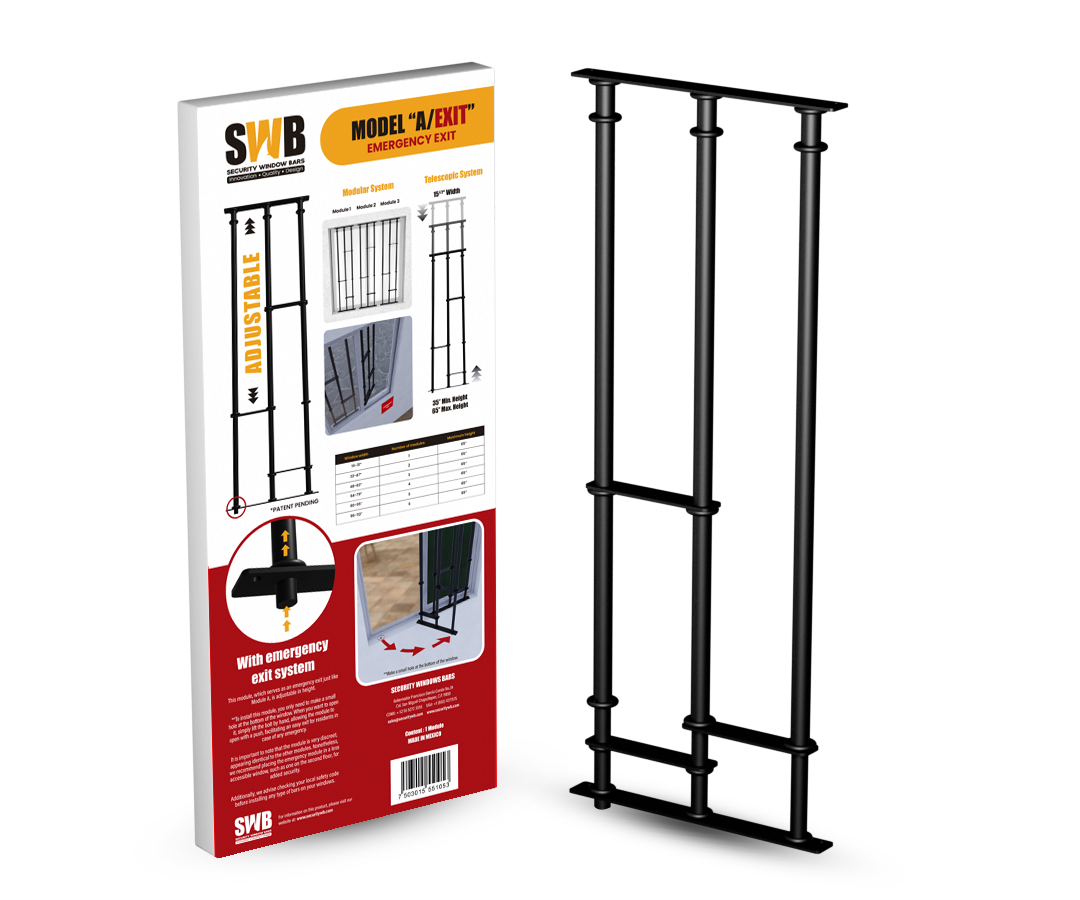
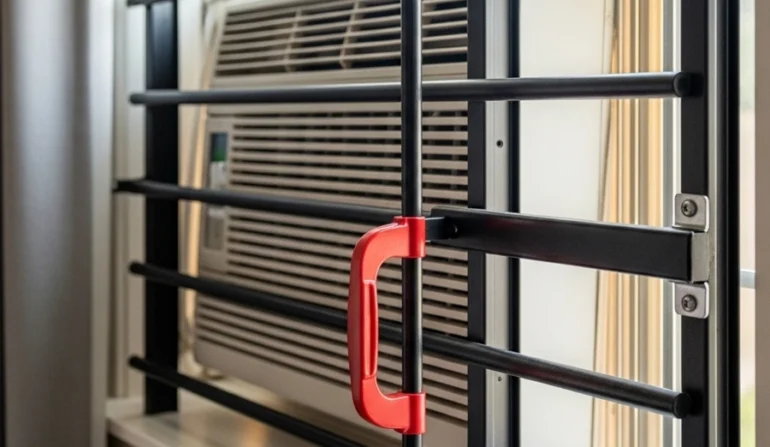
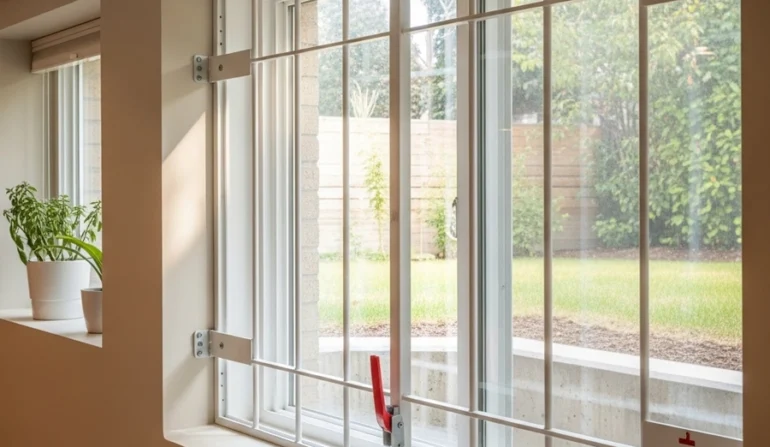
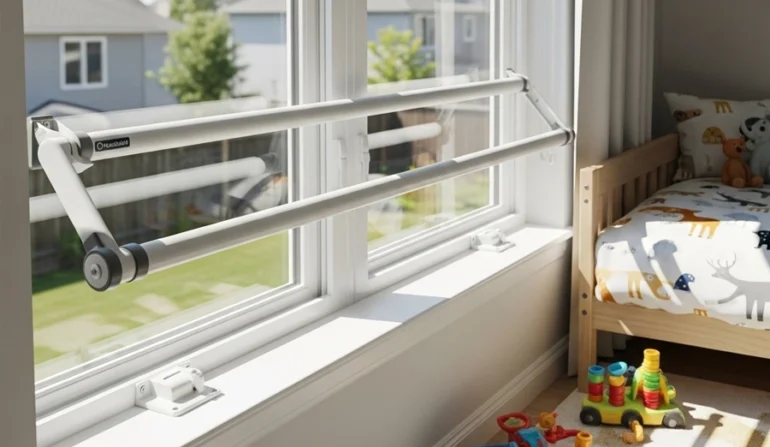
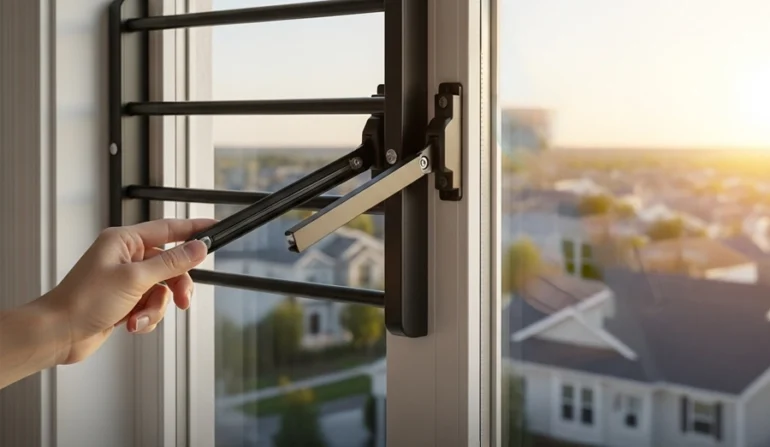
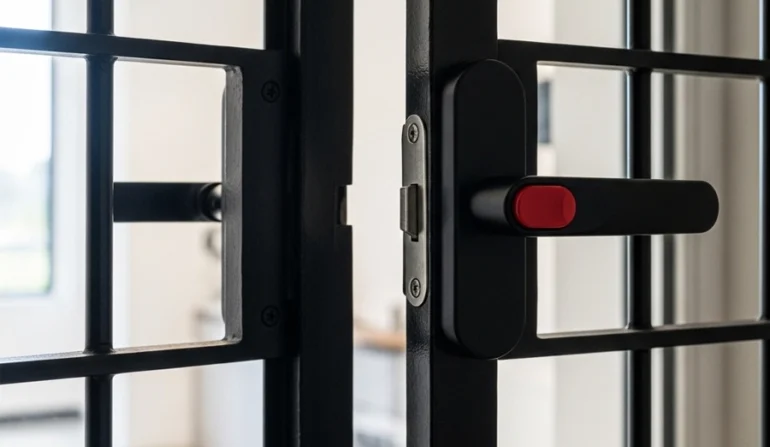
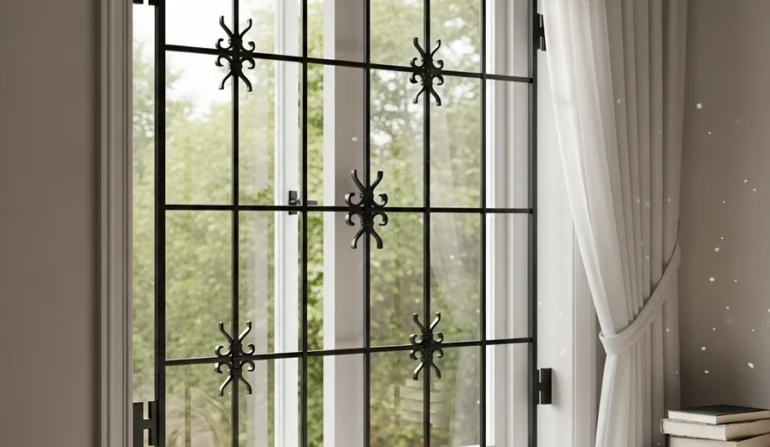
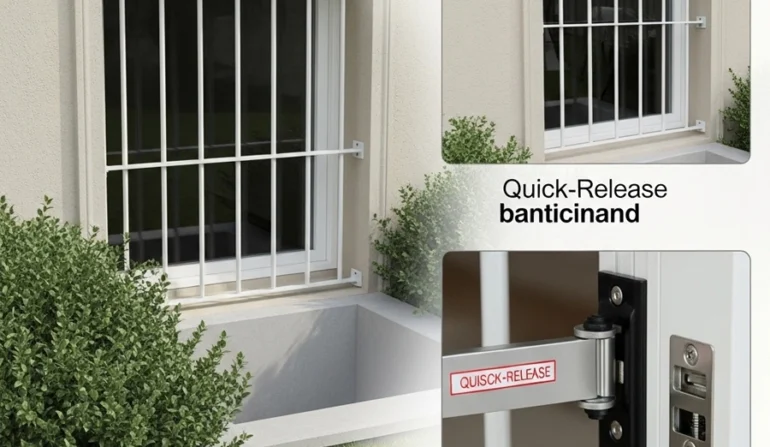
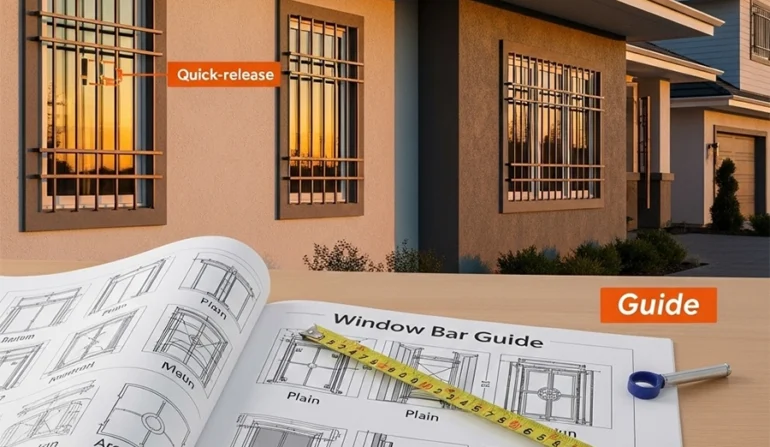
Absolutely. Use window bars that open from inside with a one-hand quick-release and train the team. Add the release check to your closing checklist.

Do I need shutters if I install bars?


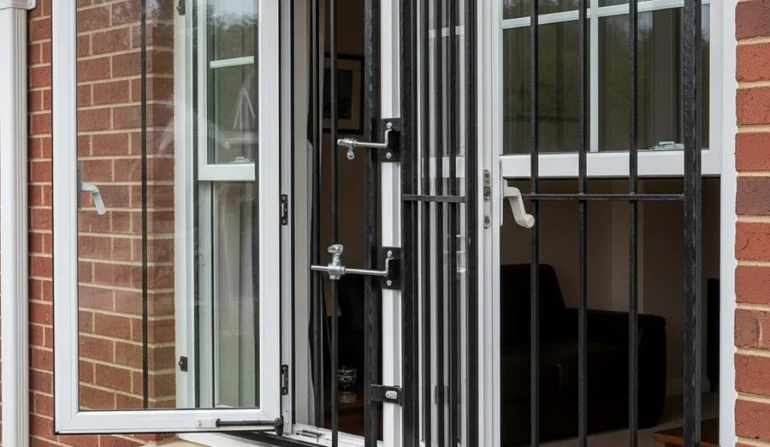
Often no. Bars behind glass stop the push-in. Some high-risk locations still add shutters or gates; many retailers succeed with a layered but shutter-free approach.

How do I handle historic districts?


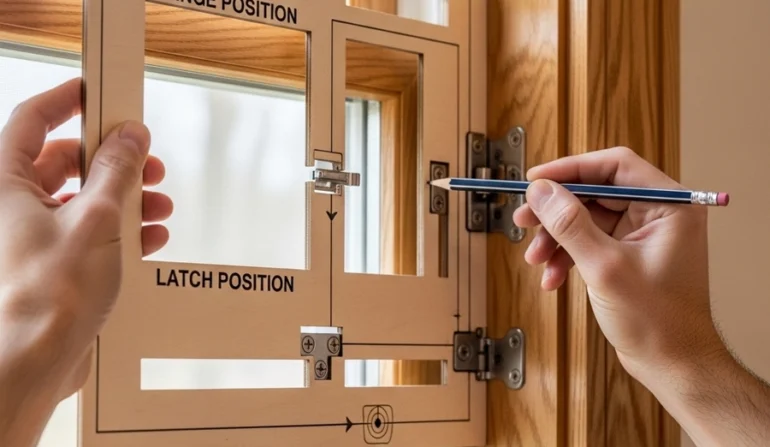
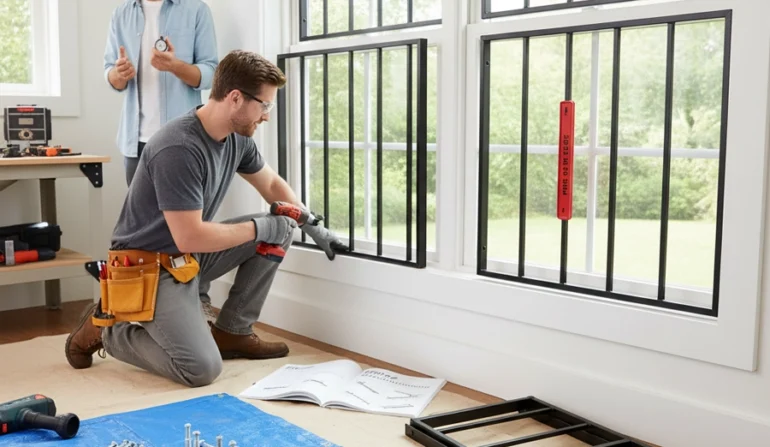
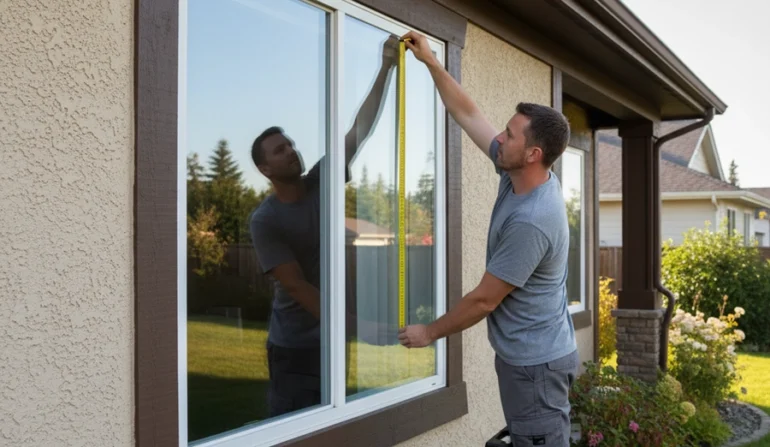
Interior bars are usually easier to approve because the exterior appearance stays intact. Provide elevation drawings and finish samples with your permit submission.

What about cleaning and displays?


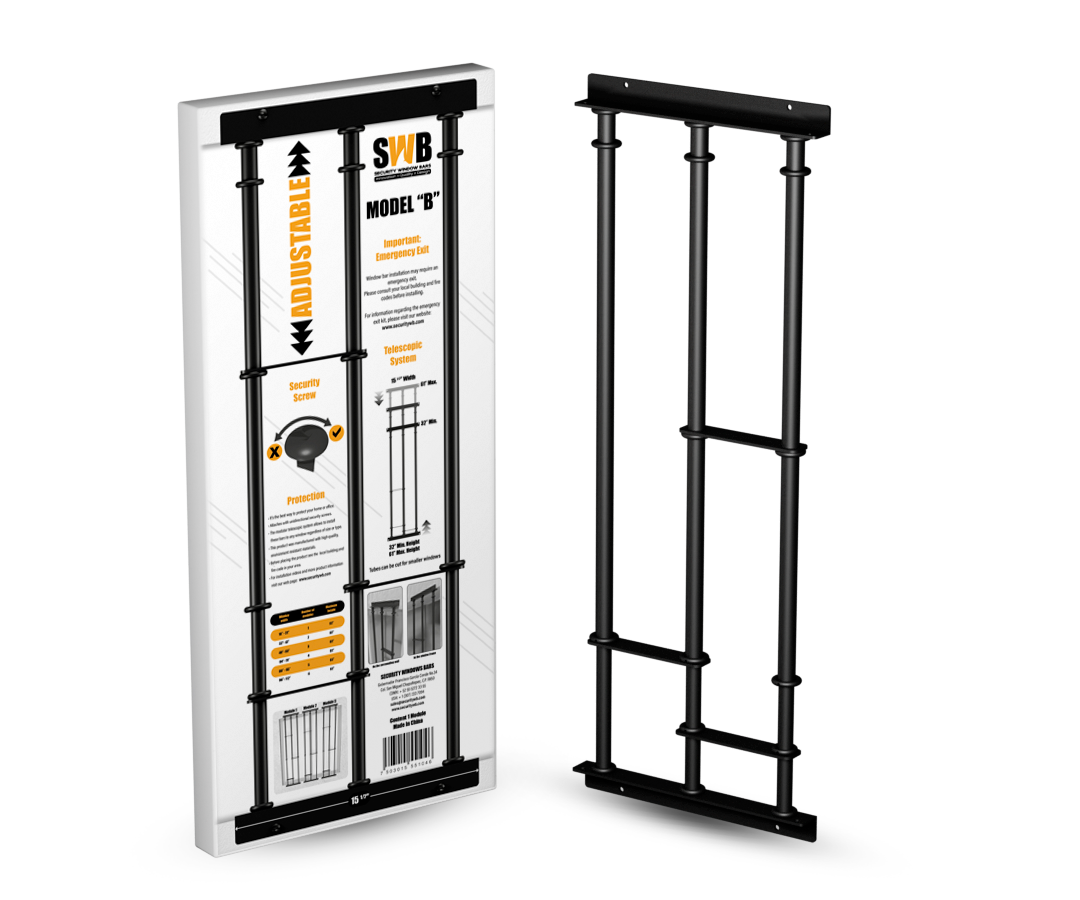
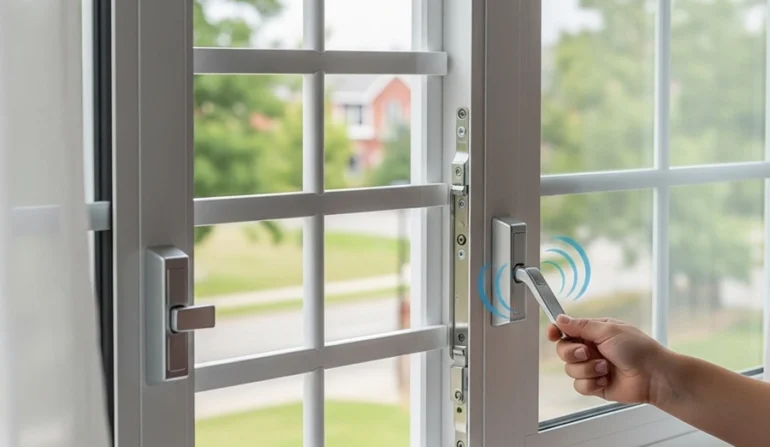
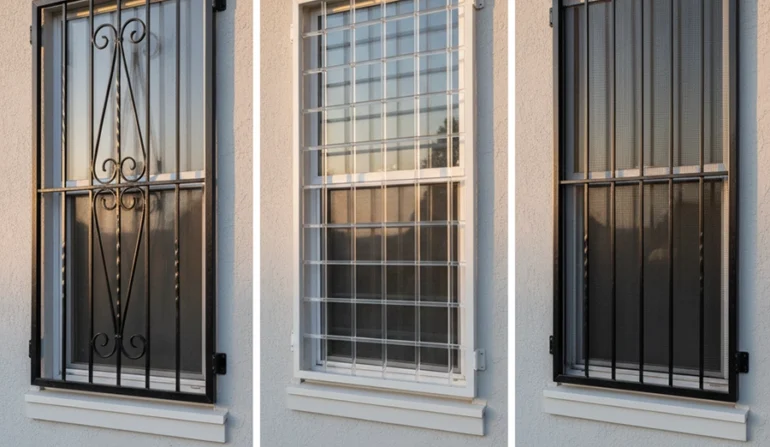
Hinged interior panels swing open for cleaning days. Keep a clear swing path and avoid hanging signs over release handles.

Can I protect side and rear windows differently from the main display?


Yes. Many projects use exterior fixed bars for alleys and interior hinged bars for front display windows.

Ready to Harden Your Storefront—Without Killing the Look?

With the right layout, finish, and anchors, commercial window security bars stop smash-and-grab attempts while keeping your brand front and center. Choose interior hinged panels for daytime visibility, use exterior fixed grilles in alleys, and align rails with your mullions so everything looks designed—not improvised. Need help scoping an RFP? Our specialists can review photos, suggest anchor strategies, and provide a precise quote.

EMAIL ADDRESS: sales@securitywb.com
SITE: www.securitywb.com
PHONE:
CDMX: +52 (55) 5272 3355  USA: +1 (650) 4371 575

Share

Recent Post

COOKIES POLICY

Security Window Bars LLC ("SWB") uses cookies and similar technologies to improve your browsing experience and enhance the functionality of our website www.securitywb.com (the “Website”). This Cookies Policy explains what cookies are, how we use them, and how you can manage your cookie preferences.

By using our Website, you agree to our use of cookies as described in this policy.

Last Updated: 01/01/25